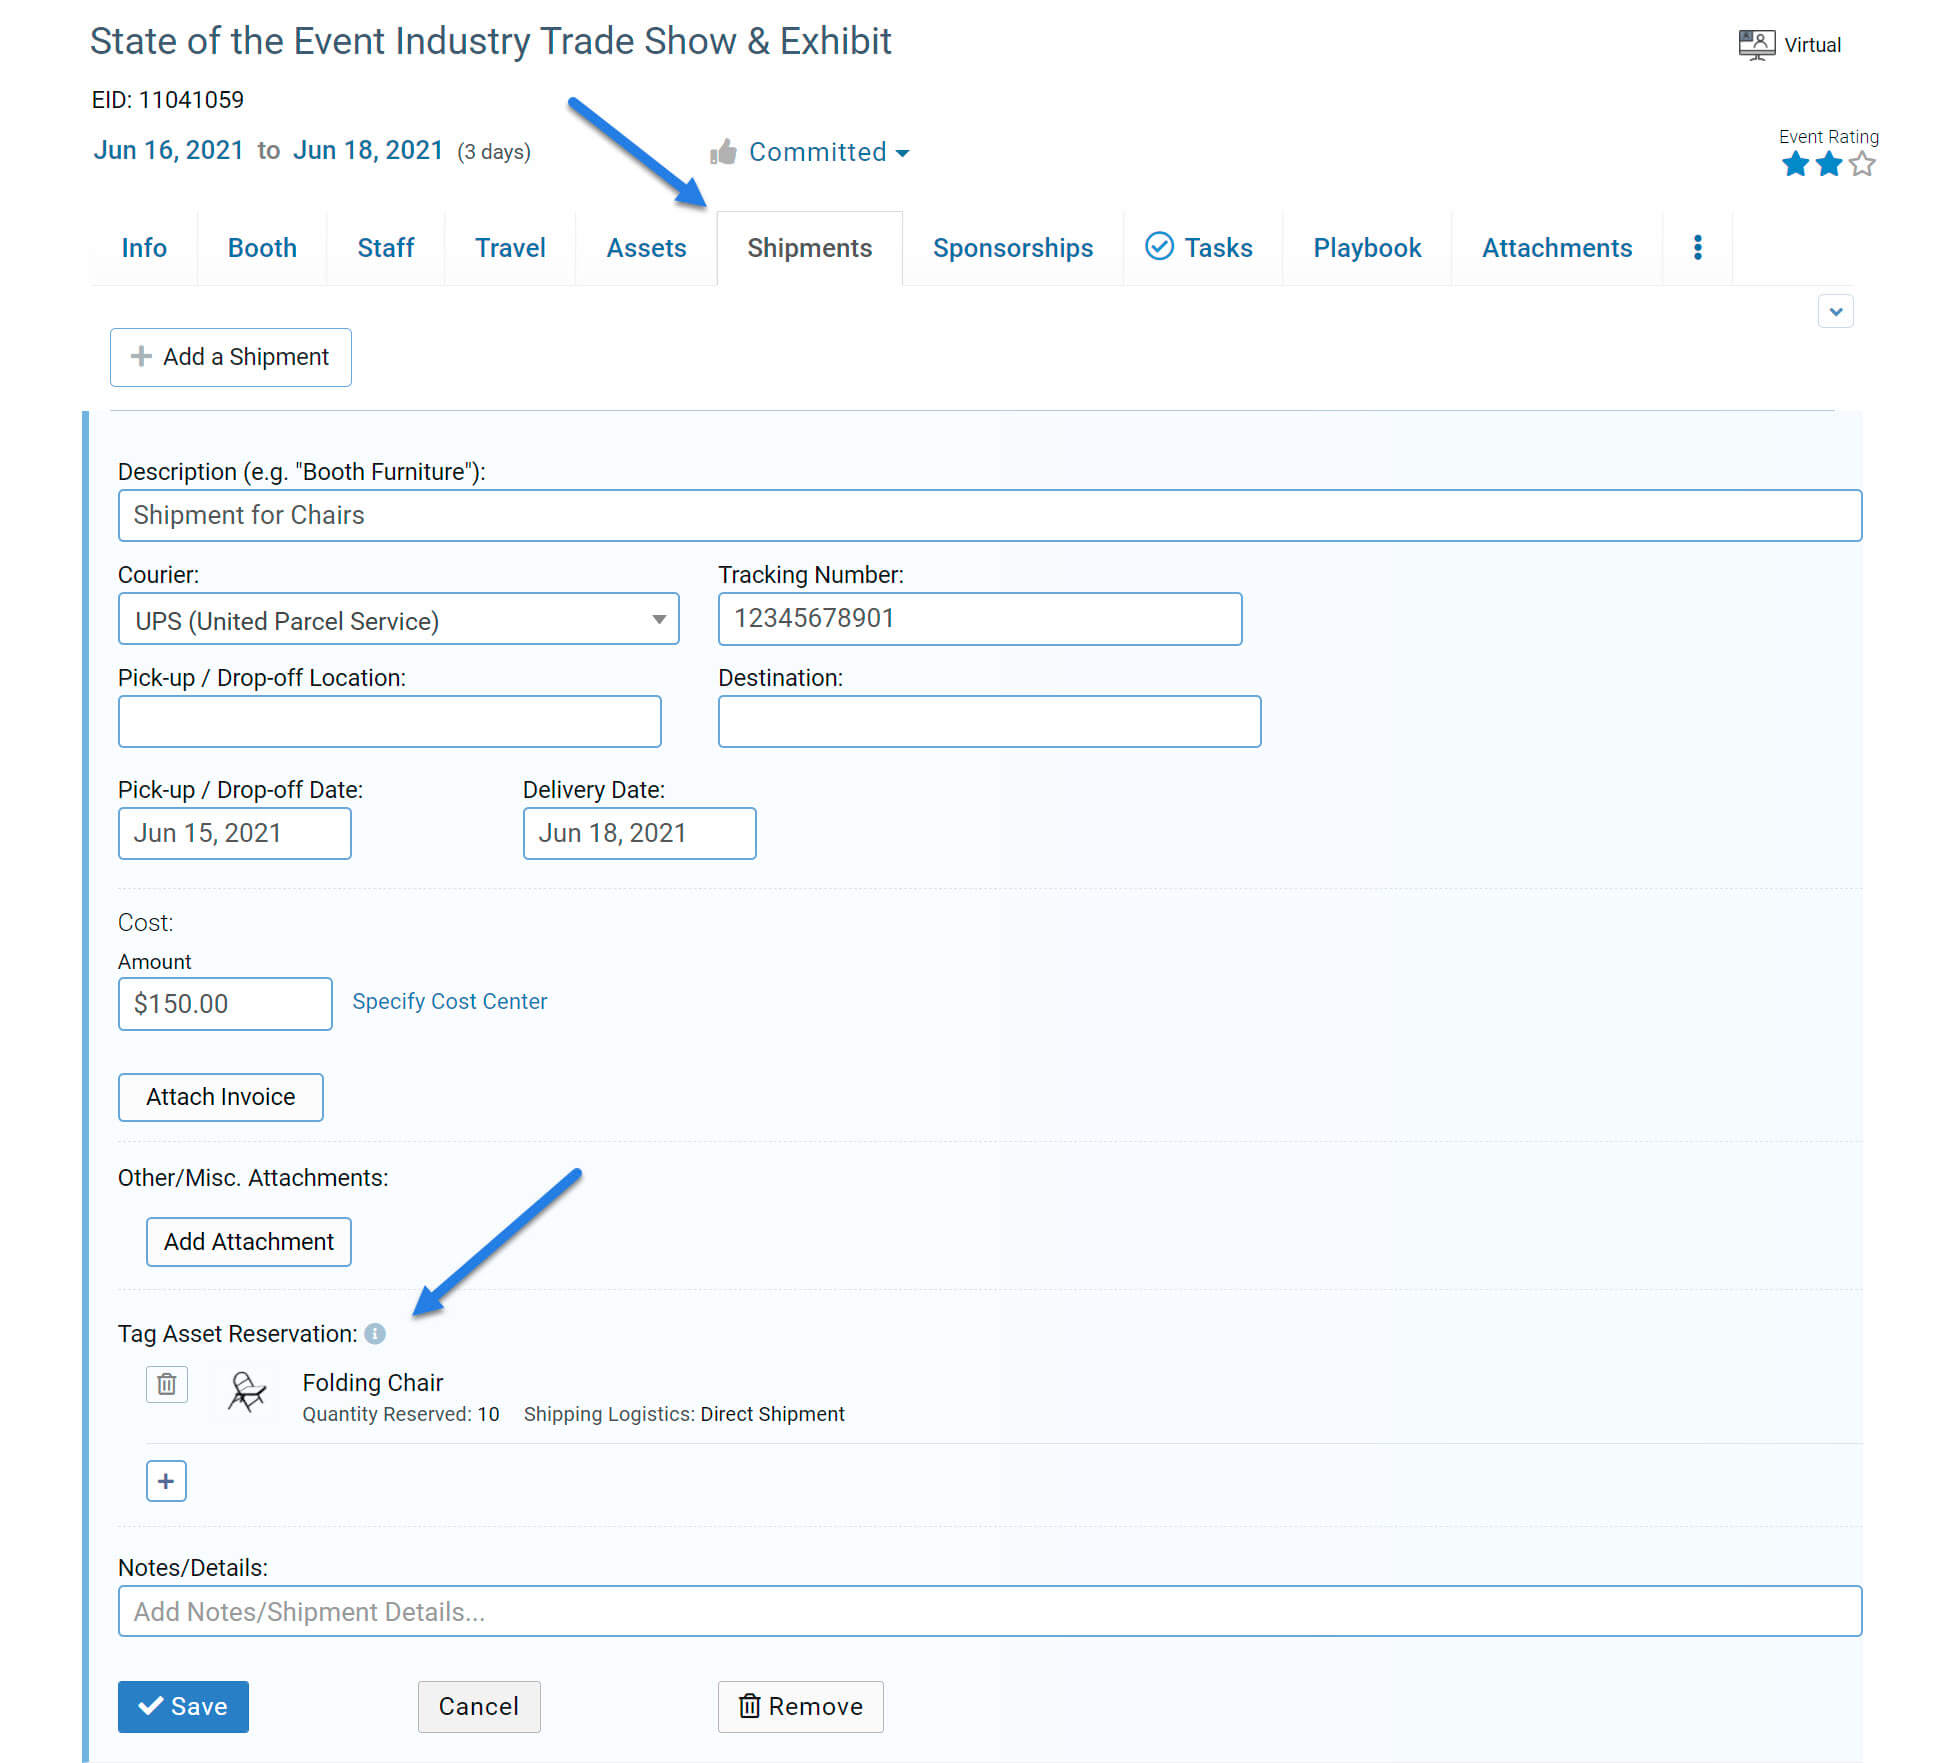
Asset reservations can now be tagged in Shipments for your Events in ExhibitDay.
Tagging a Reservation
Once you have made reservations for Assets (under the Event [Assets] tab), you can tag those reservations in any of your Shipments (under the Event [Shipments] tab).
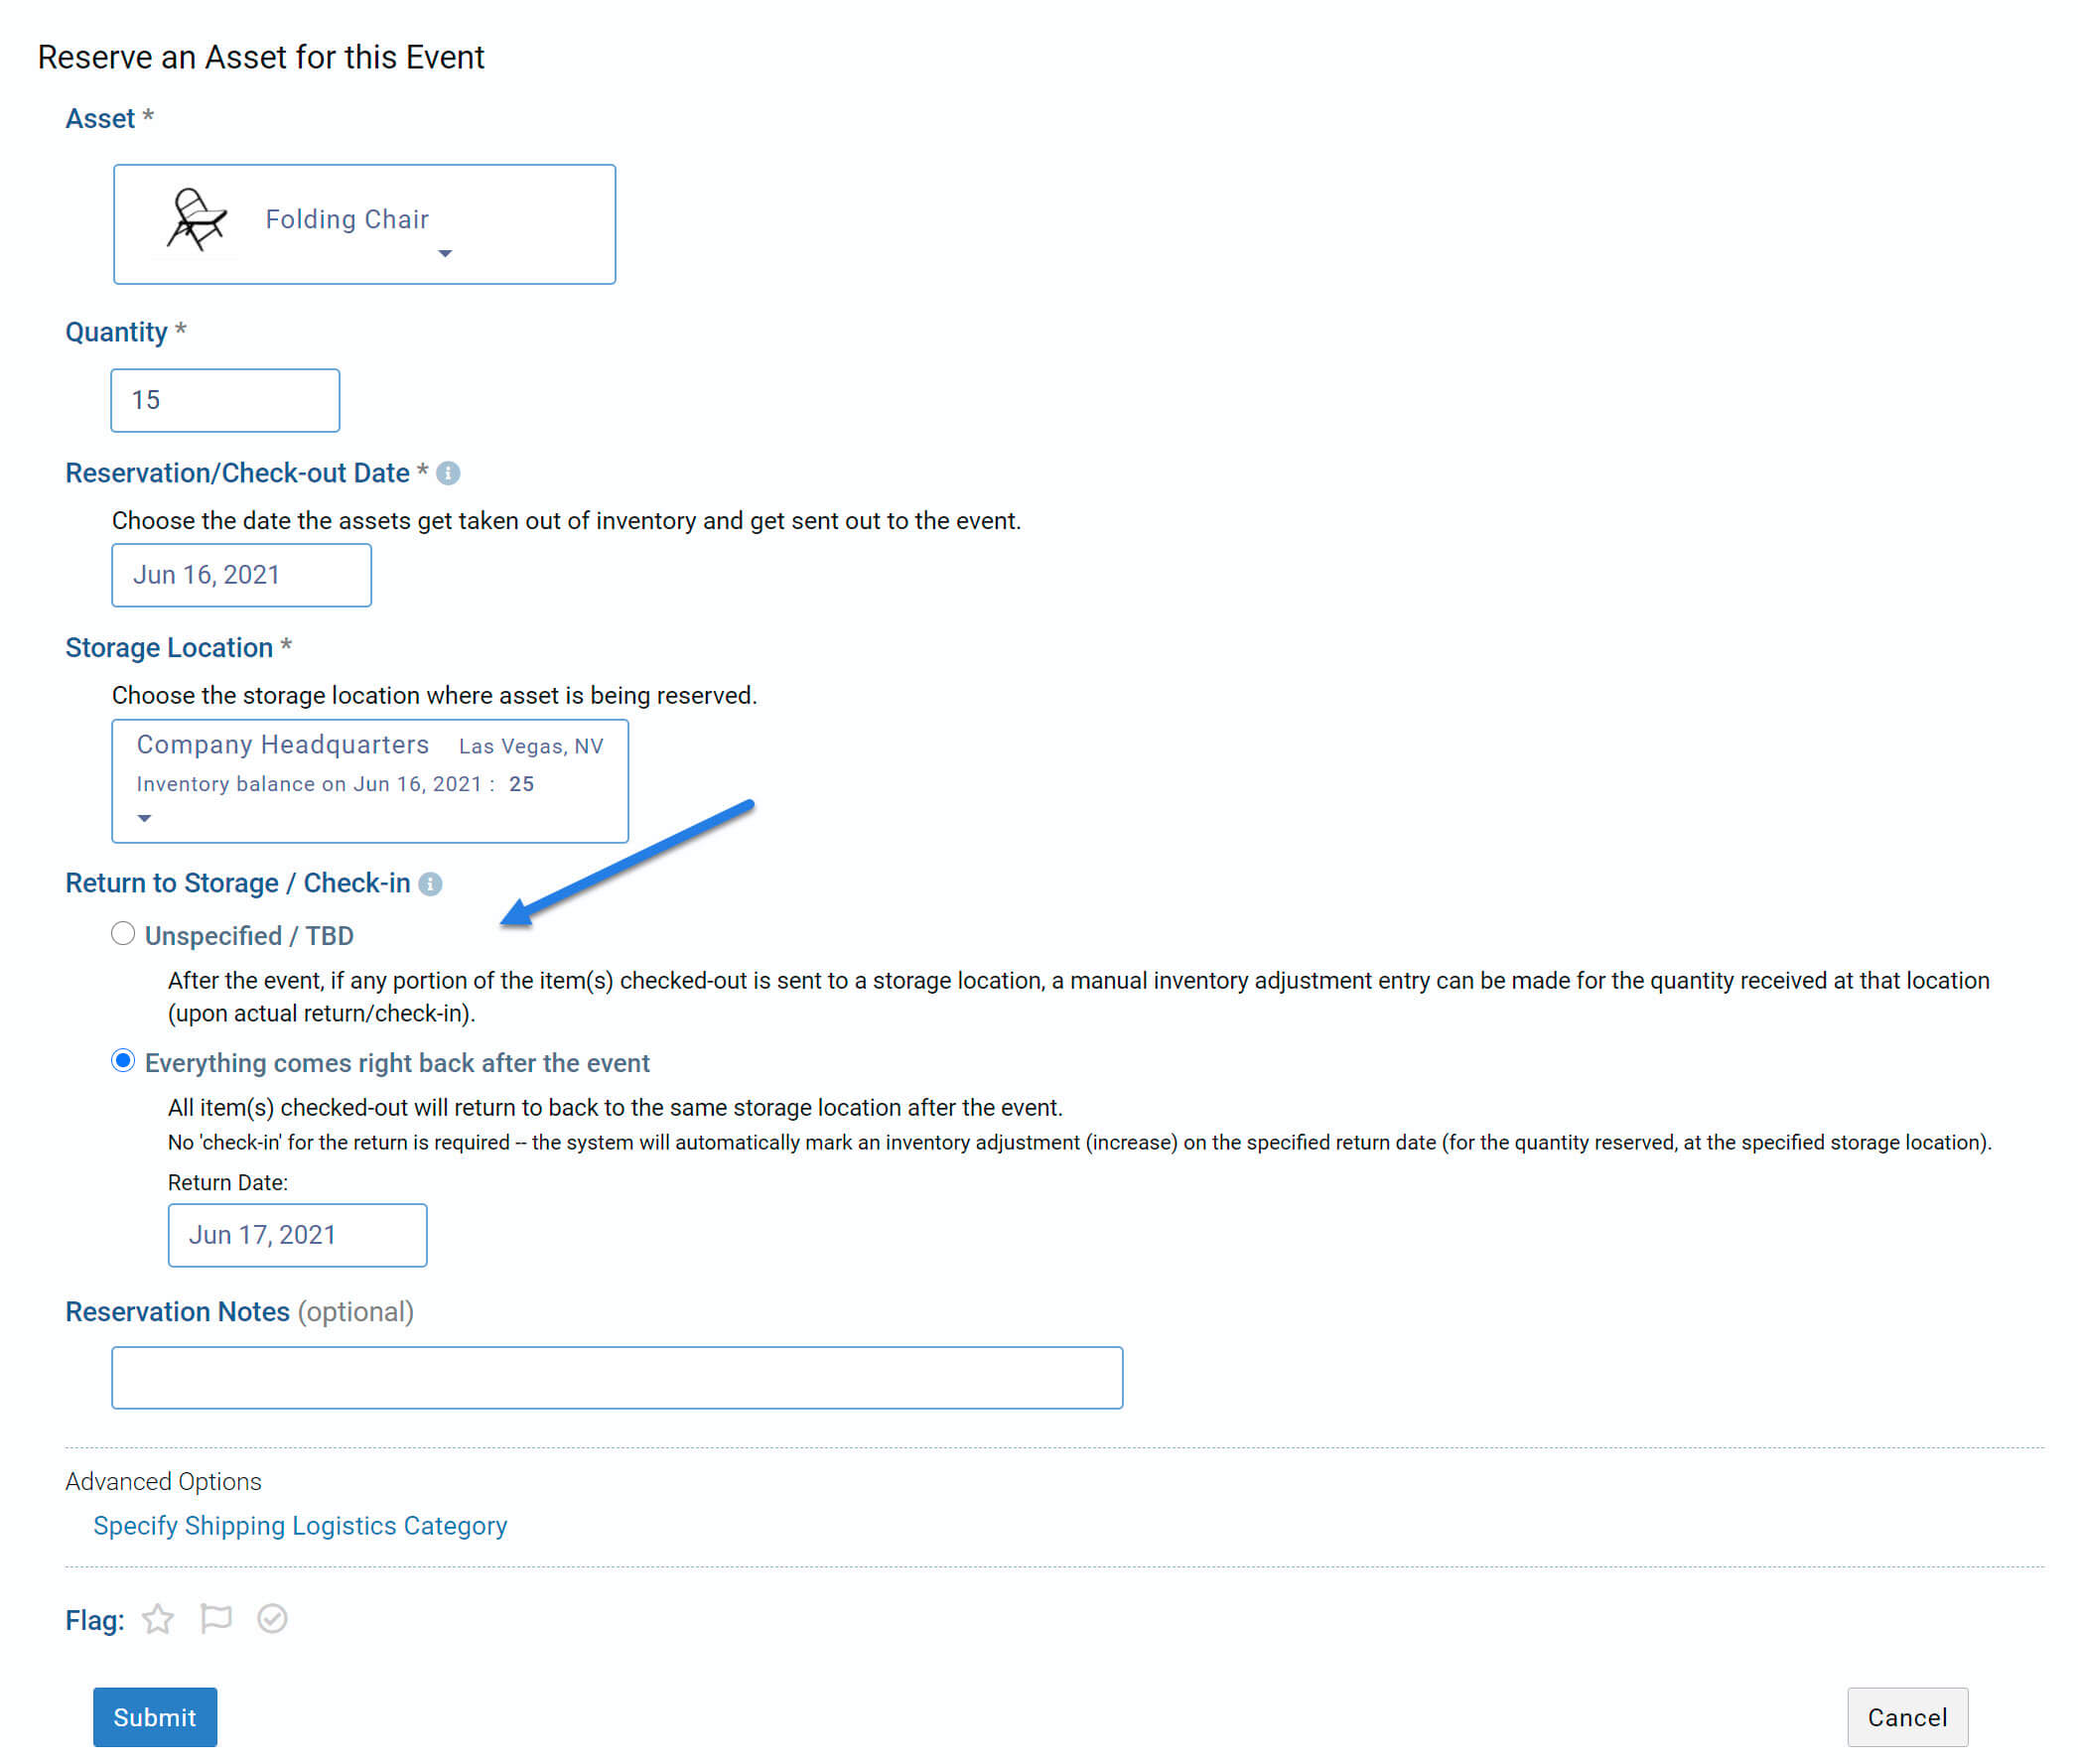
You can now specify a Check-in/Return Date for Collateral and Multi-Quantity Asset reservations in ExhibitDay.
When reserving a Collateral/Multi-Quantity Asset for an event, use the “Return to Storage / Check-in” section of the reservation form to specify if/when the items will return back to storage.
When to choose the ‘Unspecified / TBD’ option:
In certain cases, the items that get checked out either do not return back to storage at all, or, only some portion of the quantity checked-out gets returned back to storage. For example, if 500 Logo Pens are checked out for an event, some or none of the Logo Pens may return back to storage after the event. In such scenarios, choose the ‘Unspecified / TBD’ option. If/when any portion of item(s) end up getting sent back to storage, you can make a manual inventory adjustment entry for this asset at the storage location the items are returned to.
Also, in certain scenarios, some portion of the items checked-out may even go to a different location after the event (e.g. 15 chairs are checked out for an event, 5 of them return to the original storage location and 10 get shipped directly to a different event and get returned at a later date); in such cases, it is also recommended that the ‘Unspecified / TBD’ option be selected so that manual inventory adjustments are made upon actual arrival of the items at each location.
When to choose the ‘Everything comes right back after the event’ option:
Choose this option only if you know that all quantities of this asset checked-out for this reservation will return back to the same storage location after the event. The system will automatically make the inventory adjustment entry (increase) for the check-in on the specified return date. For example, if 15 chairs are reserved for an event, and after the event, all 15 chairs will return to the same storage location they were checked-out from, then you can select this option and specify the return date — this way, the system will automatically mark an inventory increase on the return date, and you won’t have to ‘check-in’ (by adding an inventory adjustment entry for the return).
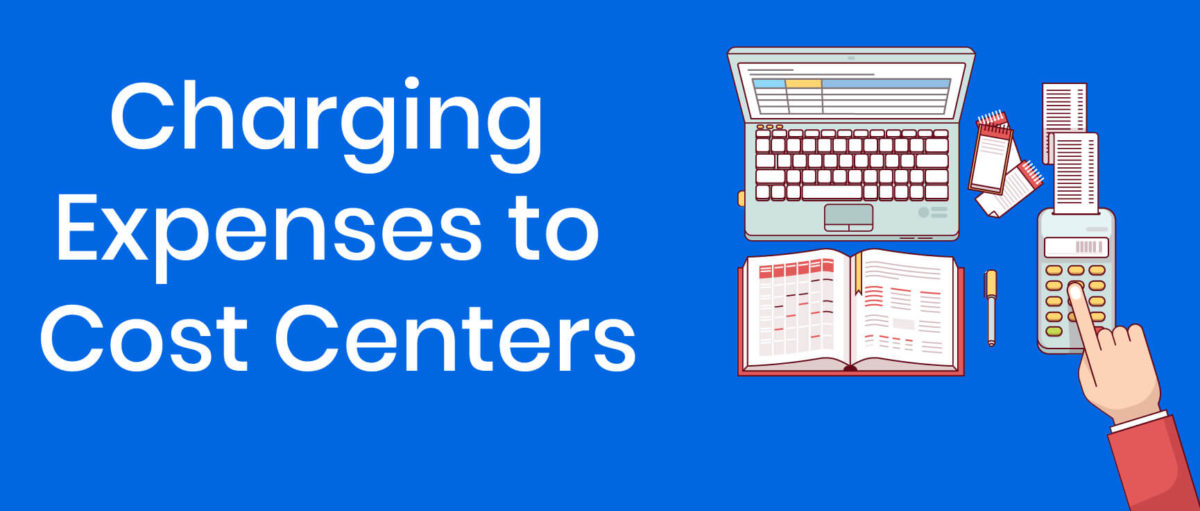
You can now charge expenses for your trade shows and exhibits to Cost Centers in ExhibitDay.
Cost Centers
Cost Centers are Departments or Business Units within your organization to which costs can be charged (for accounting purposes).
When entering the cost of specific items for your Events (e.g. Booth Reservation, Travel, Shipments, Sponsorship, etc.), you can optionally specify the Cost Center(s) that the cost should be charged to.
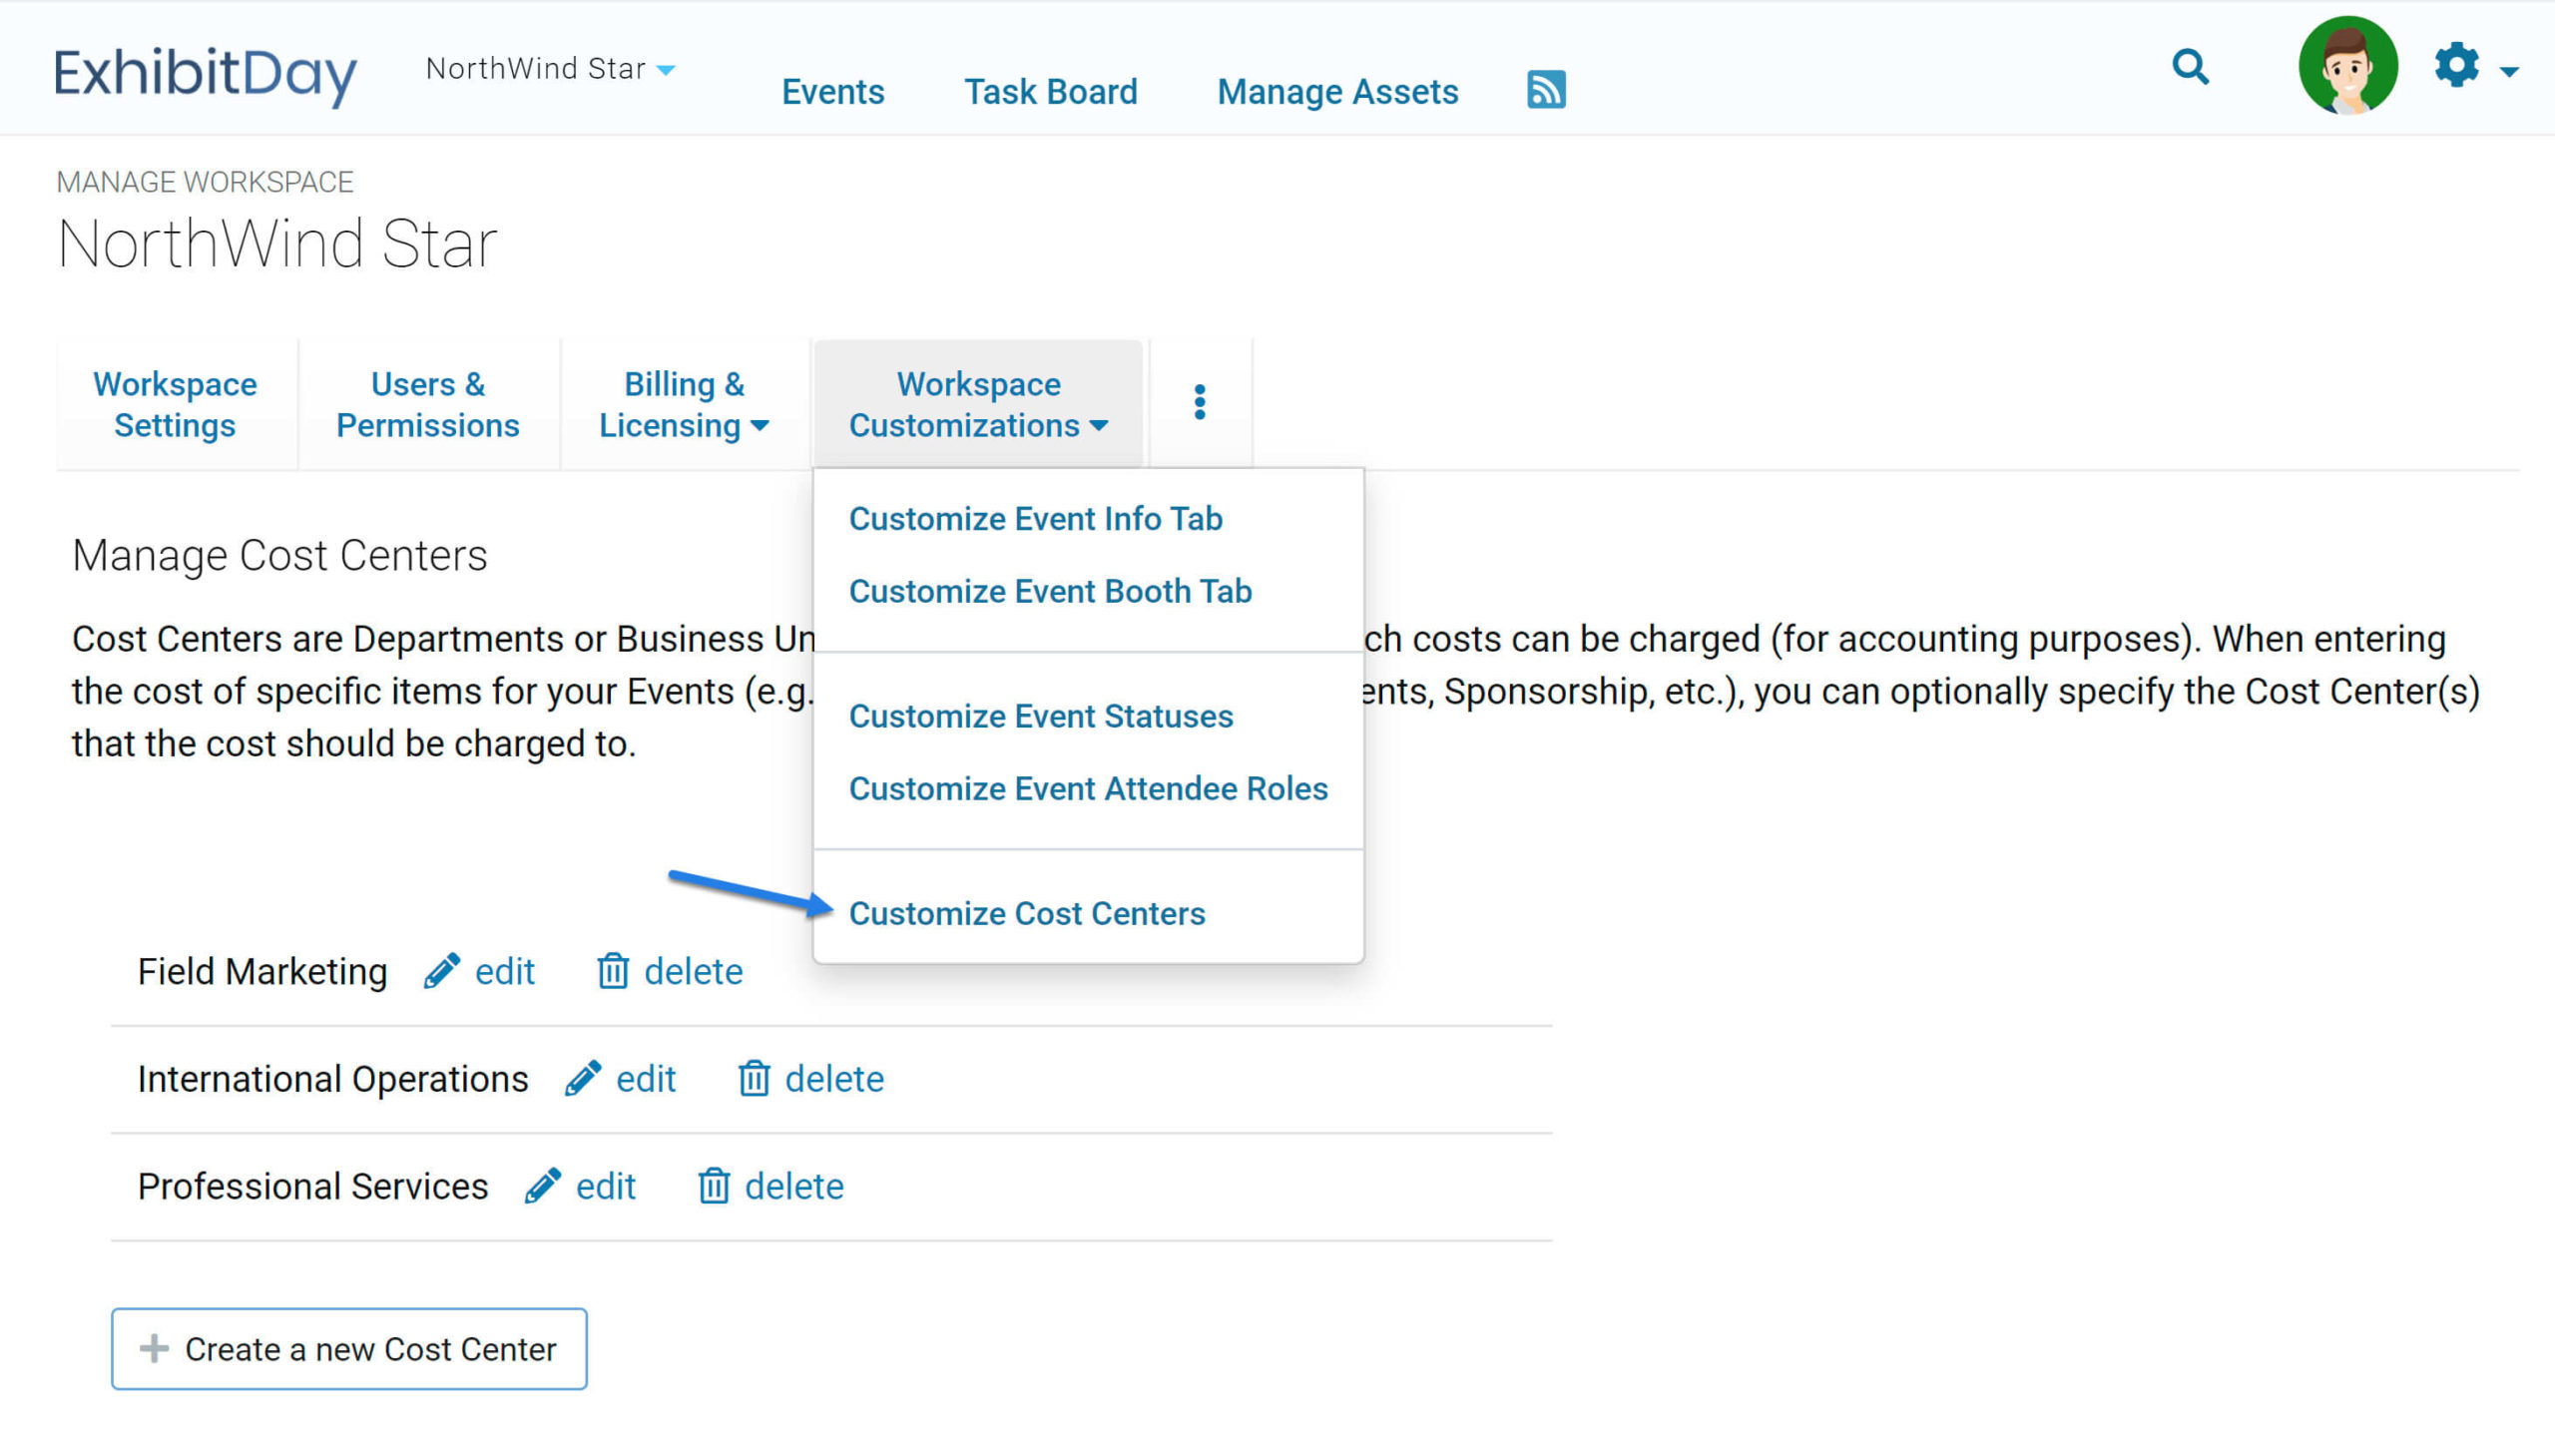
Configuring Cost Centers in your Workspace
You can manage your list of Cost Centers under Workspace Settings > Workspace Customizations > Customize Cost Centers.
Charging a Cost to a Cost Center
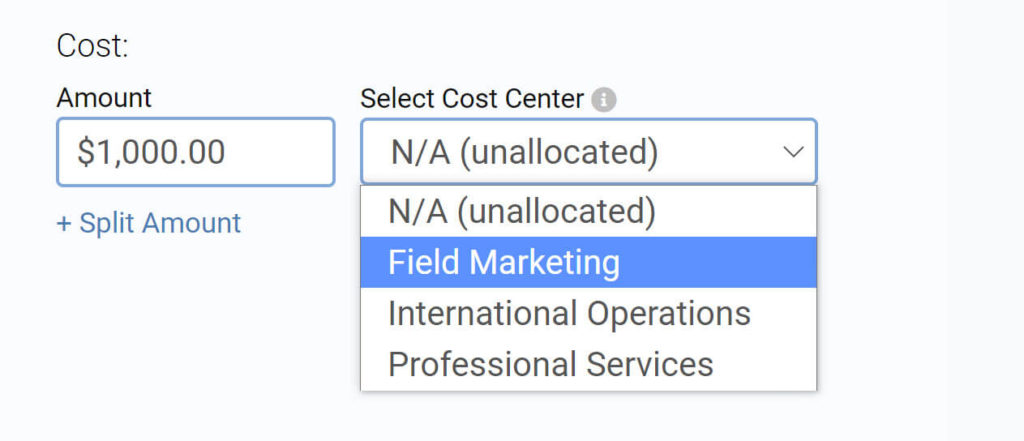
To specify a Cost Center to charge to (when entering the cost of an item), click the ‘Specify Cost Center’ link next to the text-box for the cost, then select the Cost Center you would like to charge the amount to.
Charging a Cost to Multiple Cost Centers
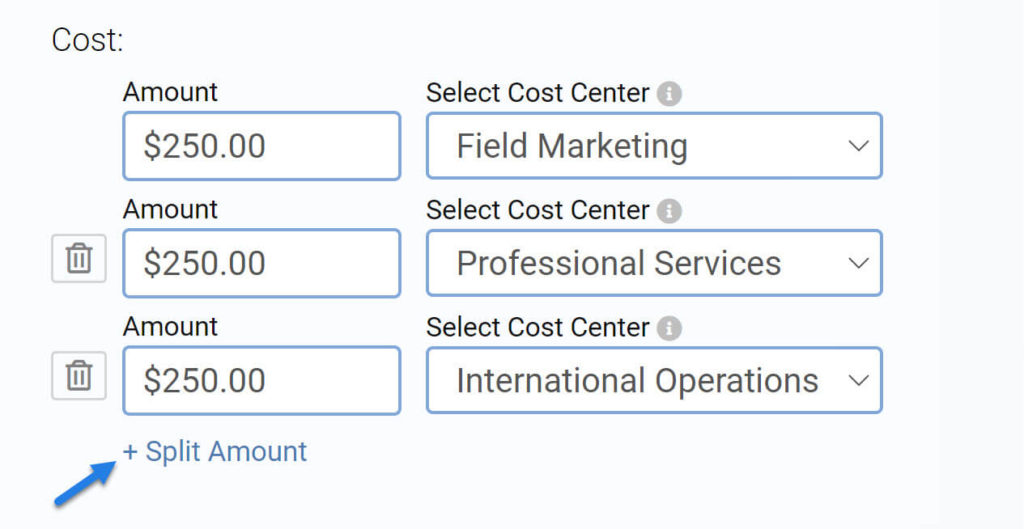
If the amount being entered should be charged to multiple Cost Centers, use the ‘Split Amount’ link to specify the Amount/Cost Center breakdown. For example, if the total amount for an item is $750, and that amount should be charged evenly across three Cost Centers ( ‘CC1’, ‘CC2’ and ‘CC3’), enter $250 and select ‘CC1’, then, click ‘Split Amount’ and enter $250 and select ‘CC2’; do the same thing for ‘CC3’…
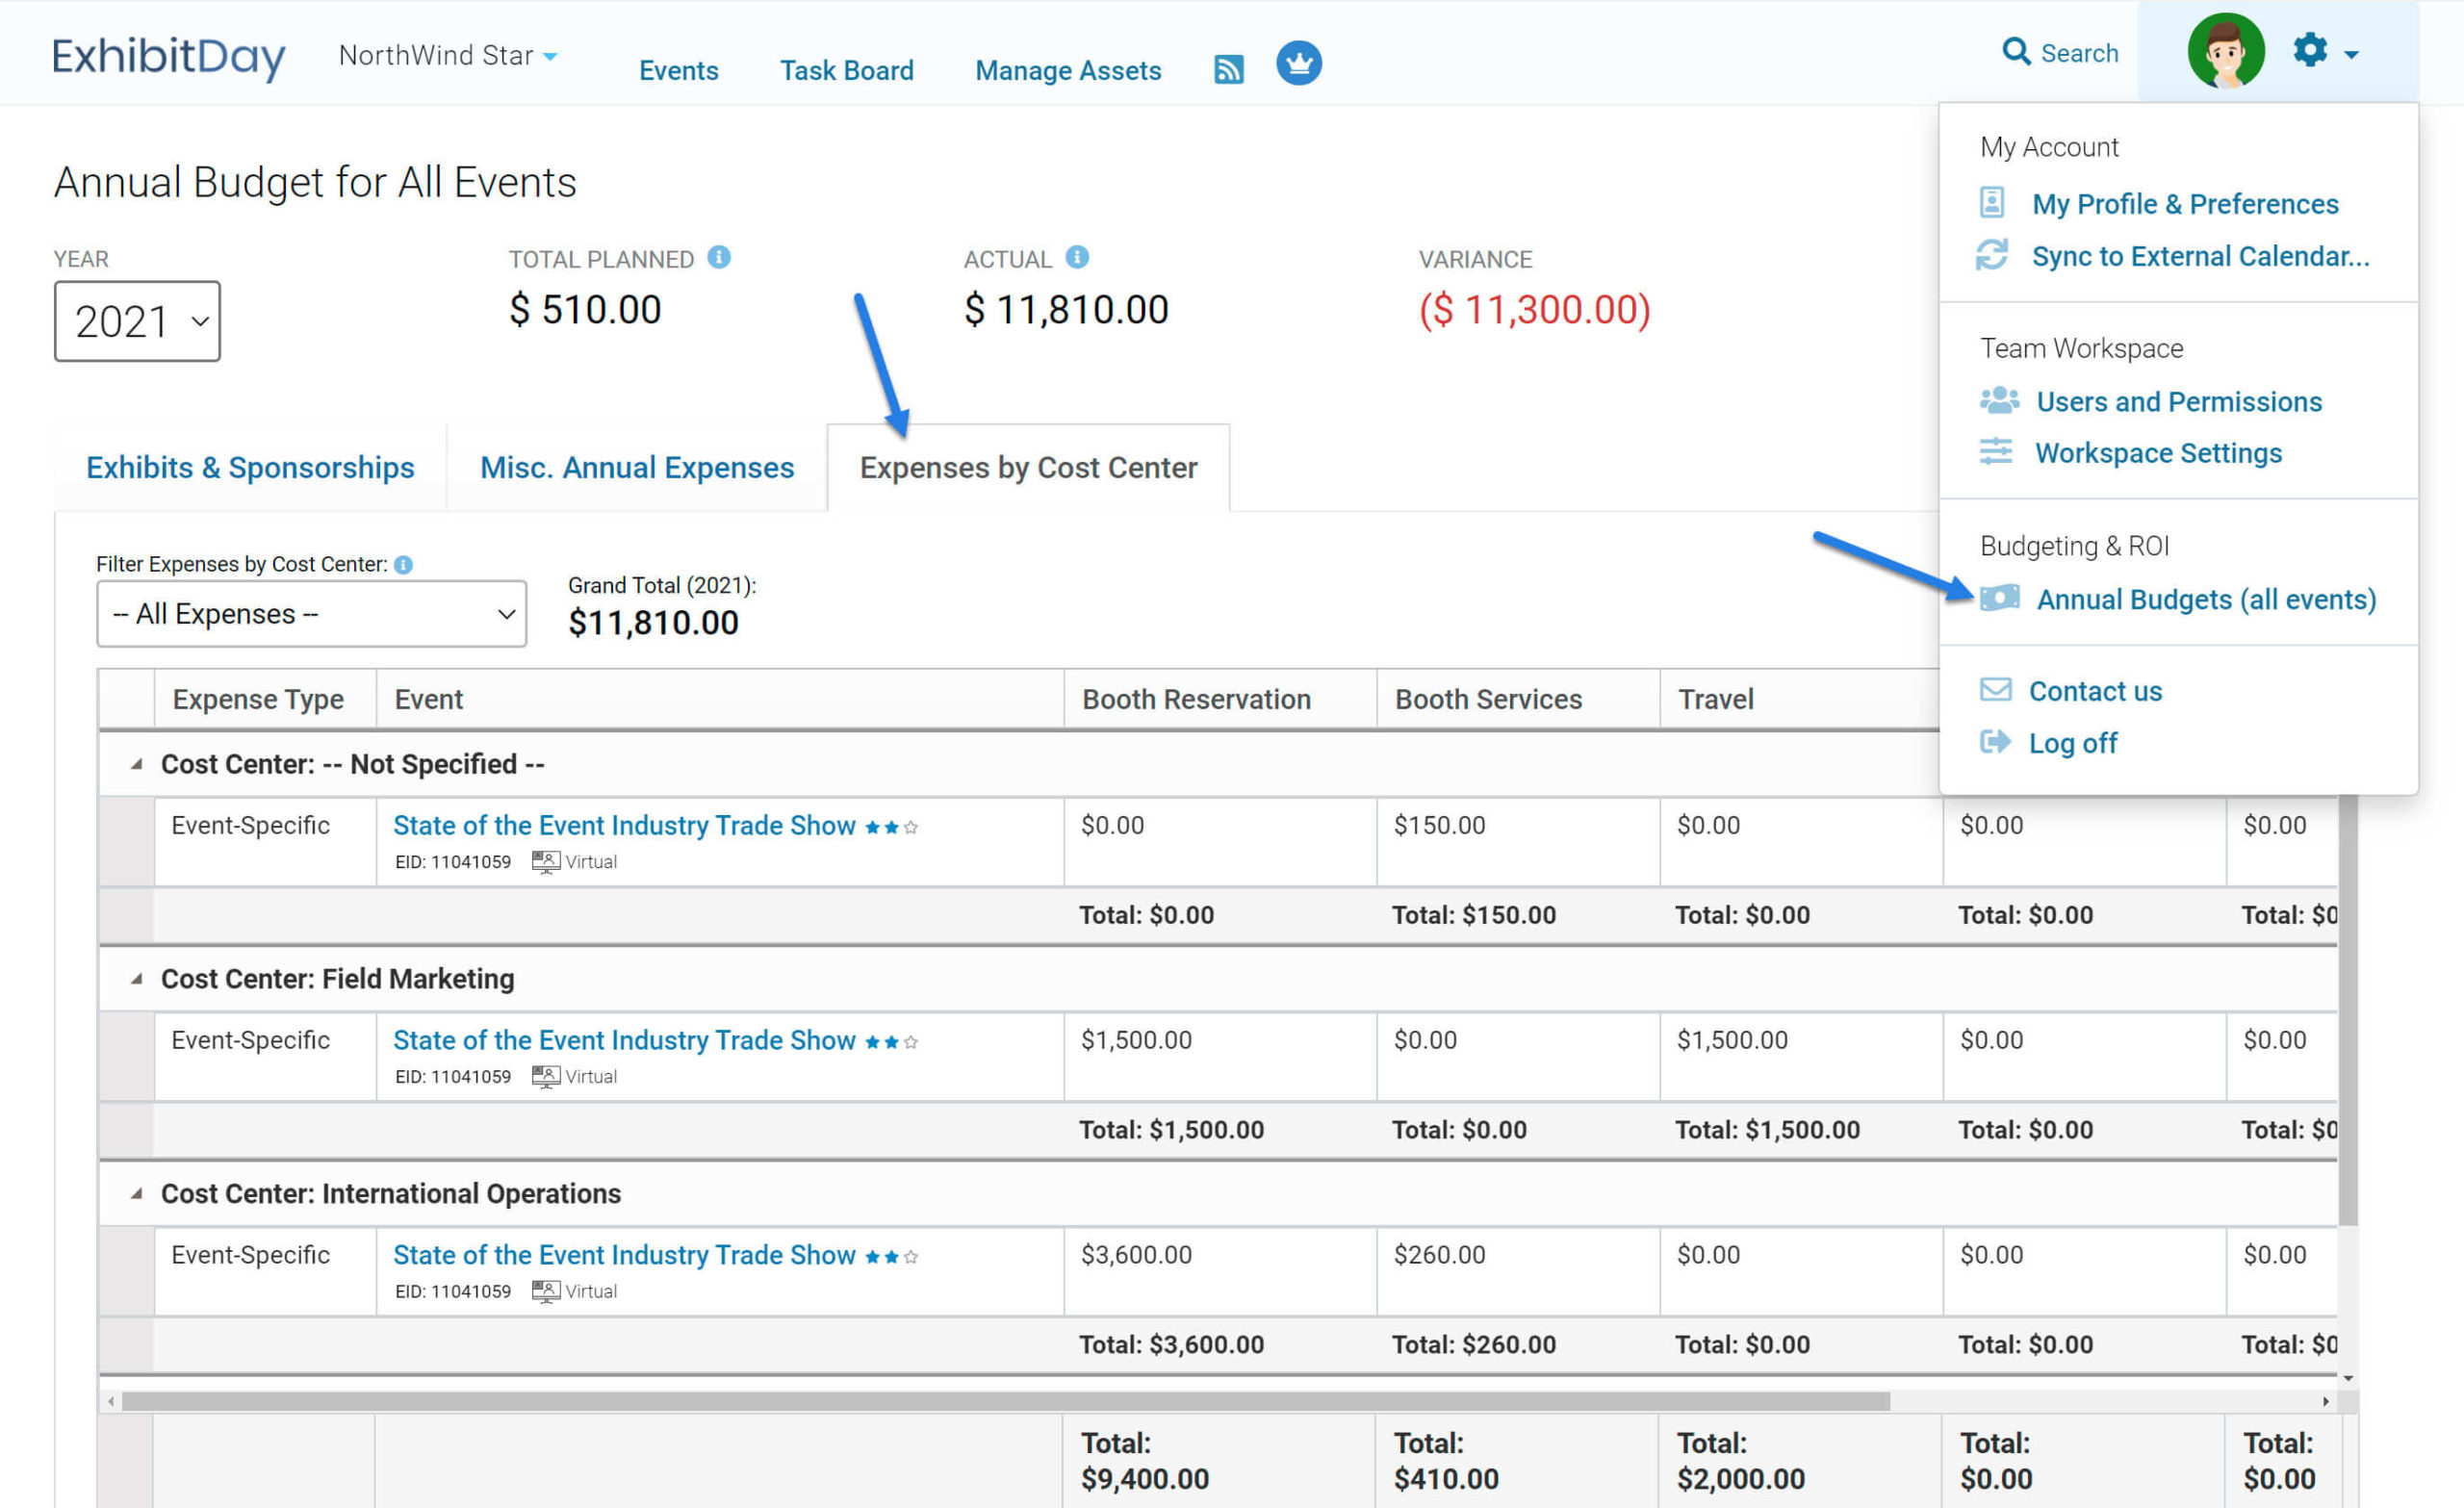
Expenses by Cost Center Report
To view a report of your annual expenses broken down by Cost Center, click on the Annual Budgets (all events) link in the top-right navigation menu. Then, click on the Expenses by Cost Center tab.
You can filter the report by Cost Center and export all expenses (for the budget year) to a spreadsheet (in .csv format).
Note: The ability to specify Cost Centers for expenses is only offered to ExhibitDay Workspaces that are on the ‘Enterprise’ plan. If you wish to enable this feature, please contact us about setting up a custom Enterprise engagement with your organization.