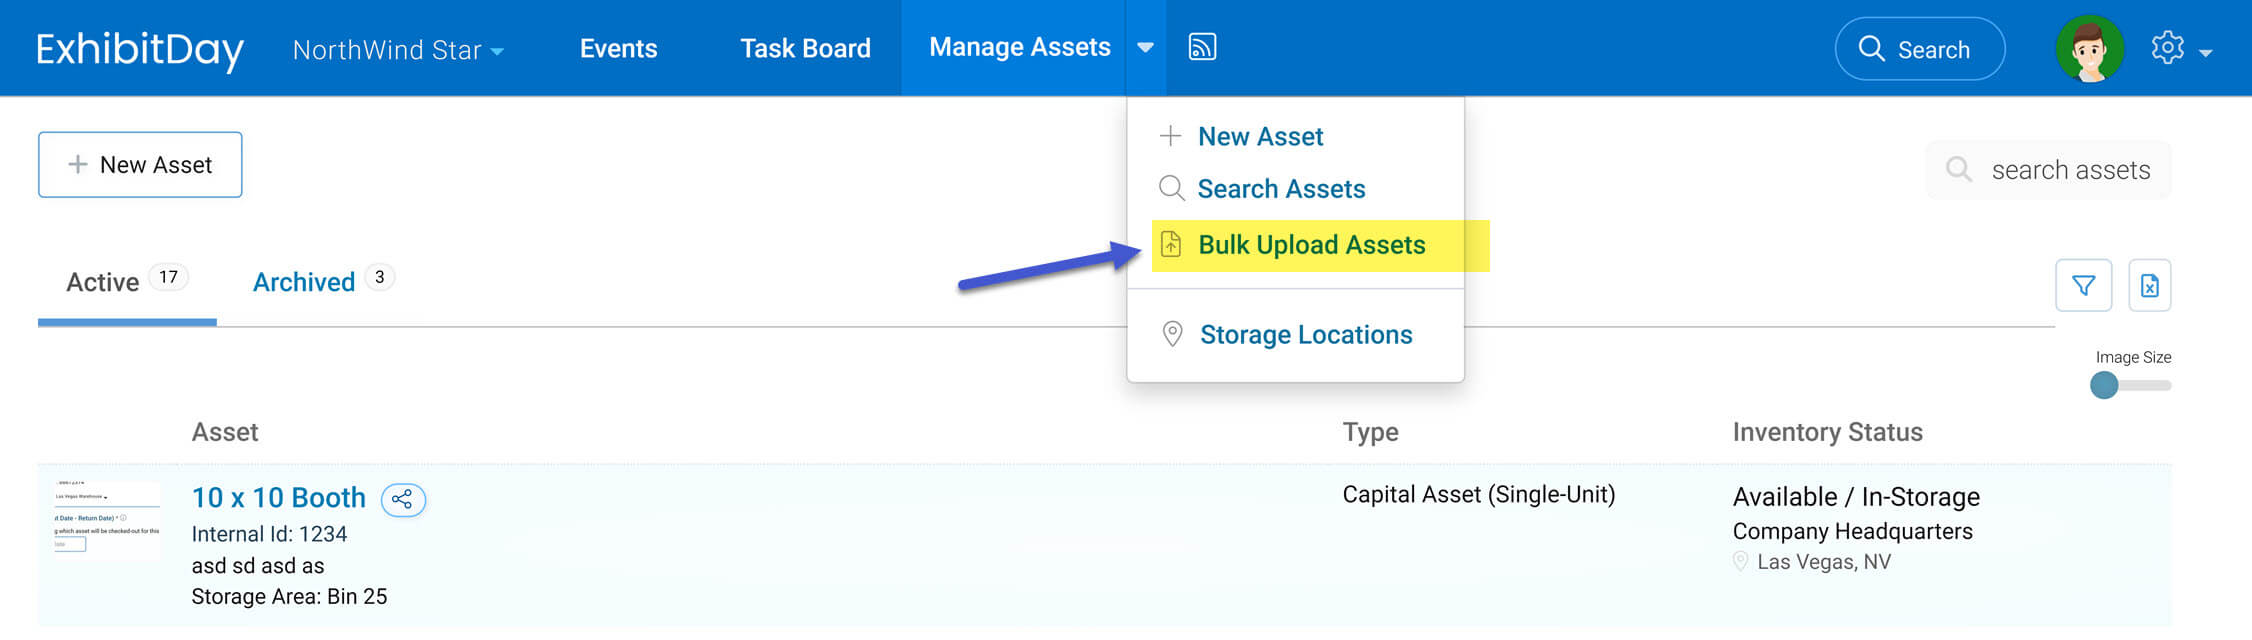
You can import your Assets from a spreadsheet into ExhibitDay. The Asset Import tool can be accessed via the dropdown menu of the “Manage Assets” tab.
Prerequisite: At Least One Storage Location
As a part of the asset bulk upload process, right after you upload your spreadsheet, you’ll be asked to specify the Storage Location for each Capital Asset that you’re importing.
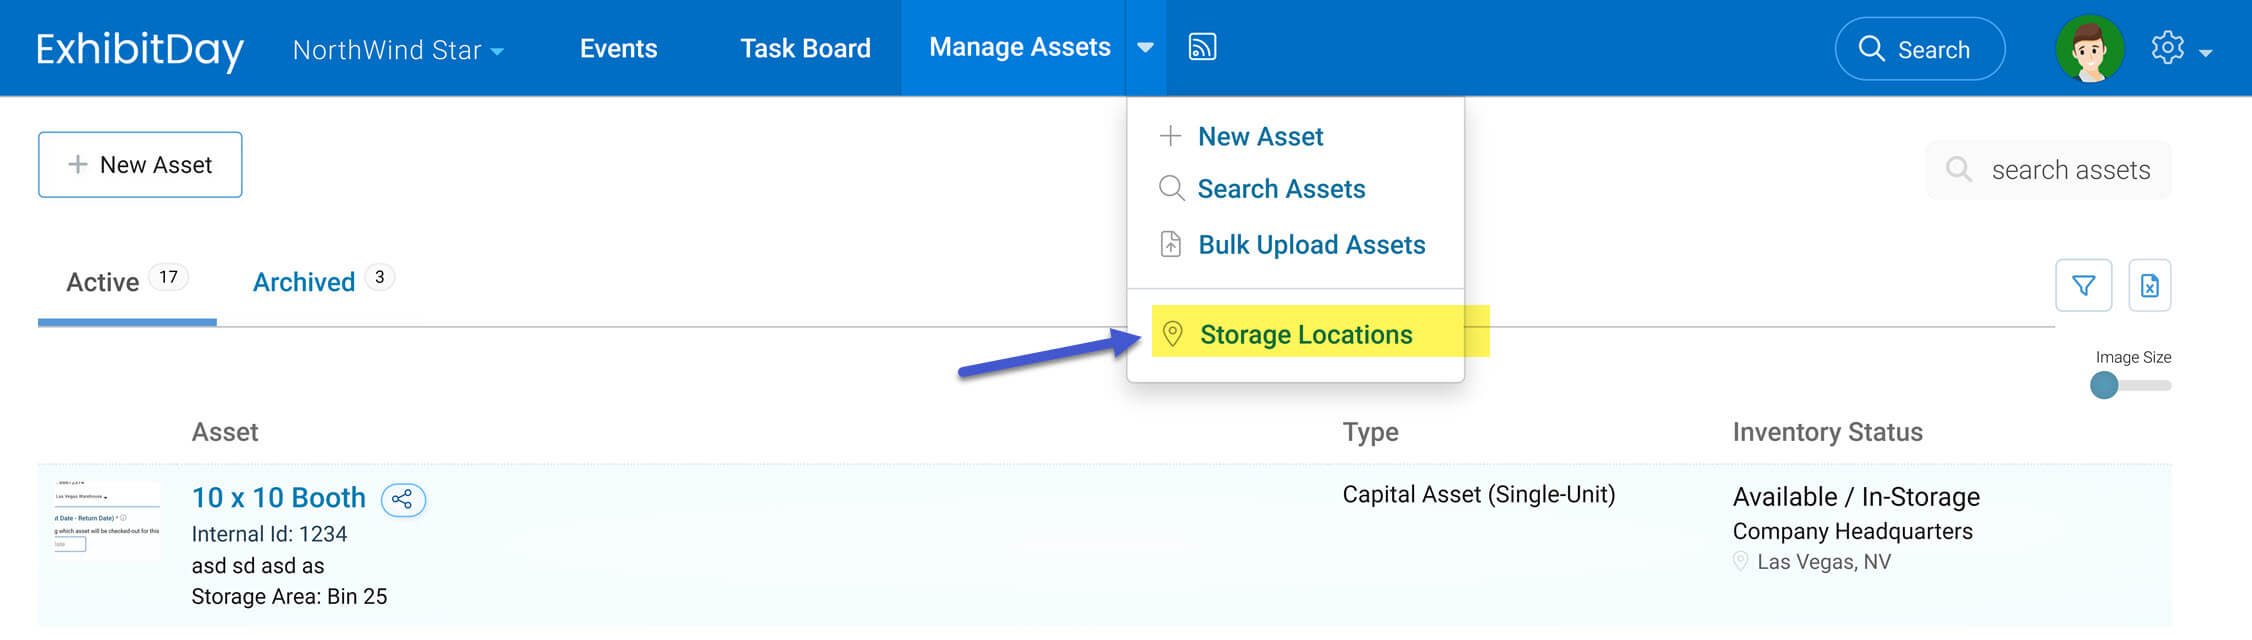
Before you begin, please ensure that the Storage Locations to which you plan to assign the assets you’re importing have already been entered into the system.
Storage Locations can be managed from the dropdown menu of the “Manage Assets” tab.
Note: Storage Locations are different from “Storage Areas.” Storage Locations are places where assets are stored (for example, Warehouse A, Warehouse B). Each Storage Location has a name, address, point of contact, etc. Storage Areas are places within Storage Locations where assets are typically stored (e.g. “Aisle 1, Bin 3”). If you want to specify Storage Areas for assets you’re importing, you can enter the Storage Area for each asset under the “Storage Area” column (Column F of the upload template).
The Import Process
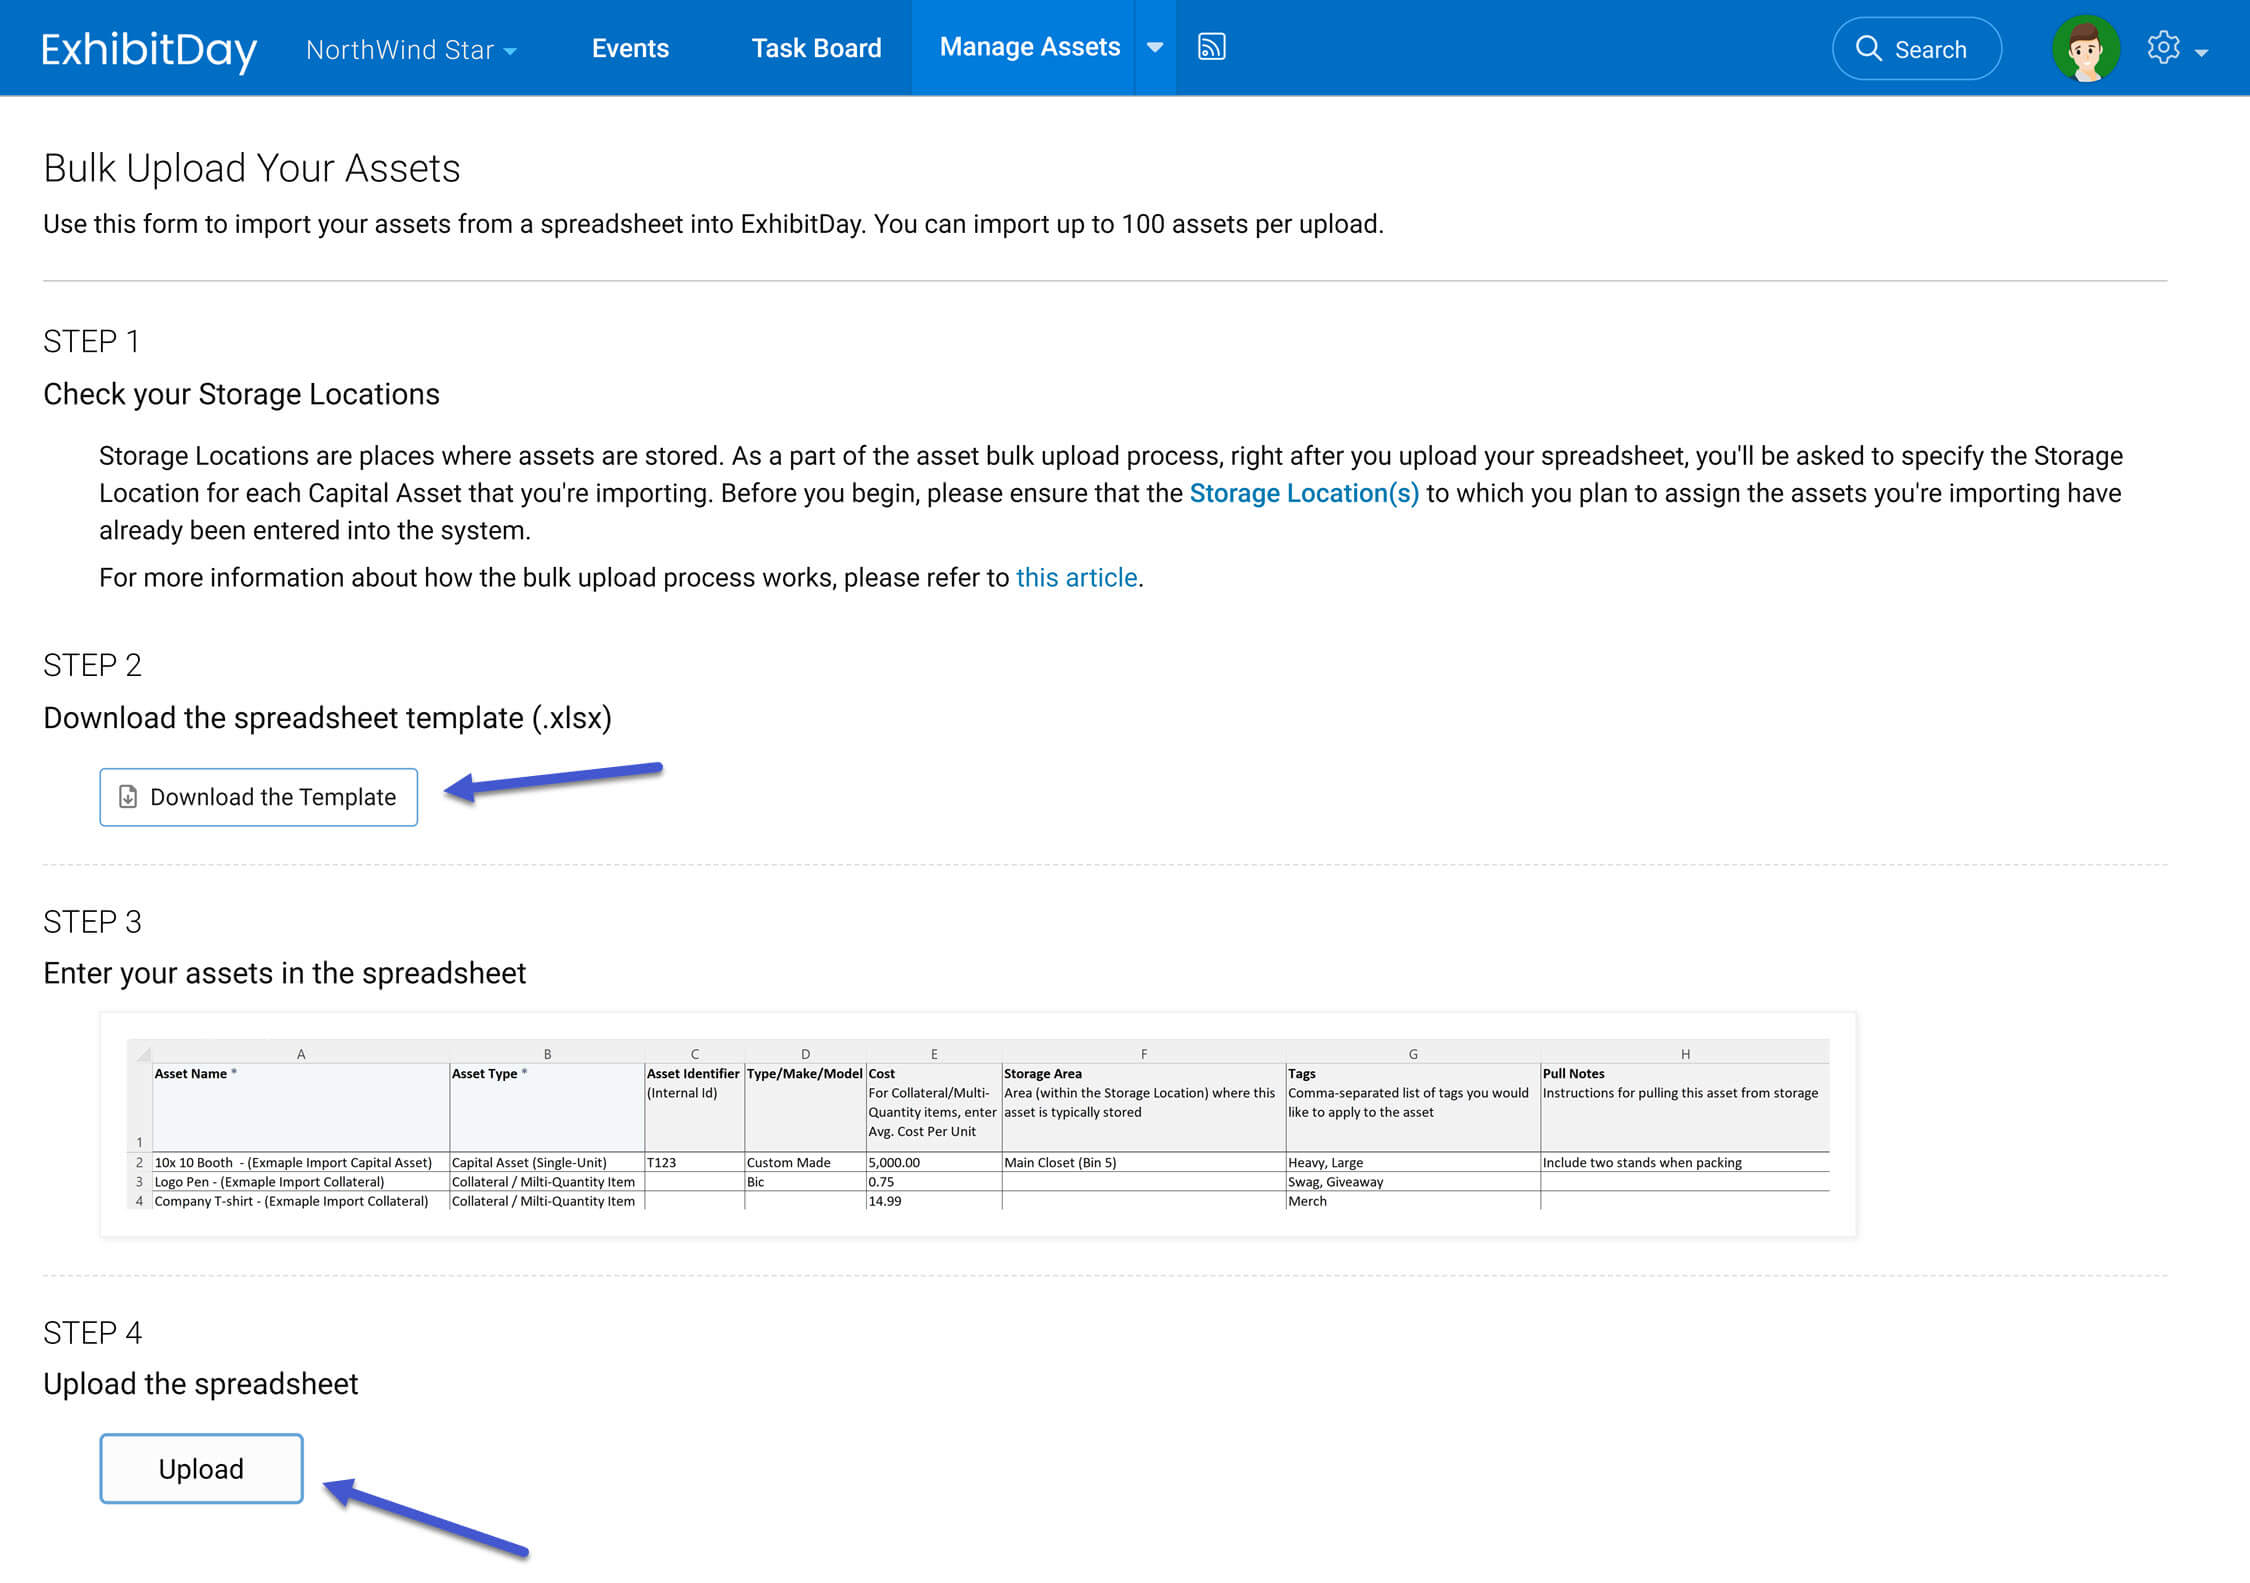
The import process is simple — you download the spreadsheet template (.xlsx), then fill in your assets (1 asset per row), and upload the completed file.
Please note that in the template, “Asset Name” (column A) and “Asset Type” (column B) are the only required columns.
Note: You can import up to 100 assets per upload. If you have more than 100 assets that you would like to import, you can break them down into multiple spreadsheets and upload each spreadsheet separately. Also, the import tool is limited to the properties of assets listed in the spreadsheet template (Asset Name, Type, Internal ID, Make/Model, Cost, Storage Area, Tags, and Pull Notes). Other properties of assets (like asset images, and quantities for collateral, etc.) cannot be imported using the import tool — they would have to be entered into the system manually after the import is complete.
Final Step: Review Screen
After you upload the spreadsheet, the system will parse your data and present you with a screen where you can review the data you’re about to import for accuracy. Review each asset that is being imported and make changes as needed.
If you are importing any Capital Assets, please ensure that you select the appropriate Storage Location for each Capital Asset on the review screen.
Once you’re done reviewing the data, click the “Submit” button at the bottom of the page to complete the import process.
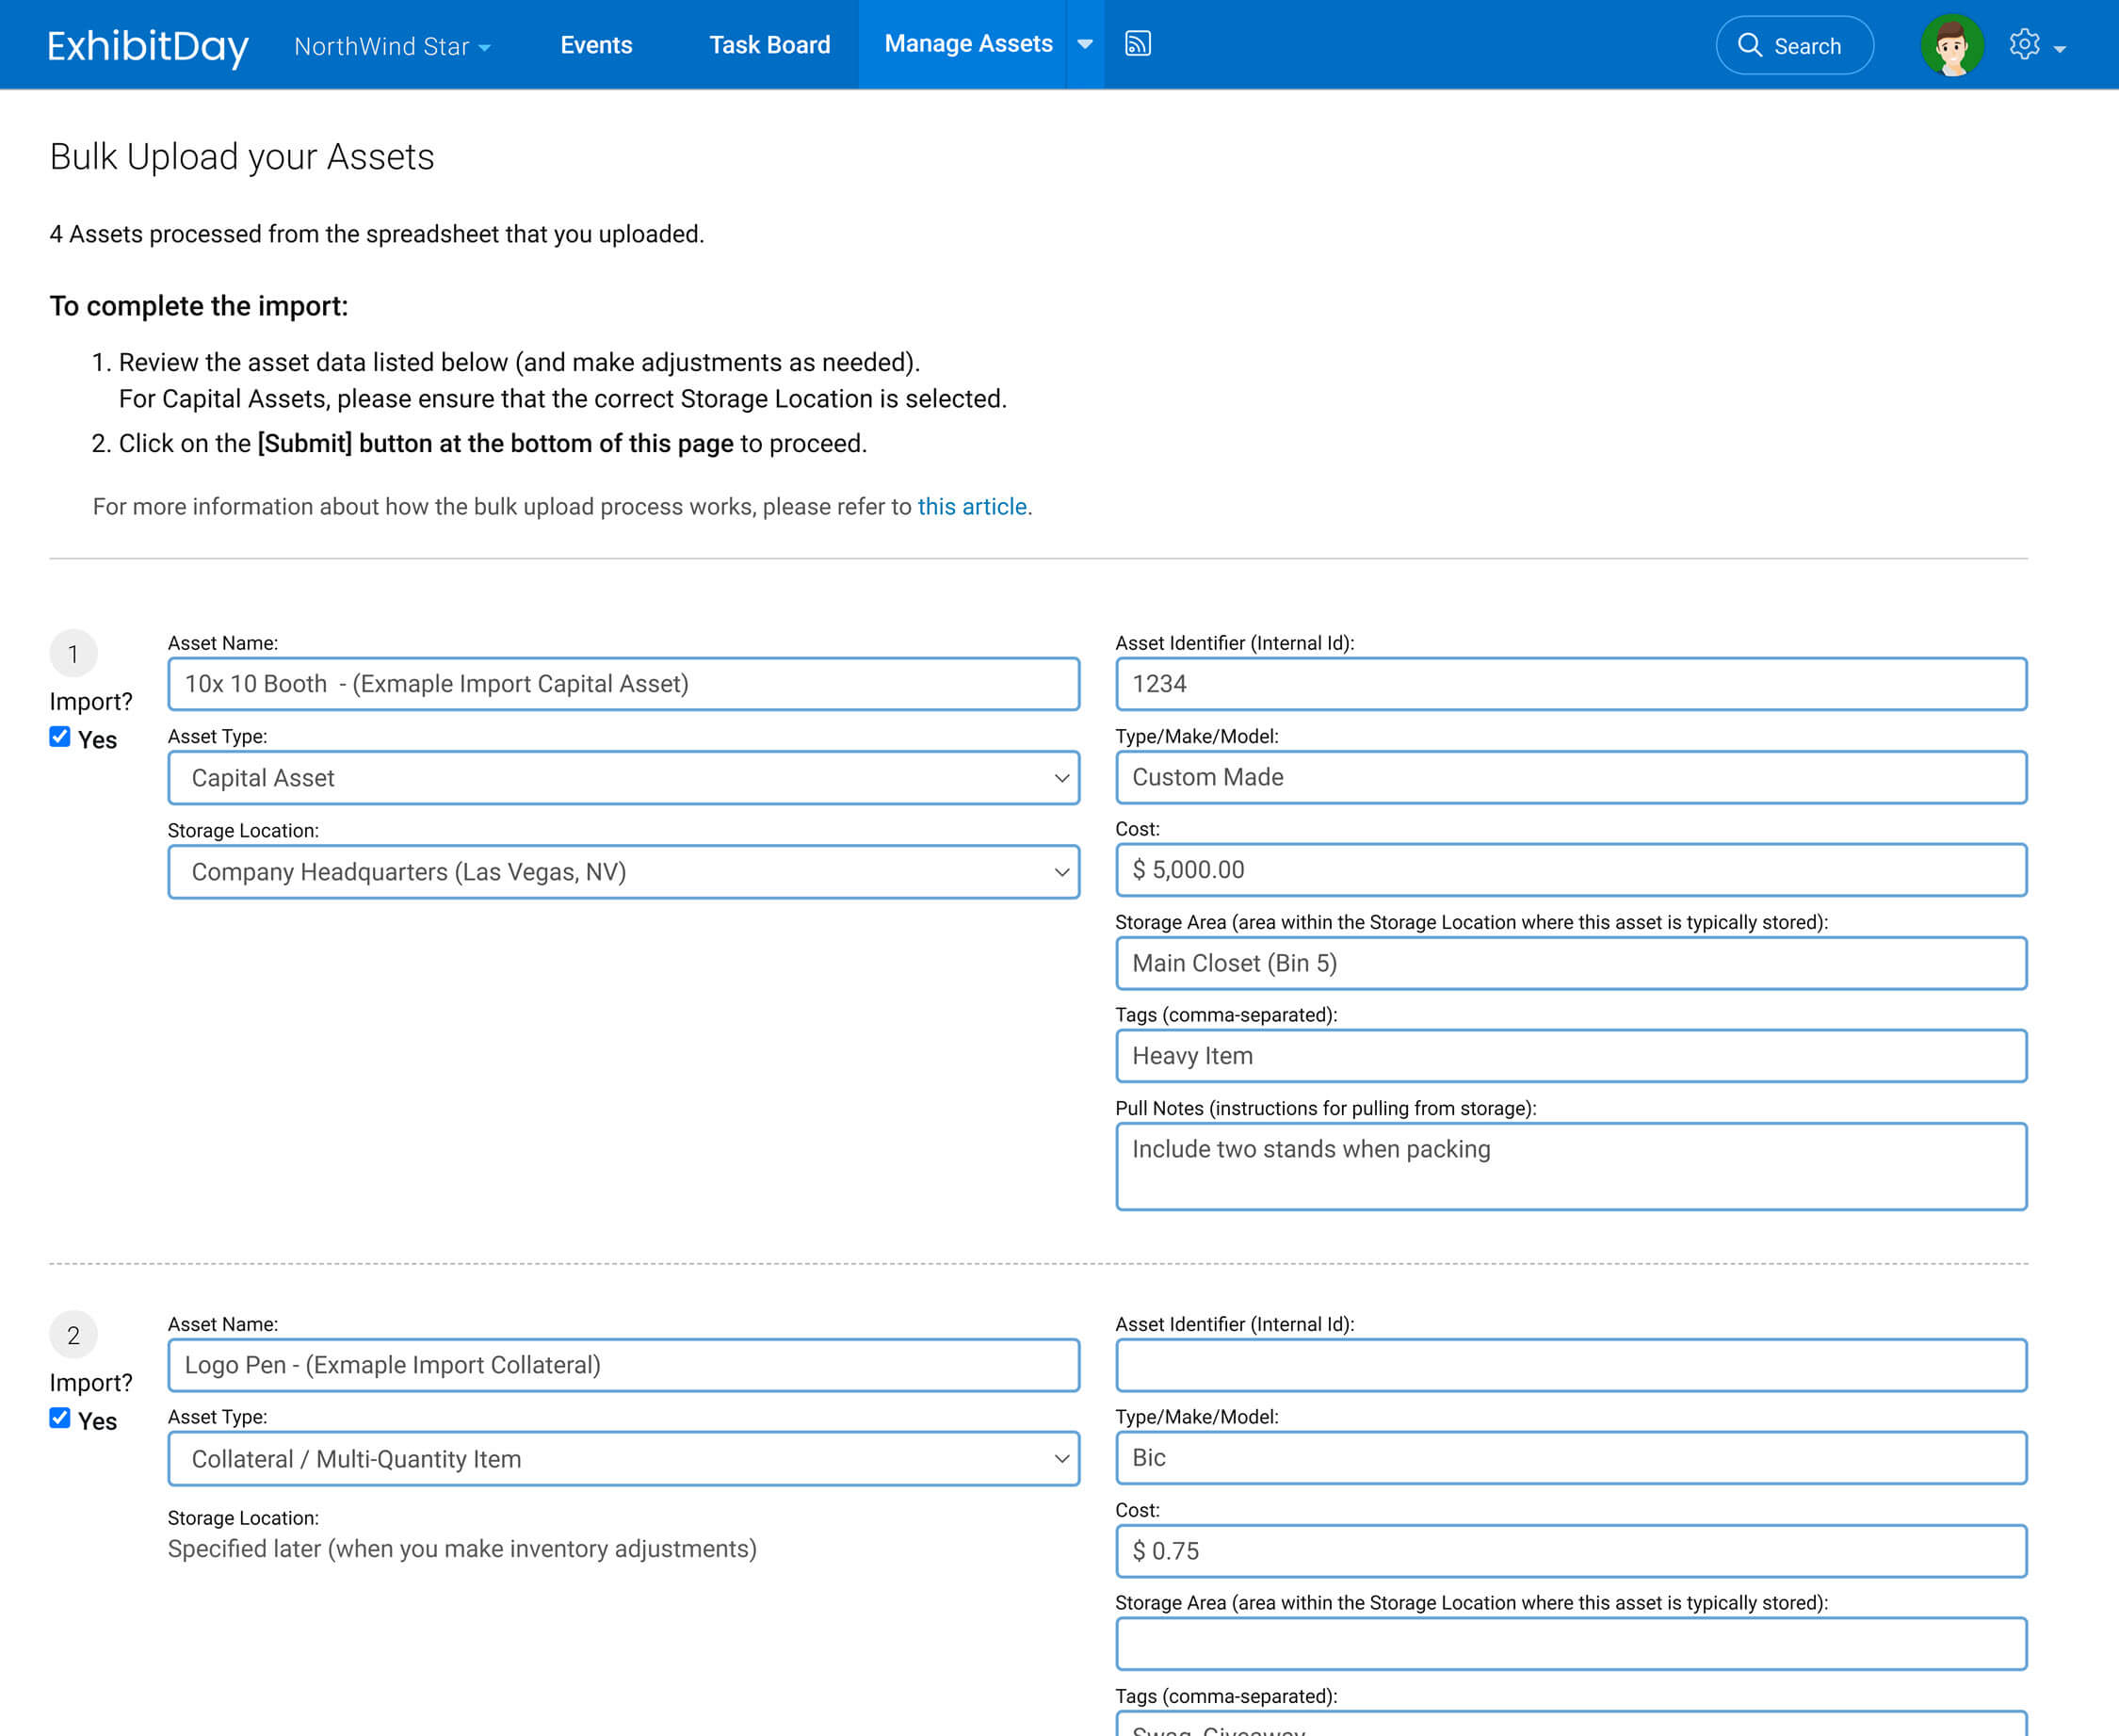
Note: In ExhibitDay, each Capital Asset must be assigned to a Storage Location. That is why you are given the option to choose the Storage Location for each Capital Asset you’re importing on the review screen. On the other hand, Collateral / Multi-quantity Items do not need to have a storage location defined; the storage locations for Collateral / Multi-quantity Items can be selected whenever you make inventory adjustments for them (after the import is done).
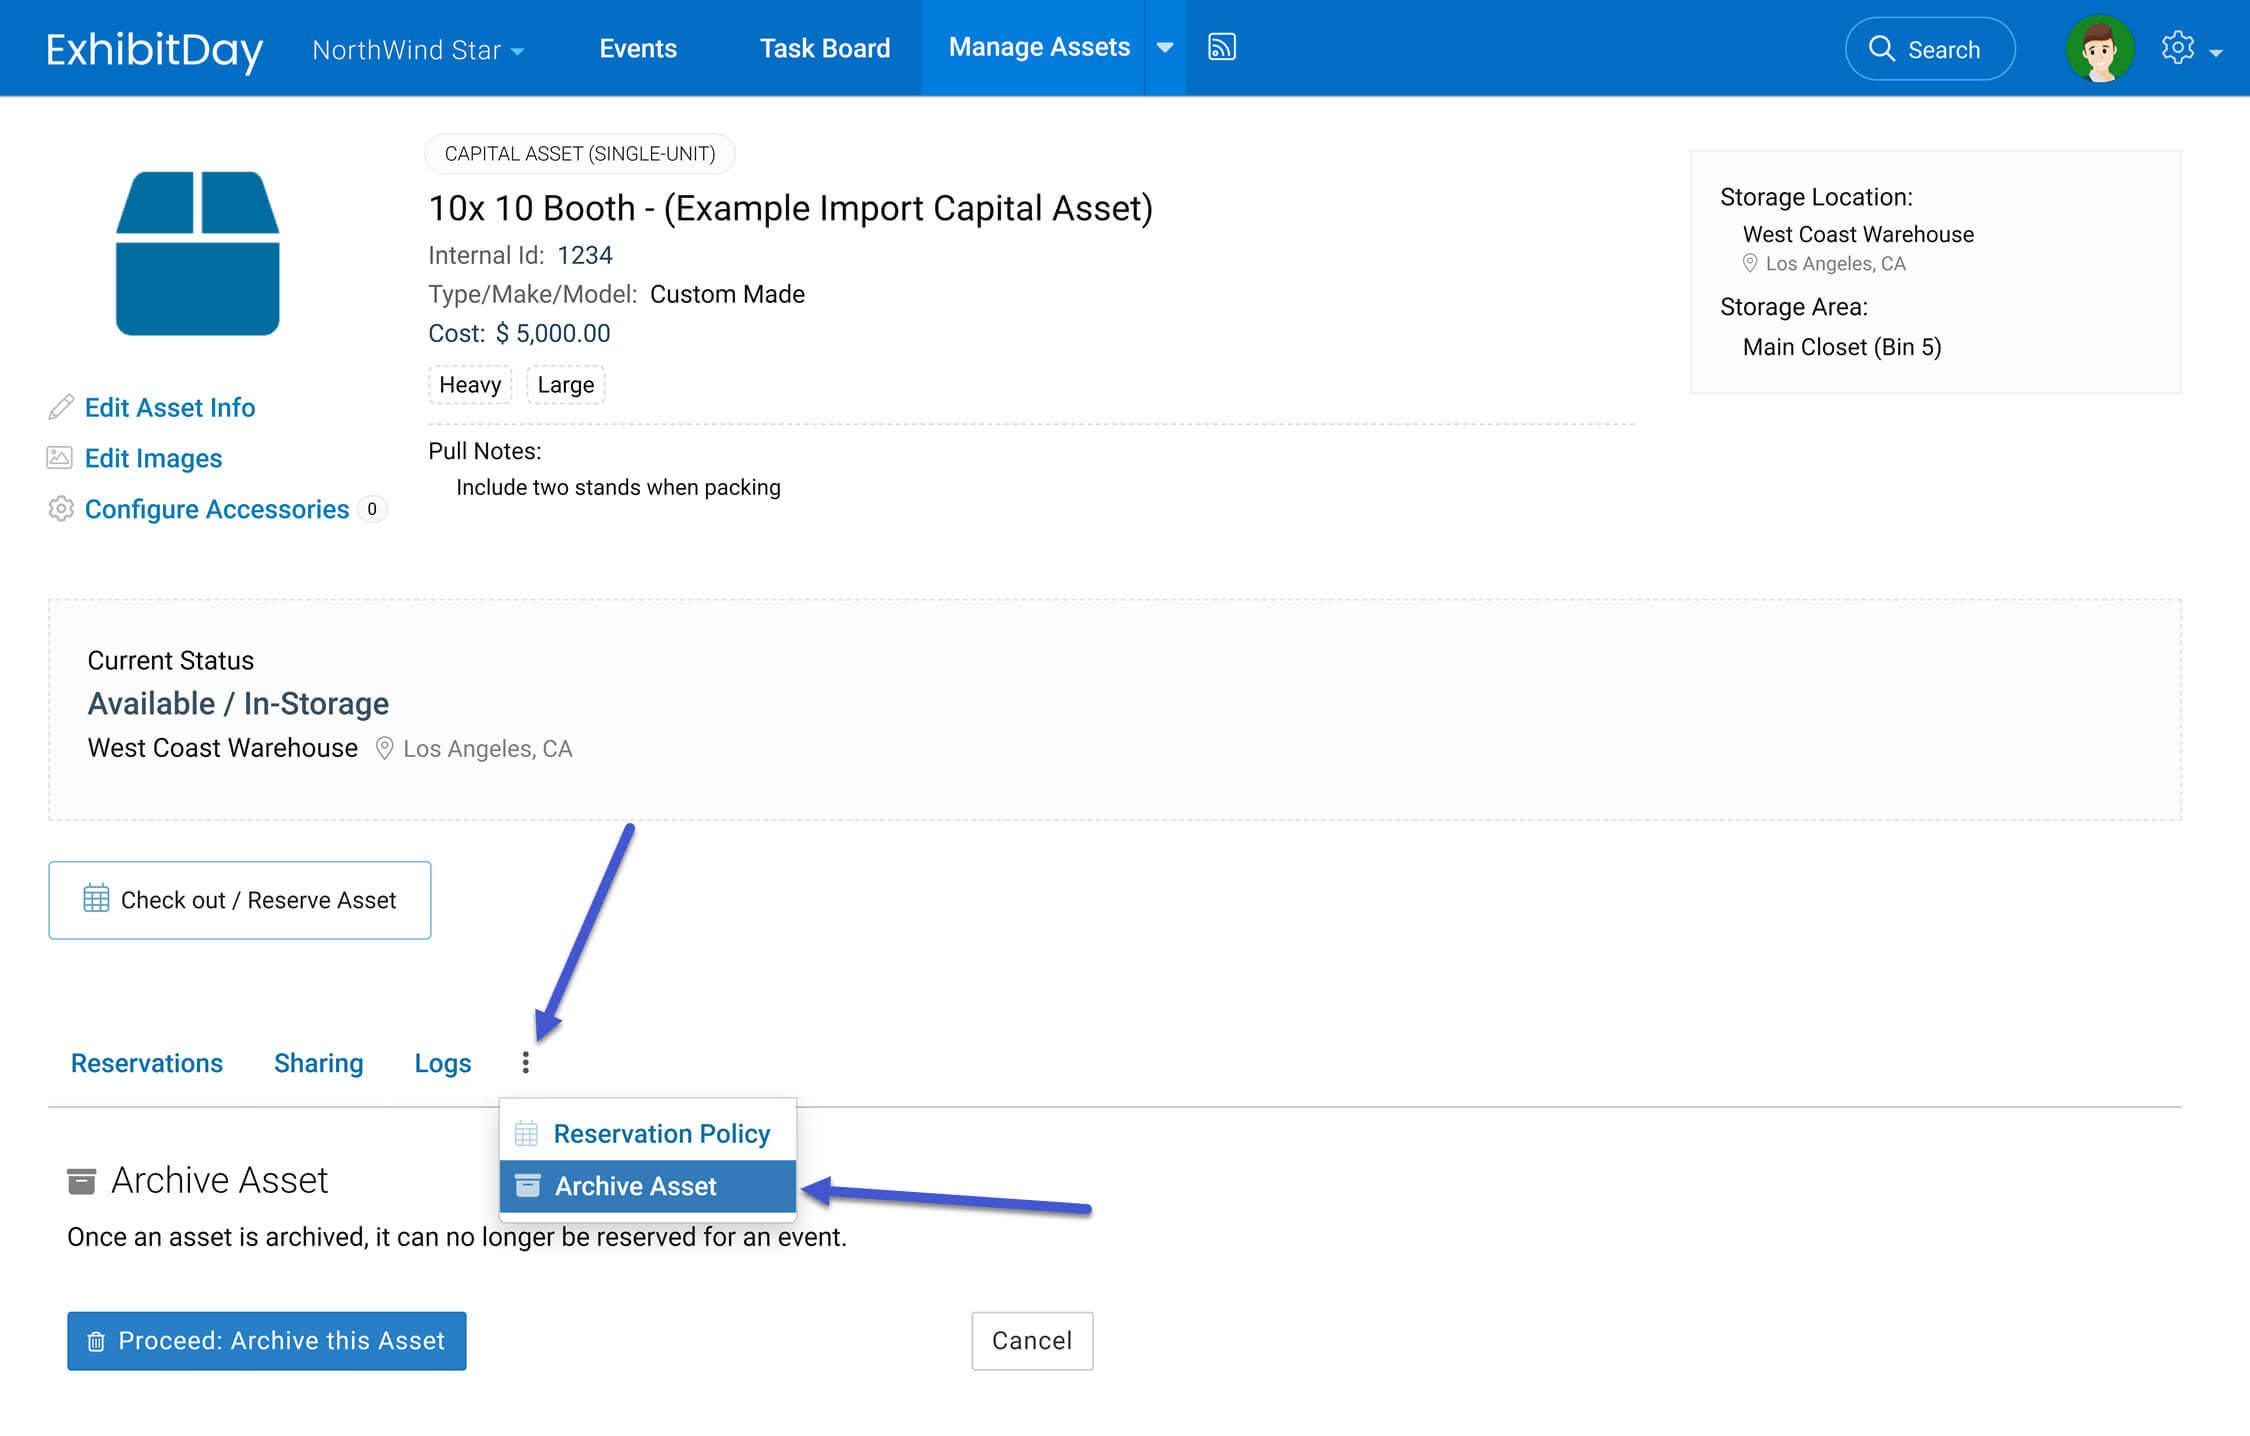
Deleting Assets
If you accidentally import a duplicate asset, you can delete it by going to the Asset page itself. Please note that prior to deleting an asset, the asset must be marked as ‘Archived’. You can archive an asset from the extended menu of the tab strip on the Asset page. Once an asset is marked as ‘Archived’, the option to delete it appears in the extended menu of the tab strip.