ExhibitDay News and Resources for Event Professionals
Category: Asset Management
Track and manage reservations for your trade show Capital Assets (like your booth, displays, and furniture), as well as your trade show Collateral (like swag and marketing material).
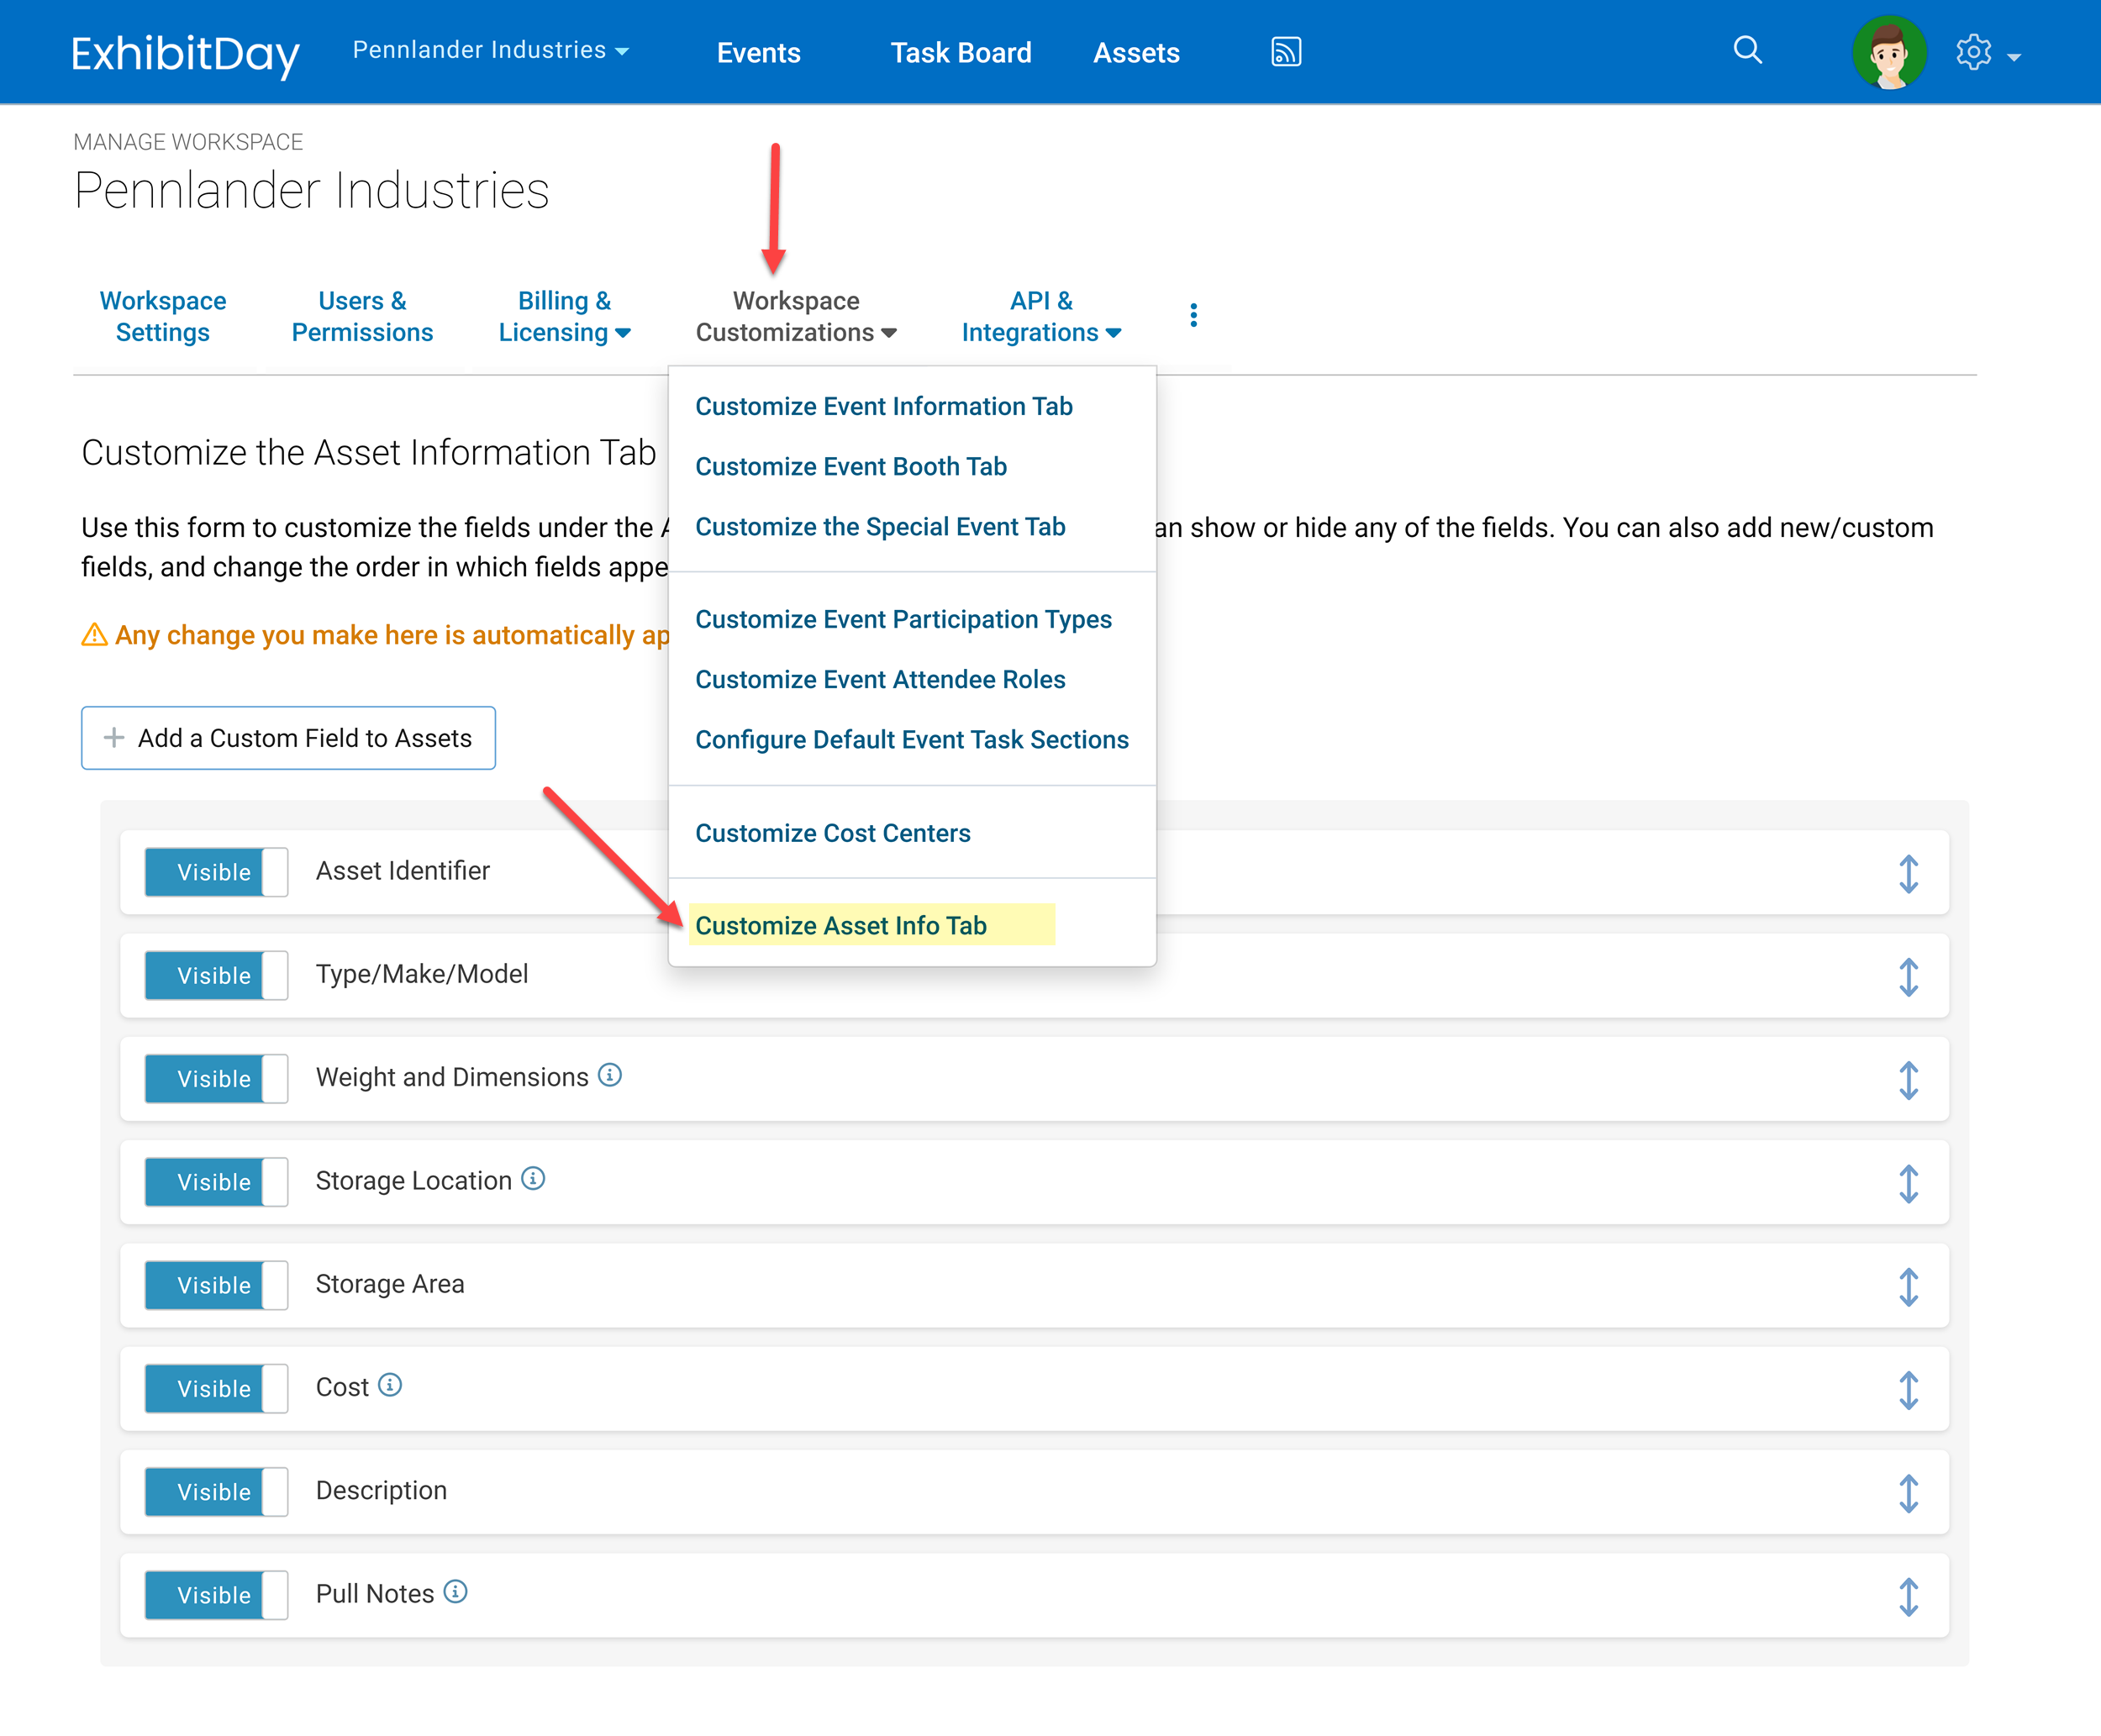
Under the ExhibitDay Enterprise plan, you can customize the properties of Capital Assets (like your booth or displays) and Collateral/Multi-quantity Items (like giveaways and swag) by adding Custom Asset Fields. These custom fields can be used to capture relevant data that best support your organization’s inventory management processes.
To add custom fields to the Asset information tab, go to Workspace Settings > Workspace Customizations > Customize Asset Info tab. There, you can add any number of custom fields (e.g. text field, date field, dropdown, file attachment, etc.) to your assets in ExhibitDay. You can also change the order in which the fields appear when you view the Asset Info tab (by grab-and-dragging the handle to right of each field) . Note: any change you make on this page will automatically apply to all of the assets in your ExhibitDay workspace.
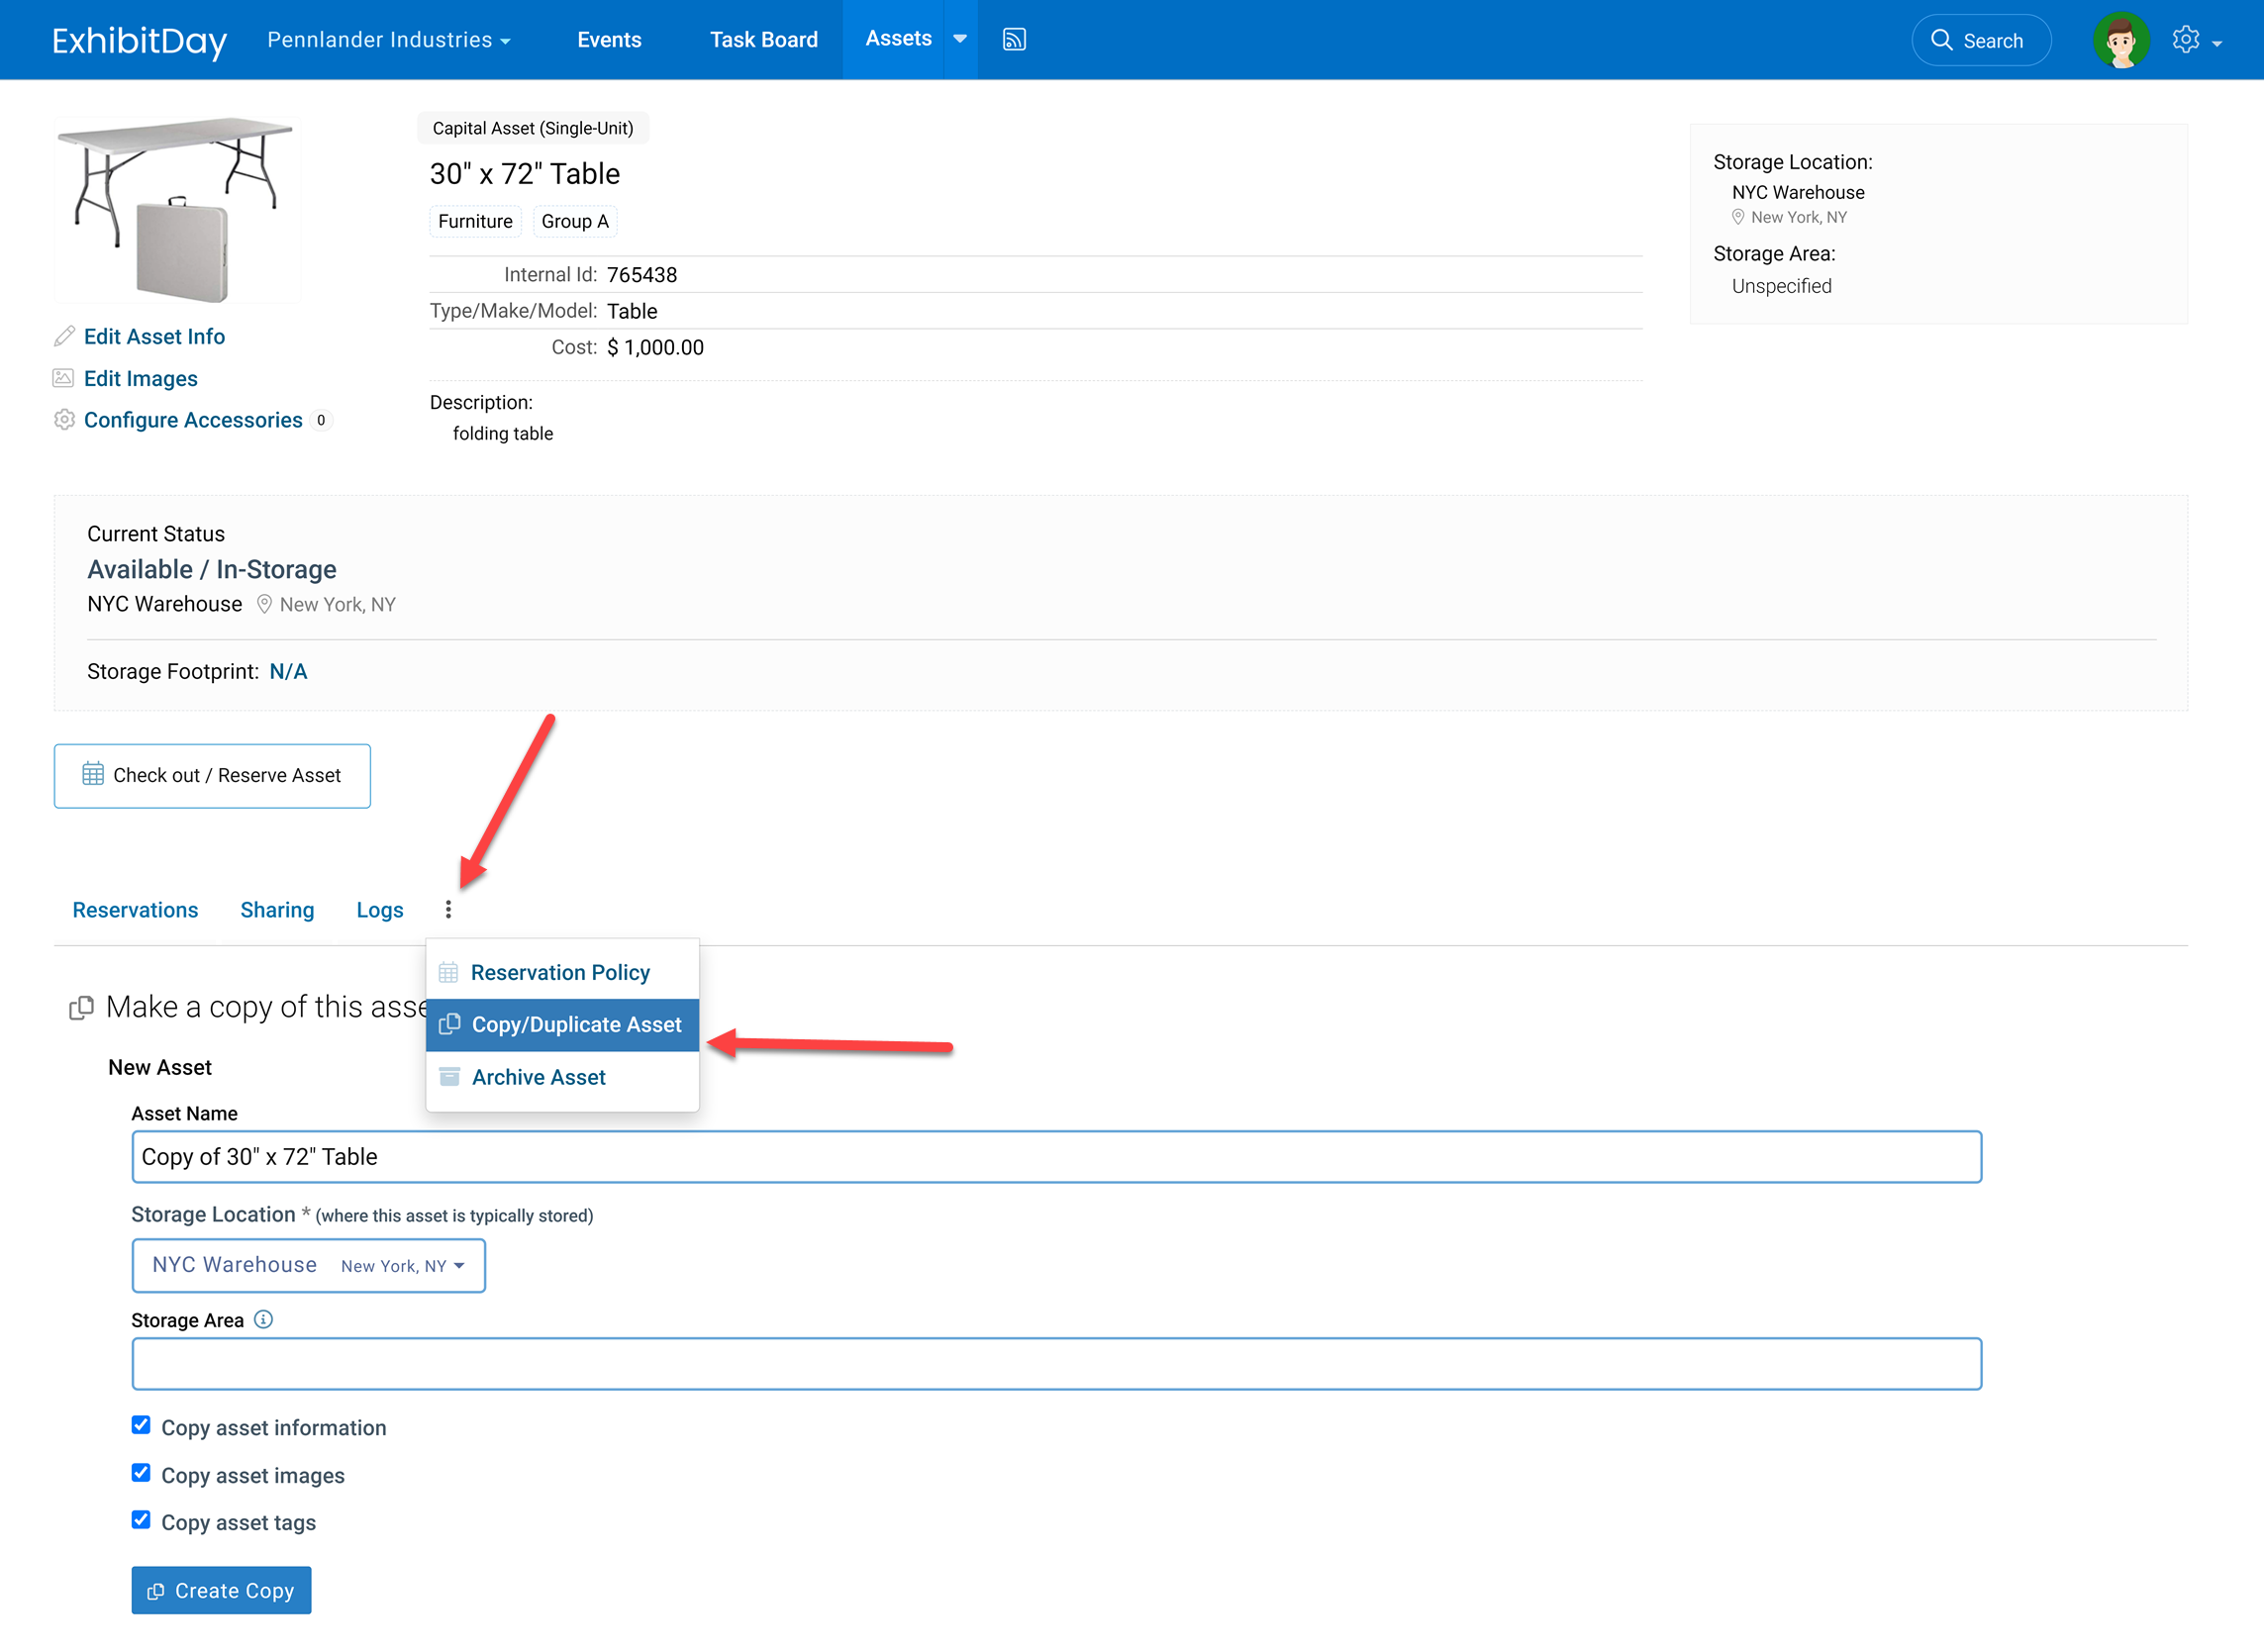
To reduce data entry when creating assets in ExhibitDay, instead of creating an asset from scratch, you can create a duplicate copy of an existing asset that is most similar to the asset you’re looking to create. To make a copy of an existing asset, go to the asset page and choose the “Copy/Duplicate Asset” option from the extended menu of the asset page tab strip.
Under the Copy/Duplicate tab, you’ll be able to choose the Name of the new asset, and you can select various options for creating the copy. Once you’re done making your selections, click the “Create Copy” button; the system will create a copy of the asset for you based on the options you selected and you’ll be taken to the newly created asset page.
Btw, did you know that you can bulk upload your assets into ExhibitDay from a spreadsheet? For more info, please refer to this article.
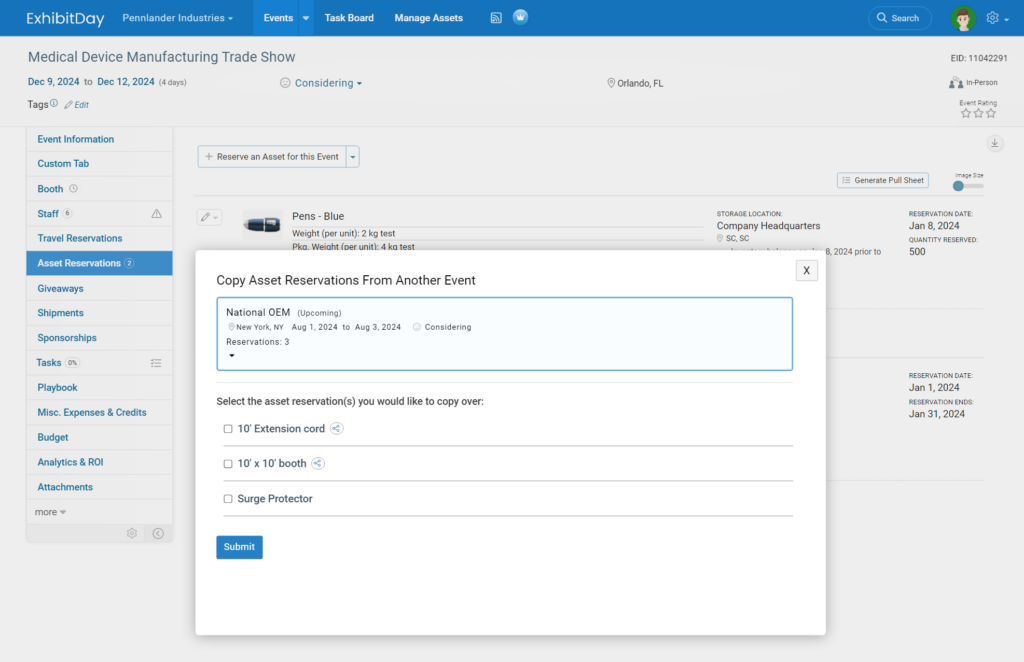
To save some data entry time, you can copy asset reservations from another event that has similar assets reserved. Use the extended menu of the “Reserve an Asset for this Event” button on the event “Asset Reservation” tab in order to start the copy process.
Once the copy dialog appears, select the event you would like to copy asset reservations from. Then, select each asset reservation you would like to copy over and enter the reservation details. When you’re done making your selections, click the “Submit” button at the bottom of the dialog to complete the copy process.
Note: the ability to copy asset reservations from another event is only available if you are on the Premium or the Enterprise plan.
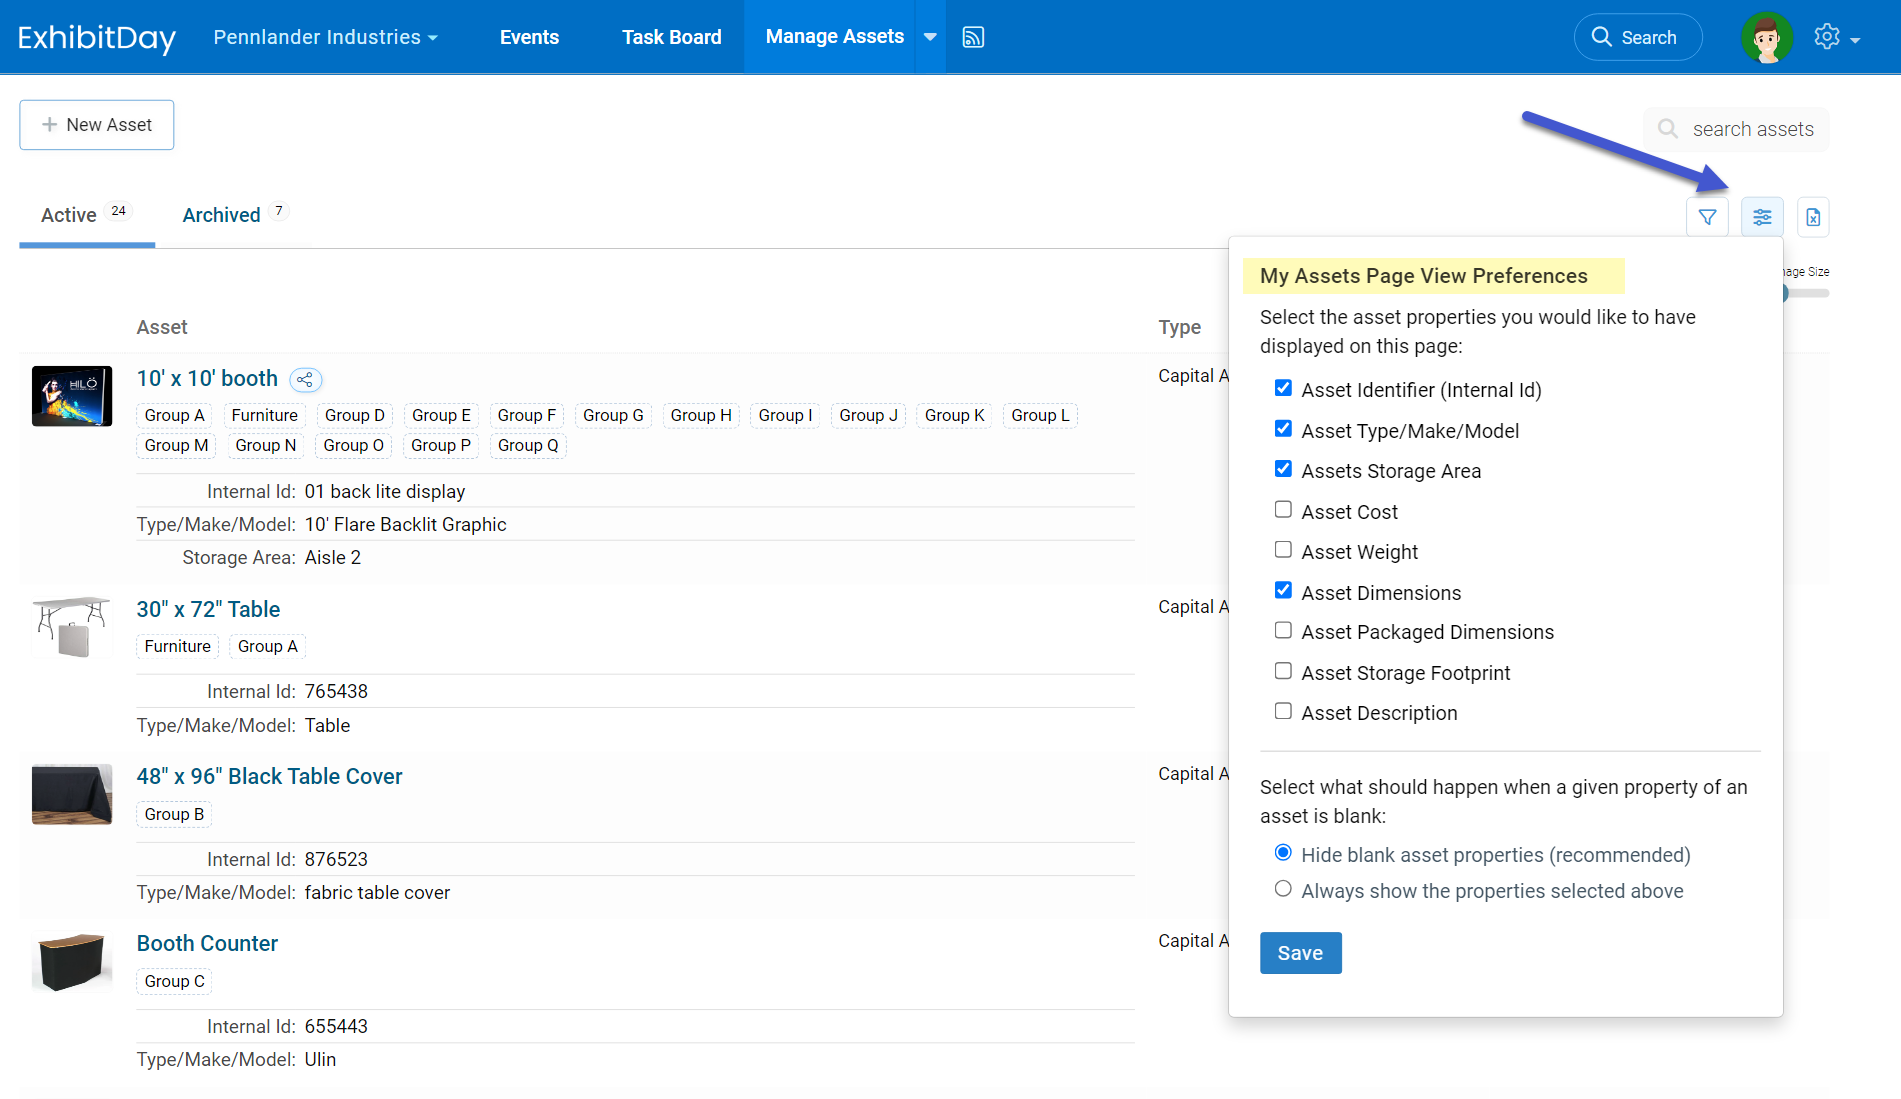
You can specify your view preferences for the main Assets page (where you see a list of all your assets in ExhibitDay). To change your view preferences, click the View Preferences button (toward the upper-right corner of the page). There, you can specify which properties of Assets you would like to have displayed on the main Assets page.
Please note that Assets Page View Preferences are user-specific. Changing your View Preferences does not affect the View Preferences of other users in your ExhibitDay workspace.
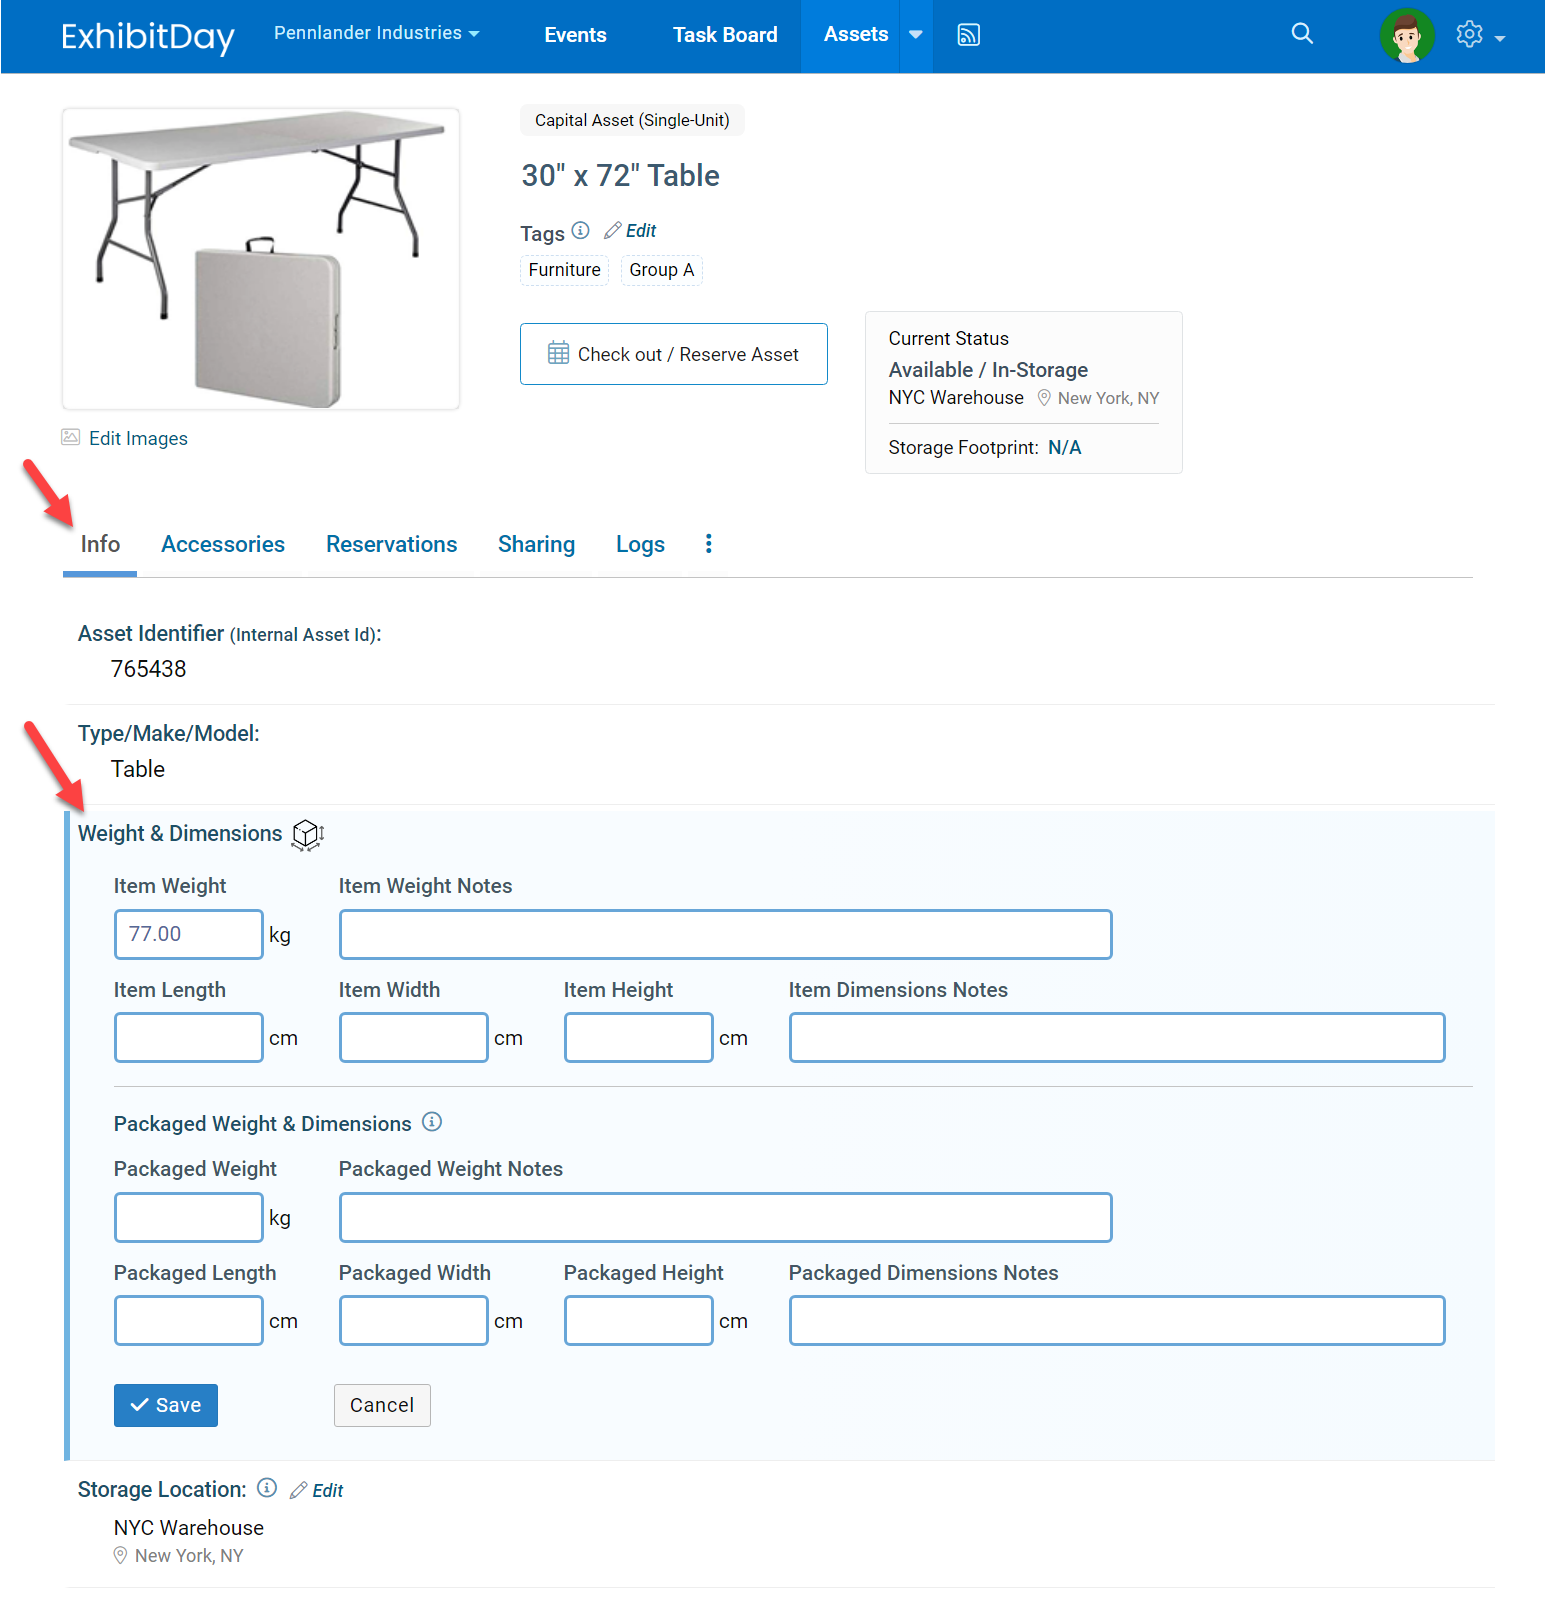
You can specify weight and dimensions (L x W x H) for an asset under the asset Info tab. Additionally, you can specify the Packaged Weight and Dimensions for the asset. Packaged Weight and Dimensions (L x W x H) are the weight and dimensions of the asset when the asset is packaged/unassembled (while in storage or during shipment).
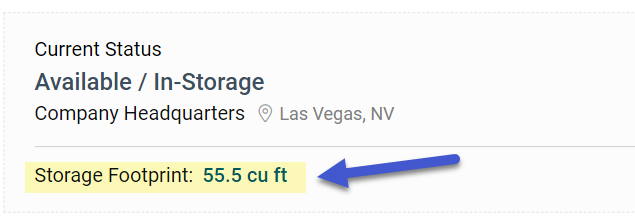
Storage Footprint
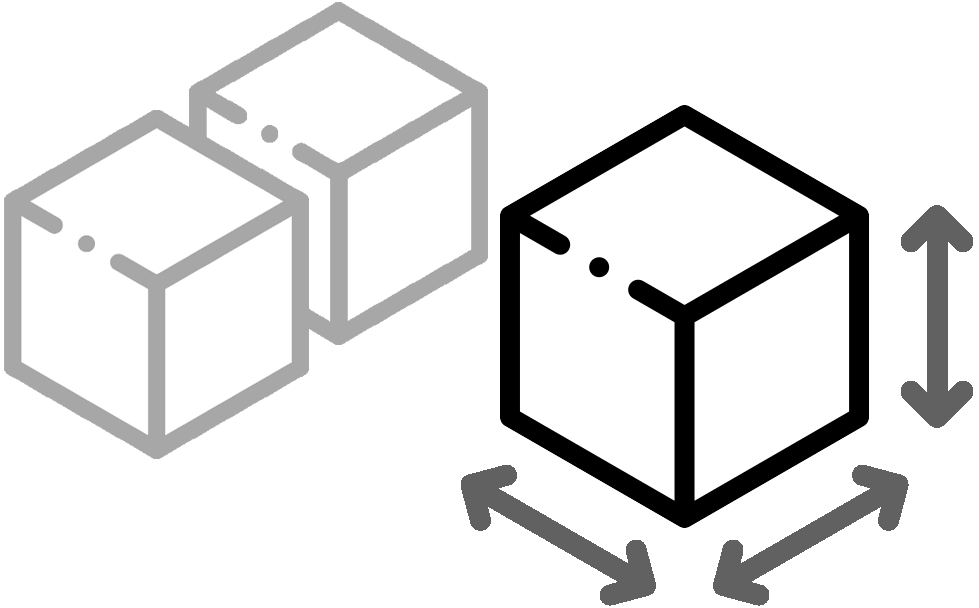
The Storage Footprint is the amount of space (volume) this asset occupies in storage.
Storage Footprint for Capital Assets
When viewing a Capital Asset (single-quantity items like your booth and display), the Storage Footprint is displayed underneath the Asset’s Status (right after the asset information).
The Storage Footprint for Capital Assets is calculated based on the asset’s dimensions.
Storage Footprint = Length x Width x Height
Note: If Packaged Dimensions are specified for an asset, then Packaged Dimensions will be used for the calculation of the asset’s Storage Footprint. Otherwise, the Item Dimensions will be used for the calculation of the asset’s Storage Footprint.
Storage Footprint for Collateral/Multi-quantity Items
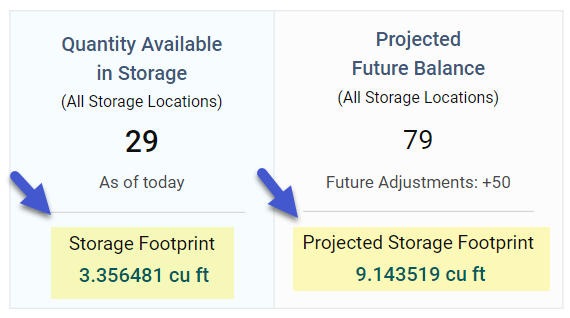
When viewing a Collateral/Multi-quantity asset (like swag and marketing material), the Storage Footprint and the Projected/Future Storage Footprint are displayed underneath the Asset’s Quantity in Storage section of the page (right after the asset information).
The Storage Footprint for Collateral/Multi-quantity assets is calculated based on dimensions and quantity in storage.
Storage Footprint = [Quantity in Storage] x Length x Width x Height
If Packaged Dimensions are specified for an asset, then Packaged Dimensions will be used for the calculation of the asset’s Storage Footprint. Otherwise, the Item Dimensions will be used for the calculation of the asset’s Storage Footprint.
Note: Typically, Packaged Dimensions are only specified for Capital Assets (single-unit items like your booth, display and furniture). For Collateral/Multi-quantity items (like swag and marketing material), Packaged Dimensions can be left blank. But, if you would like to enter the Packaged Dimensions for a Collateral/Multi-quantity asset, please enter the Packaged Dimension of a single unit of the item (not the Packaged Dimensions of a group/pack of the item); this is because the calculation of Storage Footprint for Collateral/Multi-quantity items will take into consideration the quantity of the item available in storage – meaning that if you enter the Packaged Dimensions of a group/pack of the item, the Storage Footprint will become erroneously inflated.
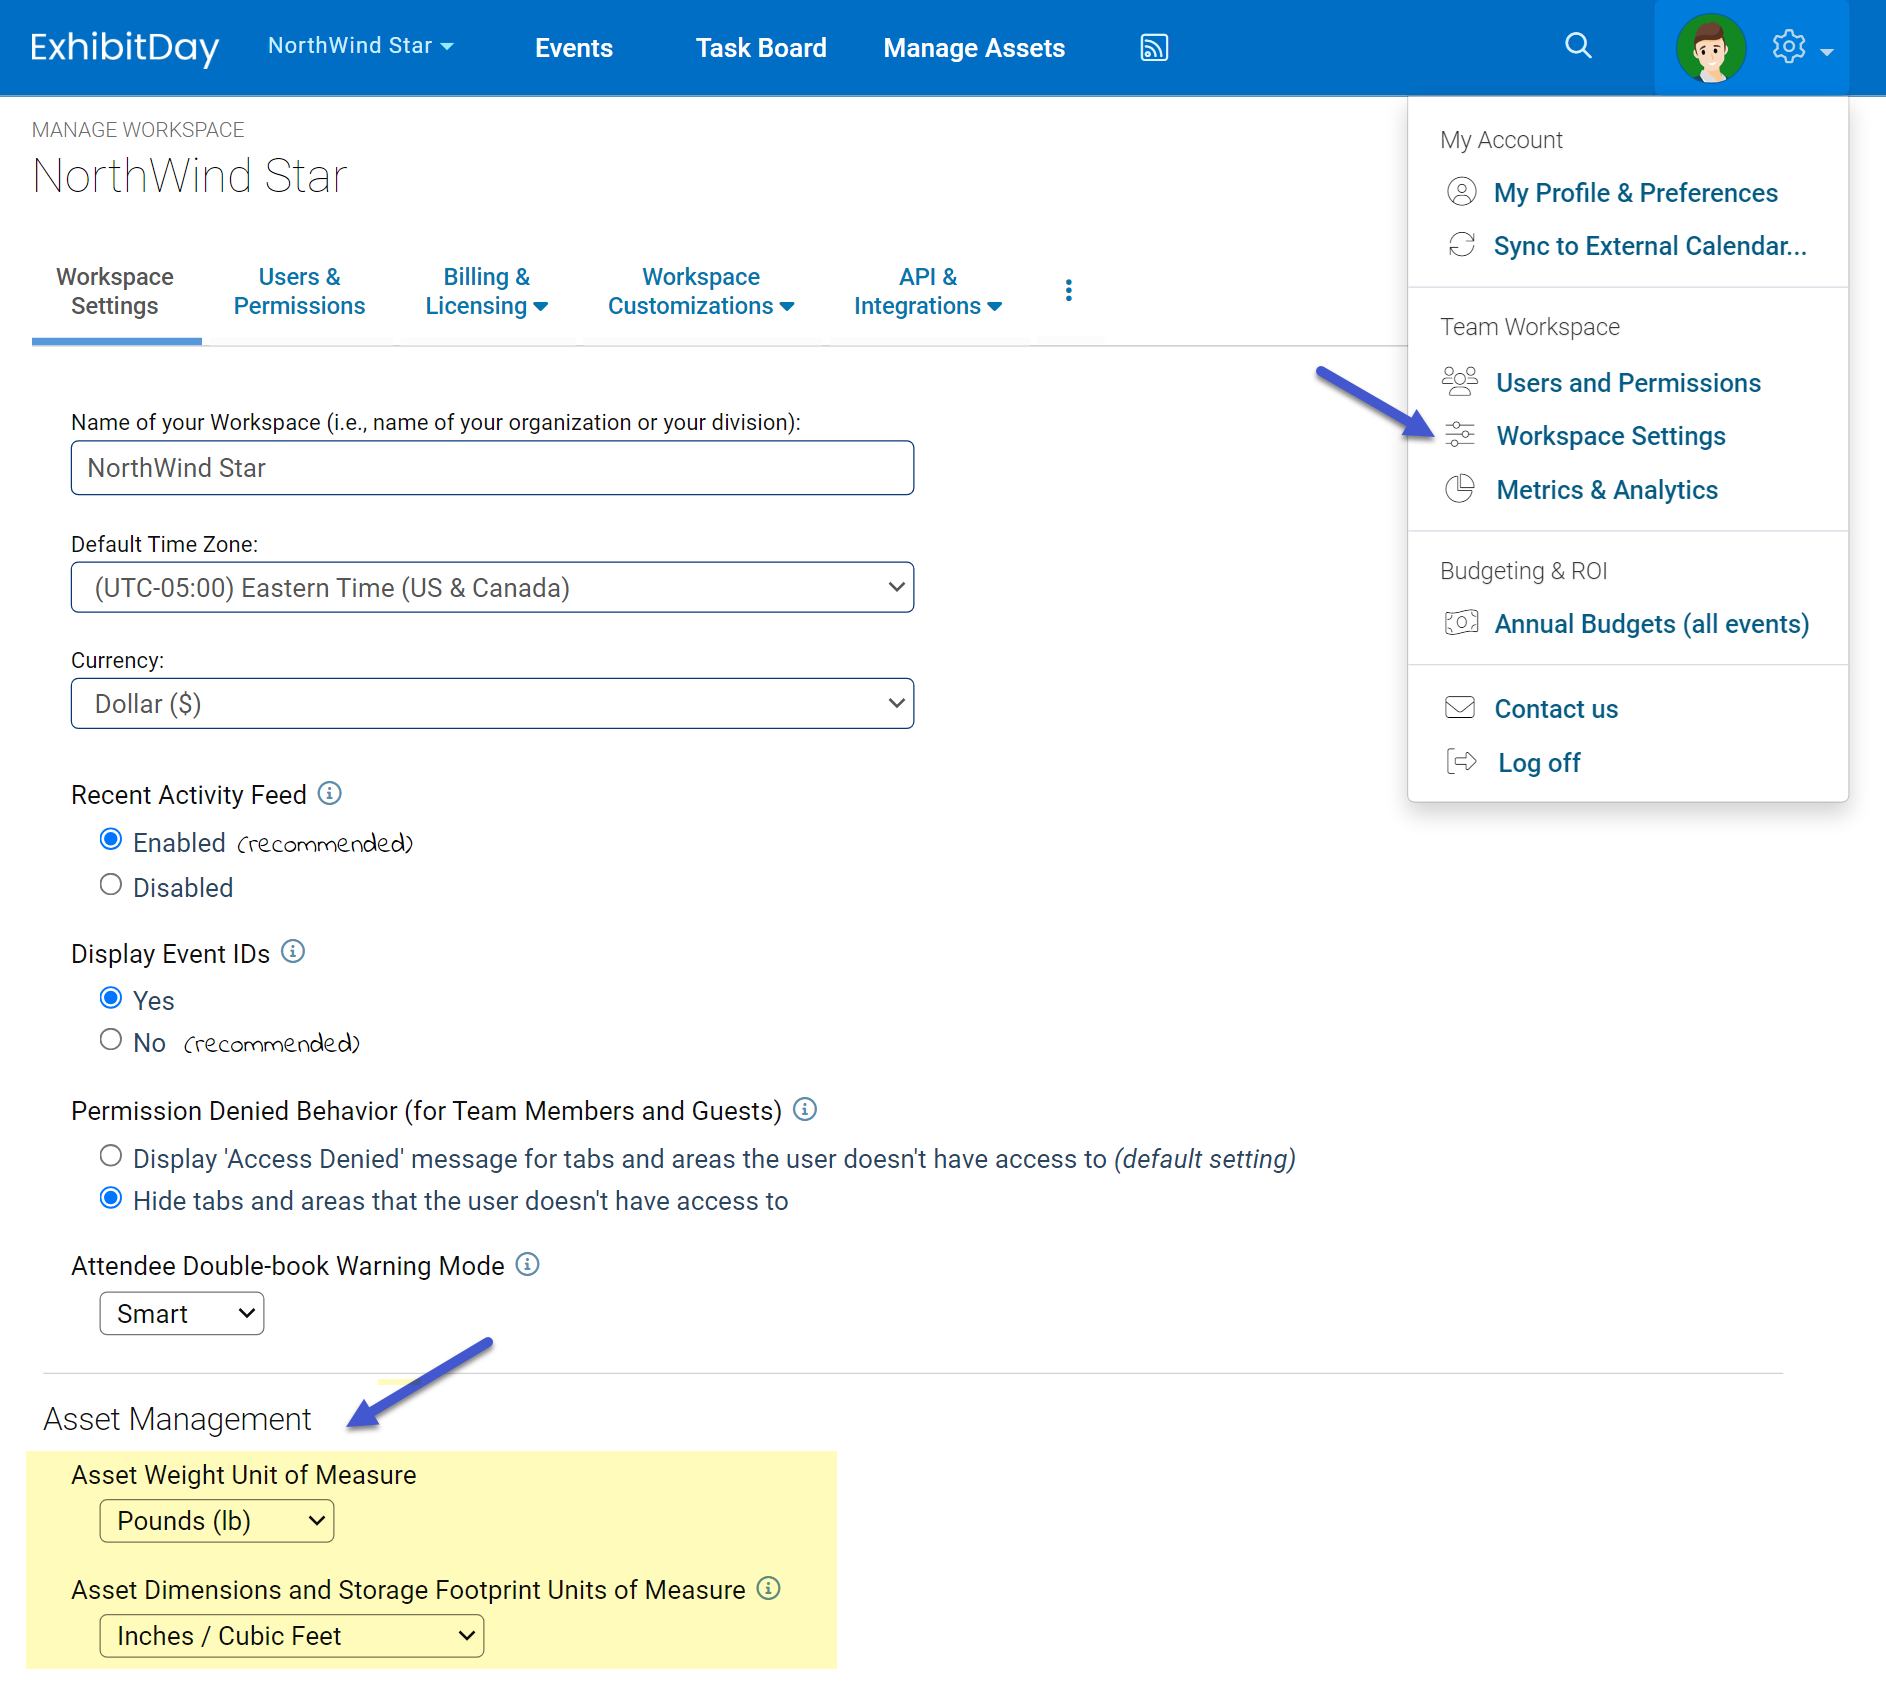
Changing Units of Measurement for Asset Weight and Dimensions
You can change the units of measurement for asset weight and dimensions under Workspace Settings.