You can lock specific sections of an event to prevent future modifications. Locked sections become read-only. To manage an event’s lock settings, go to the event page, click on the “Event Settings” tab; then click on the “Tab Visibility & Locking” sub-tab and scroll down to the “Lock Event” section.
Notes:
– The event locking feature is available only if you are on the Premium plan or the Enterprise plan.
– When an event tab is locked, no one can make edits to that tab until it is unlocked.
– Any changes you make to an event’s lock settings apply to all users in your workspace, not just you.
– Locking is event-specific — lock settings configured for one event do not affect any other events in your workspace.
– When you use the “Copy/Duplicate Event” feature to make a copy of an event, the lock settings from the source event do not carry over; the newly created event will have all tabs unlocked.
– API/Integrations Exception: If you are on the Enterprise plan and use an integration that updates events through the ExhibitDay API or Zapier, locked events may still be updated programmatically.
In ExhibitDay, a Resource (non-user) is someone you can tag in events, but they do not have an ExhibitDay account or access to your workspace.
You cannot directly change a Resource into a User. However, there may be cases where you’ve added someone as a Resource and later decide they should be an actual User.
Follow these two steps to convert a Resource to a User:
Step 1 – Invite the person to join your ExhibitDay Workspace
Go to Workspace Settings > Users & Permissions and click the “Add” button. Select “Invite a User” and enter the email address of the person you’re inviting to join your workspace. Once the recipient accepts the invitation and creates an ExhibitDay account, they automatically join your workspace as a User.
You’ll now have two records in your workspace representing the same person — one as a User and one as a Resource.
Step 2 – Merge the Resource with the User
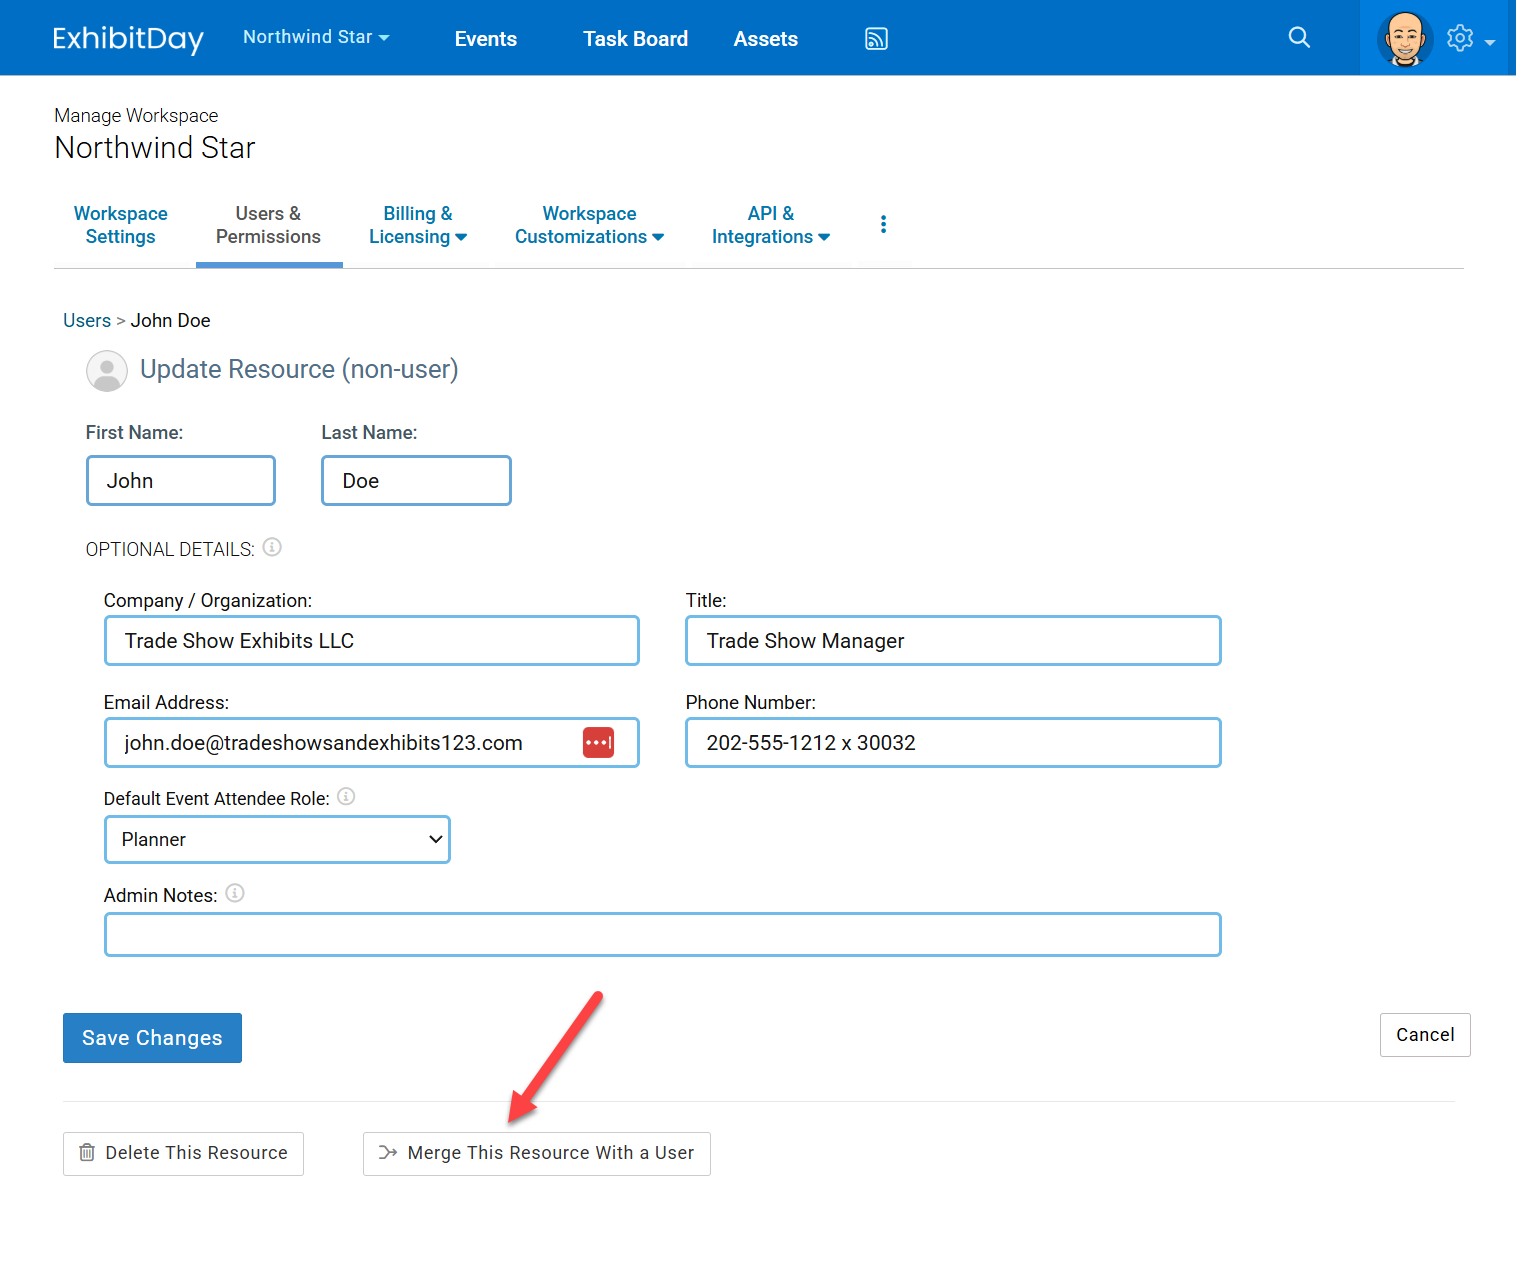
Go to Workspace Settings > Users & Permissions and edit the Resource. At the bottom of the page, click “Merge This Resource With a User.” When the merge dialog appears, select the newly added user and follow the instructions to complete the merge. The Resource will be deleted, and the new User will be tagged in the events the Resource was previously tagged in — preserving historical data and maintaining continuity in your workspace.
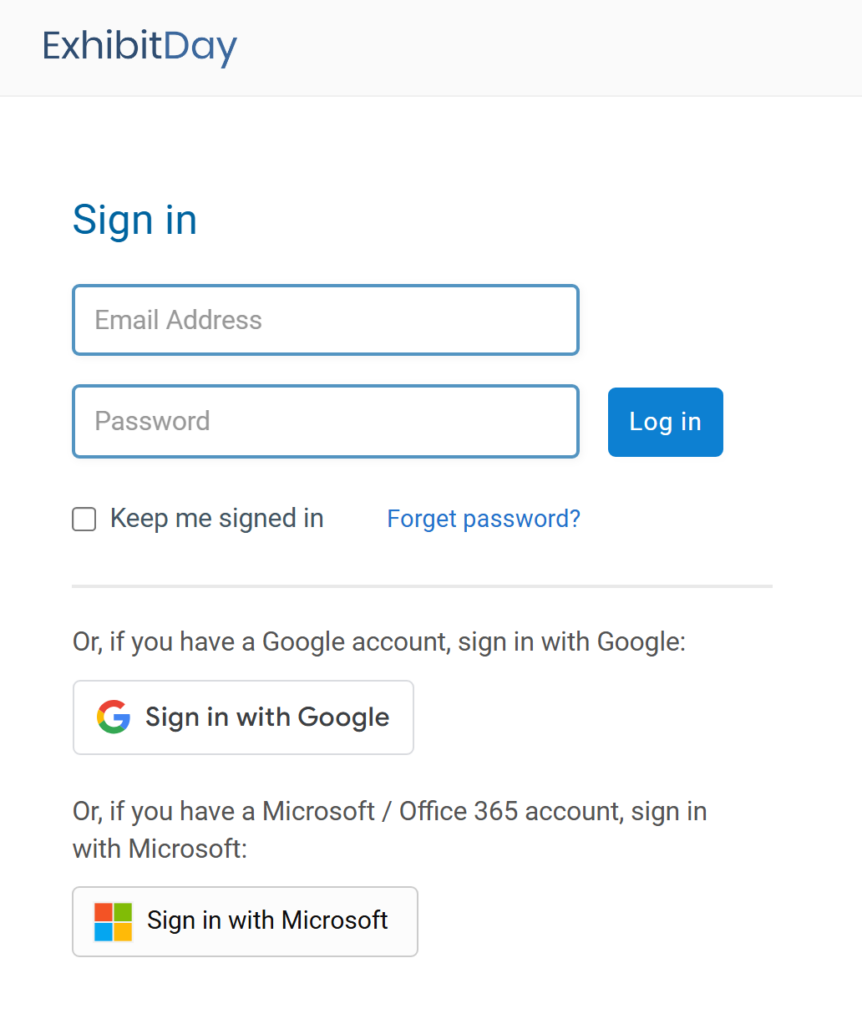
By default, ExhibitDay offers three authentication methods for logging in:
Login using an ExhibitDay account
Sign-in with Google (SSO)
Sign-in with Microsoft / Office365 (SSO)
These authentication methods are available to all users on our platform.
Restricting How Your Users Sign In
As an added security measure and to support centralized identity management, your organization may choose to restrict certain authentication methods for logging into ExhibitDay. For example, Acme Corporation may require users to log in exclusively via Sign-in with Microsoft (SSO). To accommodate this, we offer the option to restrict authentication methods based on specific email domains. Acme Corporation can request that users with an @AcmeCorporation.com email address only be allowed to sign into ExhibitDay using Microsoft SSO.
How to Restrict Authentication Options
To enable authentication restrictions, you must be on the ExhibitDay Enterprise plan.
Contact your Enterprise account manager and specify which authentication methods should be allowed for your users.
Once we verify your organization’s ownership of the email domain, we’ll make the appropriate configuration changes to our system.
Afterward, your users will only be able to log into ExhibitDay using the allowed authentication method(s).
Note: Authentication restrictions can only be applied to email domains that your organization owns.
Example
– Your organization owns the email domain AcmeCorporation.com (i.e., your users have @AcmeCorporation.com email addresses).
– The only authentication method you’ve allowed is Sign-in with Microsoft (SSO).
– Any user with a @AcmeCorporation.com email address will only be able to log into ExhibitDay via Sign-in with Microsoft (SSO).
Note: you can still invite users from other email domains (e.g., @gmail.com, @yahoo.com, @foobar.com) to join your workspace. However, no authentication restrictions will be applied to these users, allowing them to log in using any available method.
We offer the ability to restrict authentication methods to customers on the Enterprise plan for added security, centralized identity management, and a more streamlined user experience. As always, we prioritize security by employing industry-leading practices, including robust encryption and advanced firewalls. Our team regularly applies the latest security patches to ensure our servers remain secure and your information stays confidential.
We are honored to have been awarded the badge of 2024’s Best Ease of Use in the Productivity Software category by Capterra, a subsidiary of Gartner Digital Markets.
Gartner Digital Markets, the provider of Capterra, Software Advice, and GetApp, evaluates software solutions based on customer reviews in several key areas, including functionality, user experience, customer satisfaction, and overall performance. ExhibitDay emerged as 2024’s top choice for Ease of Use in the Productivity Software category.
This recognition is a testament to ExhibitDay’s user-friendly interface, intuitive features, and robust capabilities.
We are deeply thankful to our users. Many of the features and enhancements in ExhibitDay have been developed based on direct feedback from our customers.
We always welcome your comments and suggestions as we continue to create the best trade show planning platform known to humankind. 🙏🎉🚀
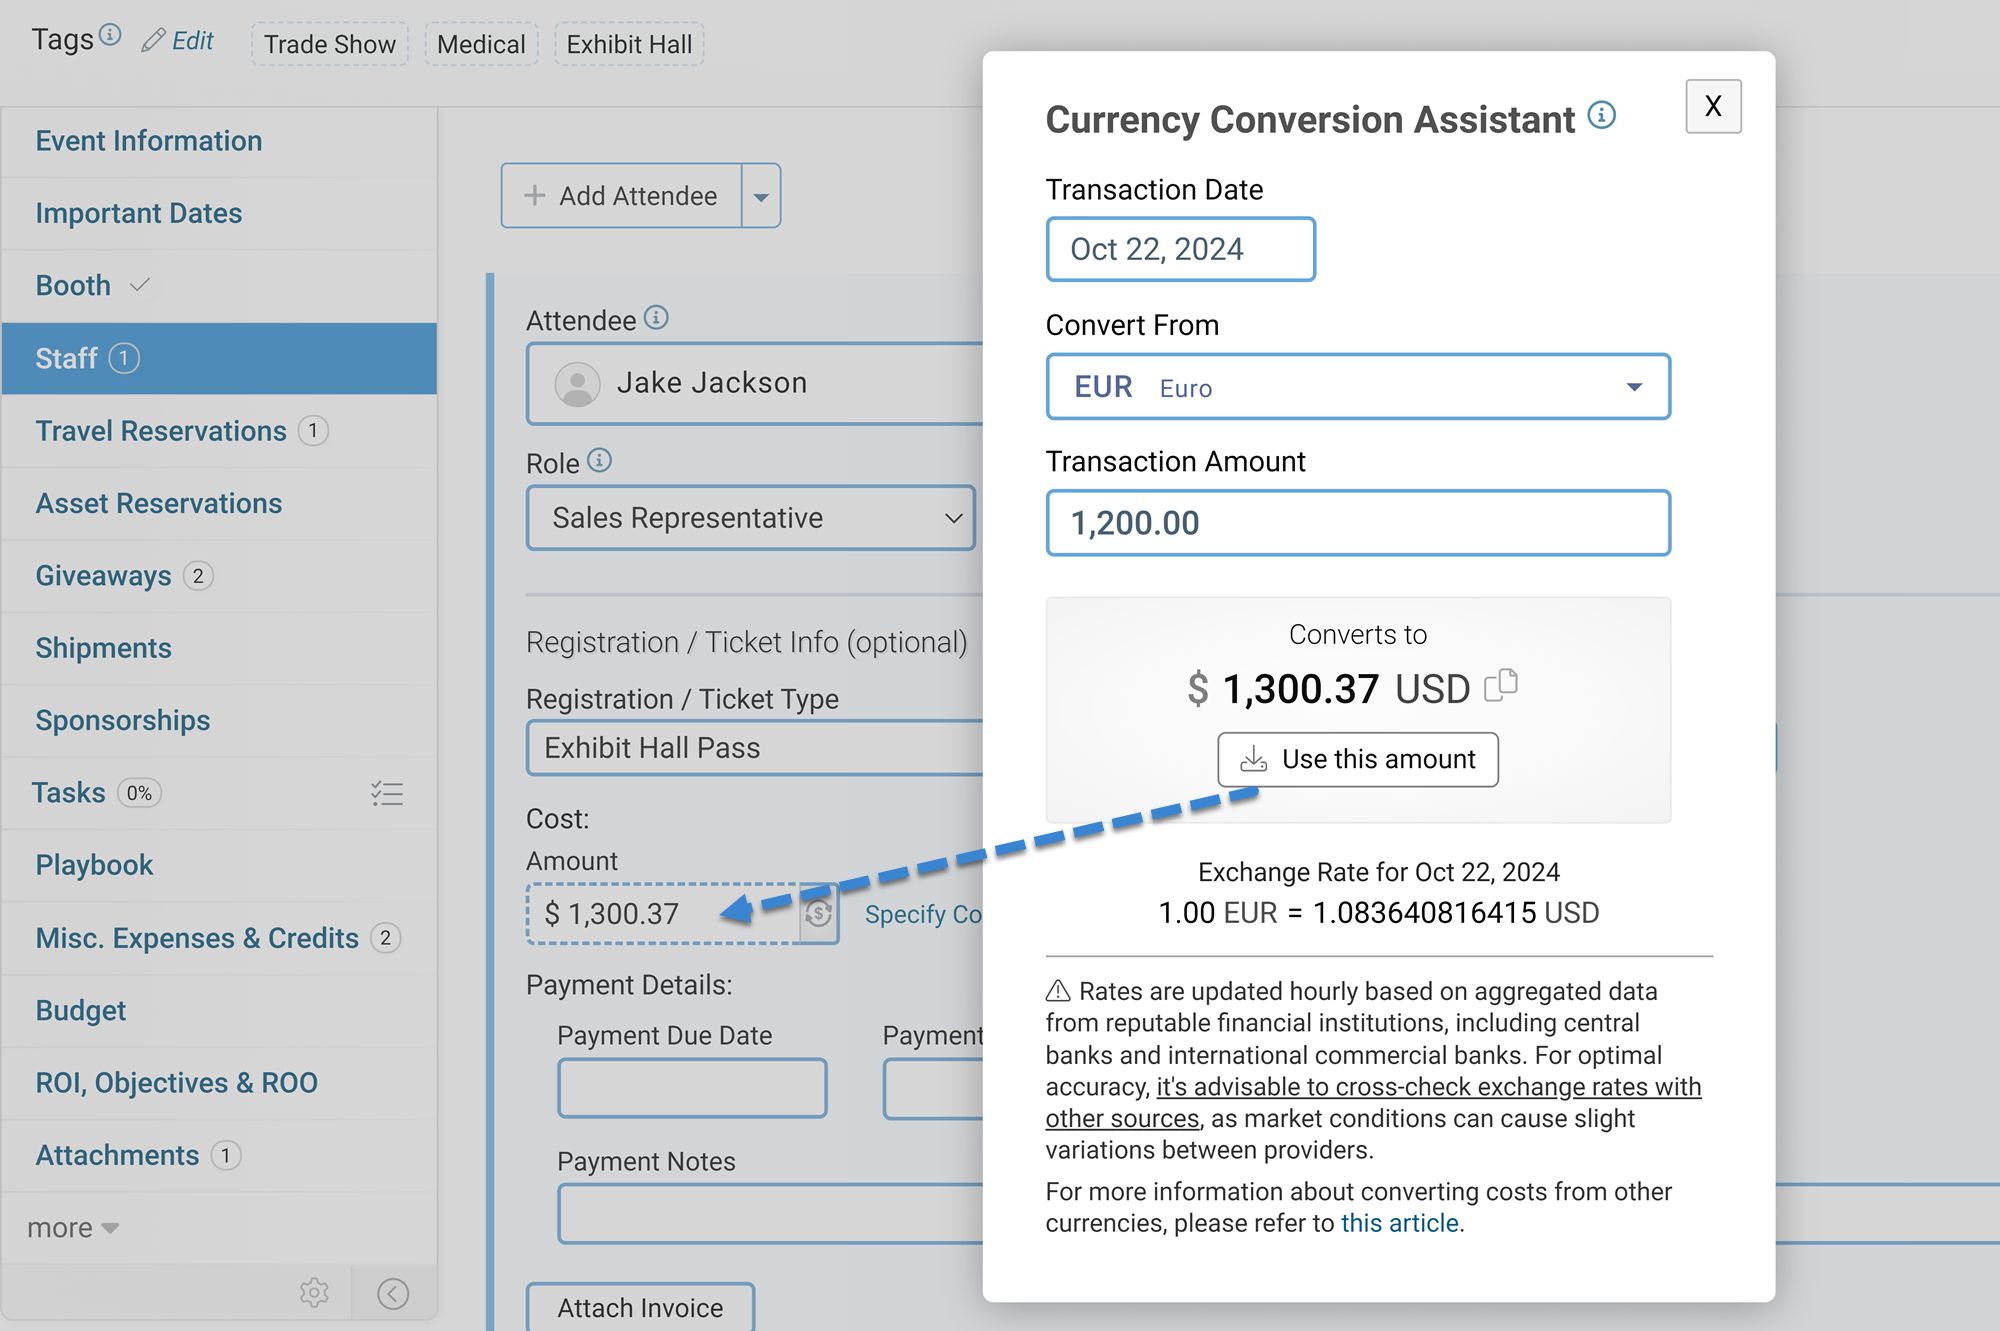
As you enter costs for your events in ExhibitDay, you may encounter situations where the incurred expense is in a different currency than your Workspace’s base currency (as defined in your Workspace Settings). In such cases, you’ll need to convert the cost to your Workspace’s base currency before entering the amount into ExhibitDay.
ExhibitDay’s Currency Conversion Assistant can help you with that!
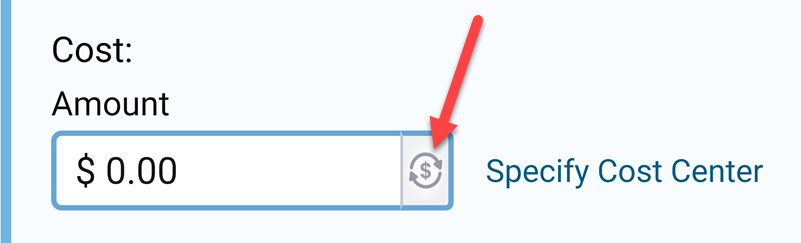
Next to every cost field in ExhibitDay, there is a “currency conversion” icon. Clicking that icon will launch the Currency Conversion Assistant.
Once the Currency Conversion Assistant launches, simply select the transaction date, choose the foreign currency, and enter the transaction amount. The converted amount will automatically be calculated based on the conversion rates for that date. Finally, click the ‘Use this amount’ button, and the system will populate the cost field with the converted amount.
The currency exchange rates used by the Currency Conversion Assistant are updated hourly based on aggregated data from reputable financial institutions, including central banks and international commercial banks. For optimal accuracy, it’s advisable to cross-check exchange rates with other sources, as market conditions can cause slight variations between providers.