Available under the ExhibitDay Enterprise plan, event tab announcements are brief messages that you can place at the top of various tabs of a given event. These messages can be used to convey information about the event itself or special instructions for a given tab to users in your ExhibitDay workspace when they view the tab.
Examples:
- You can add an announcement to the top of the “Event Information” tab with the message: “As a Gold sponsor of the event, we get access to meeting rooms A, B, and C during exhibit hall hours.”
- You can add an announcement to the “Travel Reservations” tab with the message: “In case of reservation issues or a mix-up, please call the Travel Agency directly — (800) 555-1212”
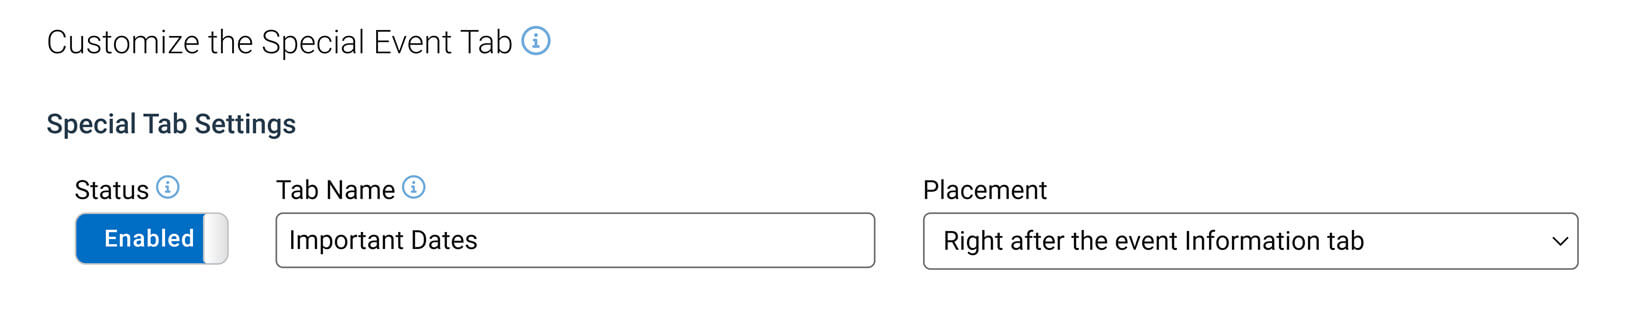
Adding An Announcement Message
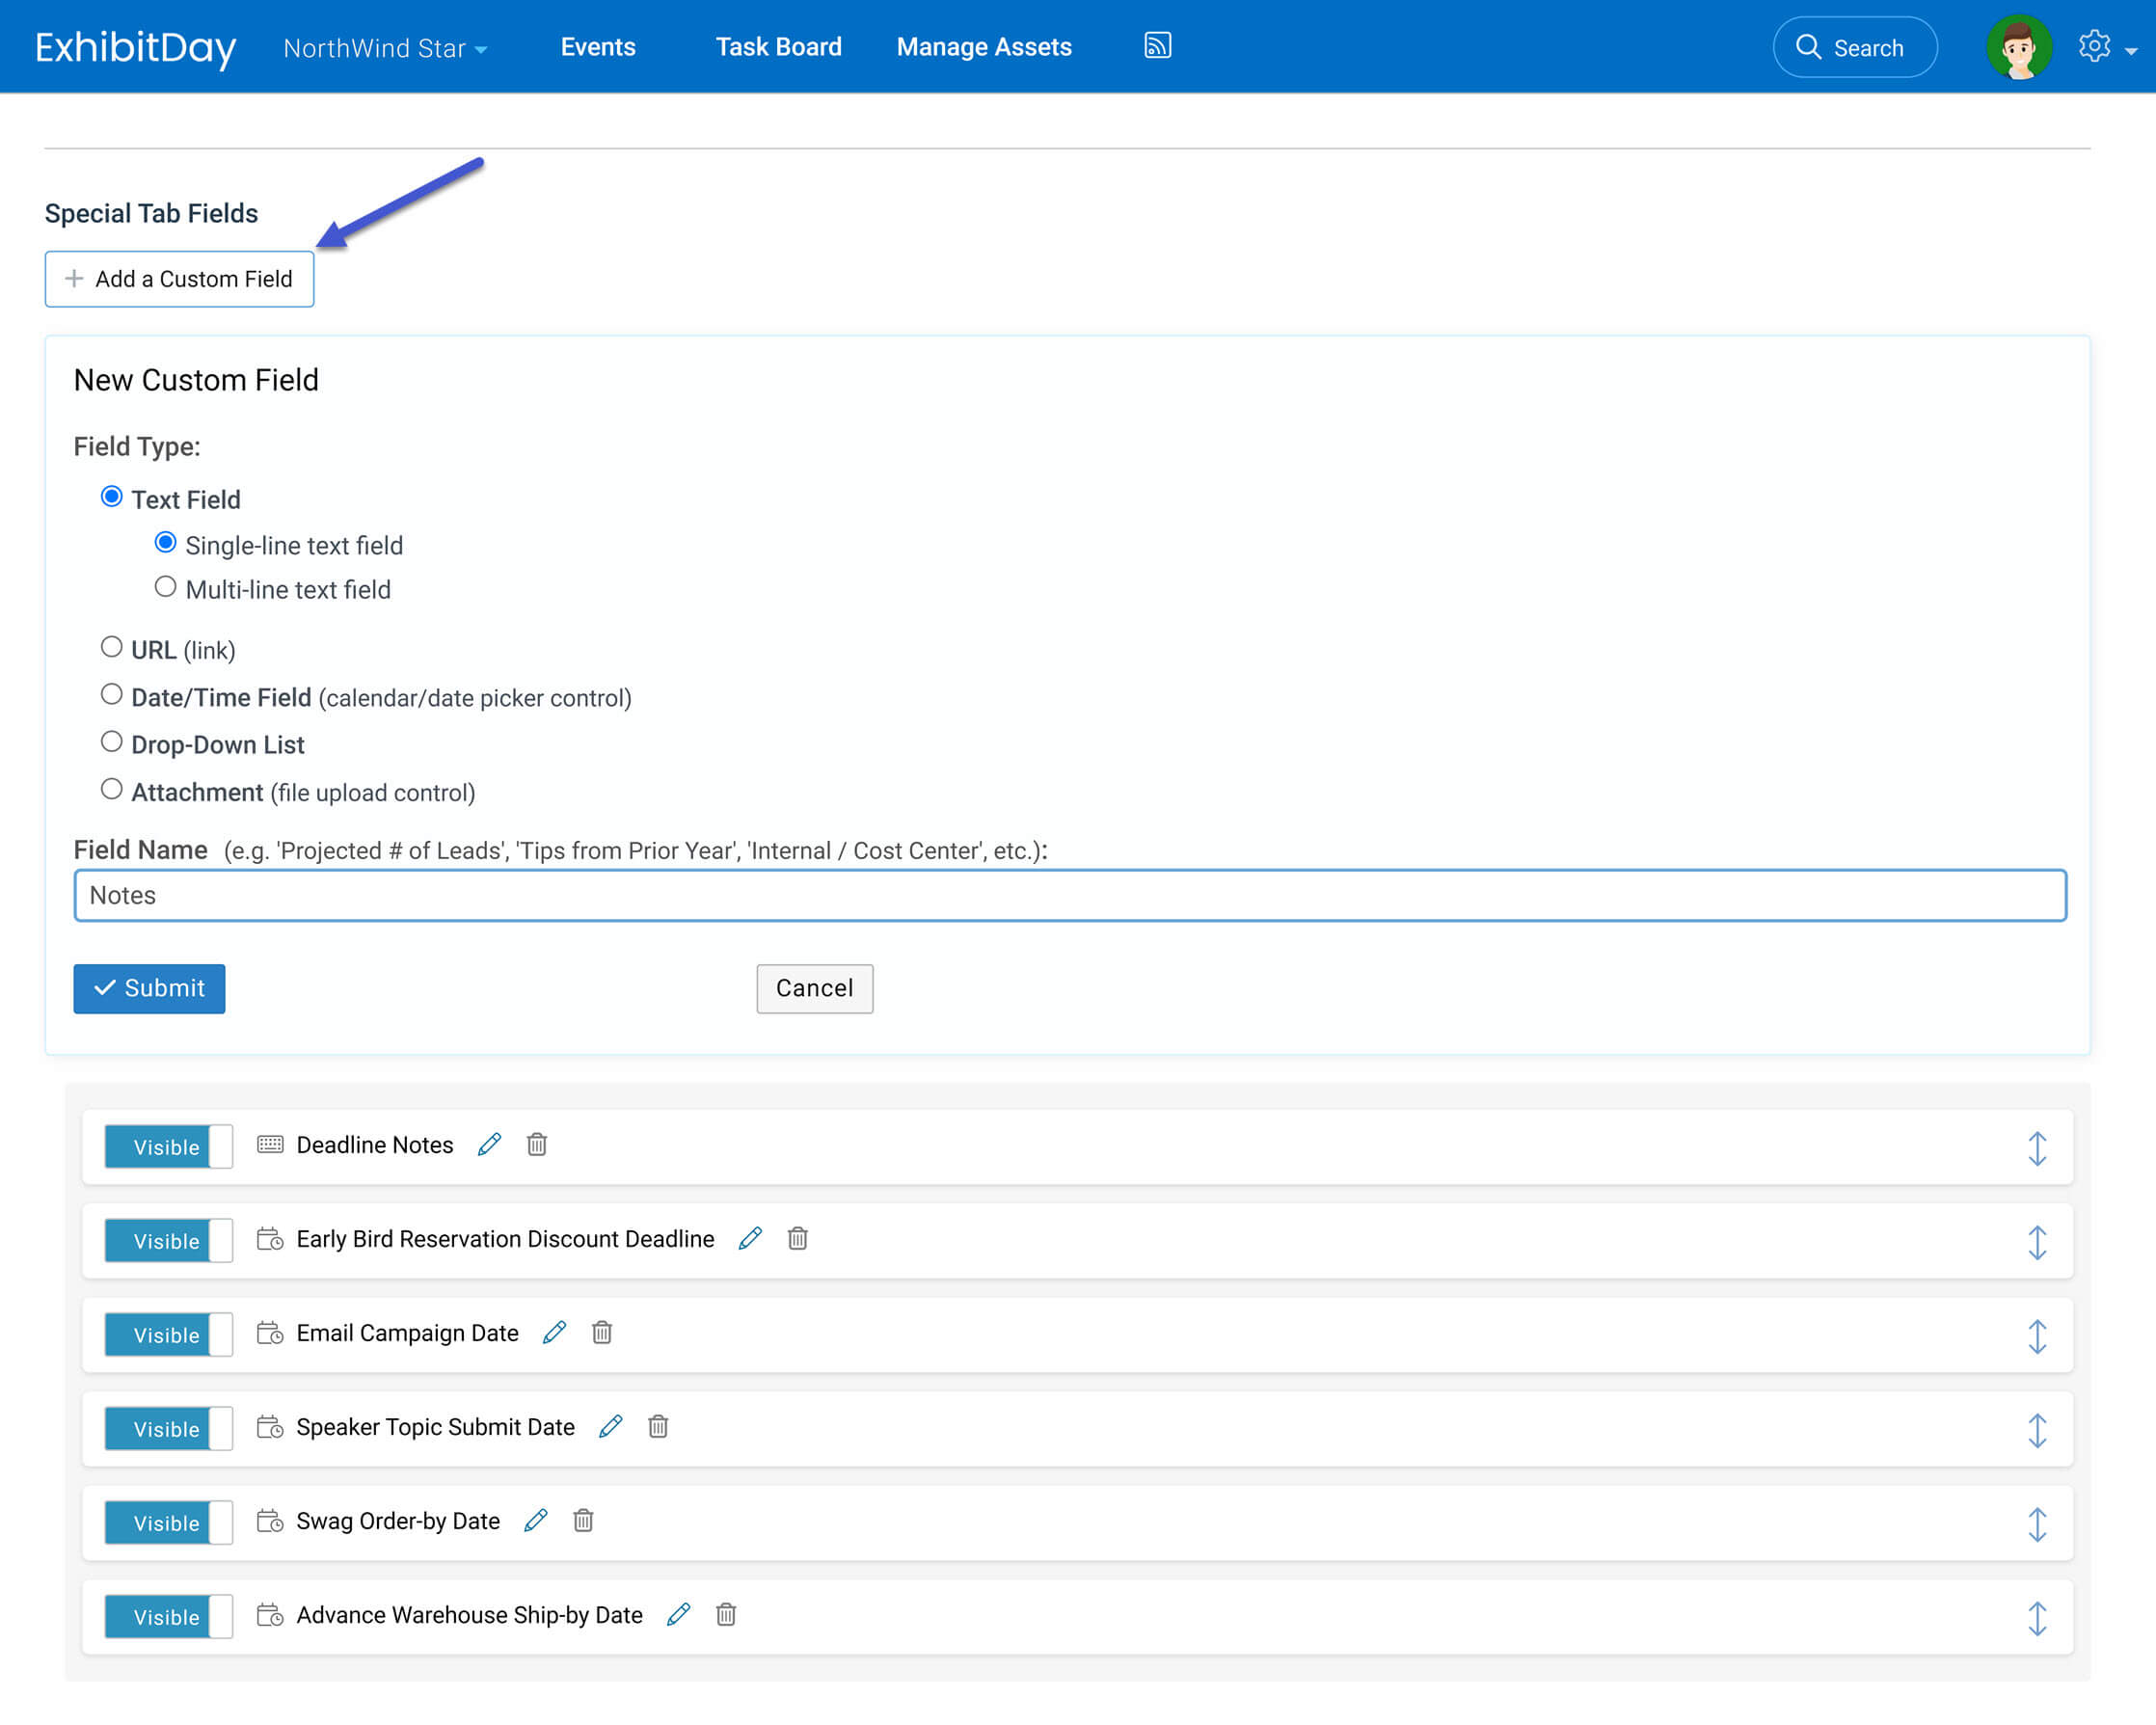
Announcements messages can be added to event tabs from the “Announcements” section of the “Event Settings” tab of a given event.
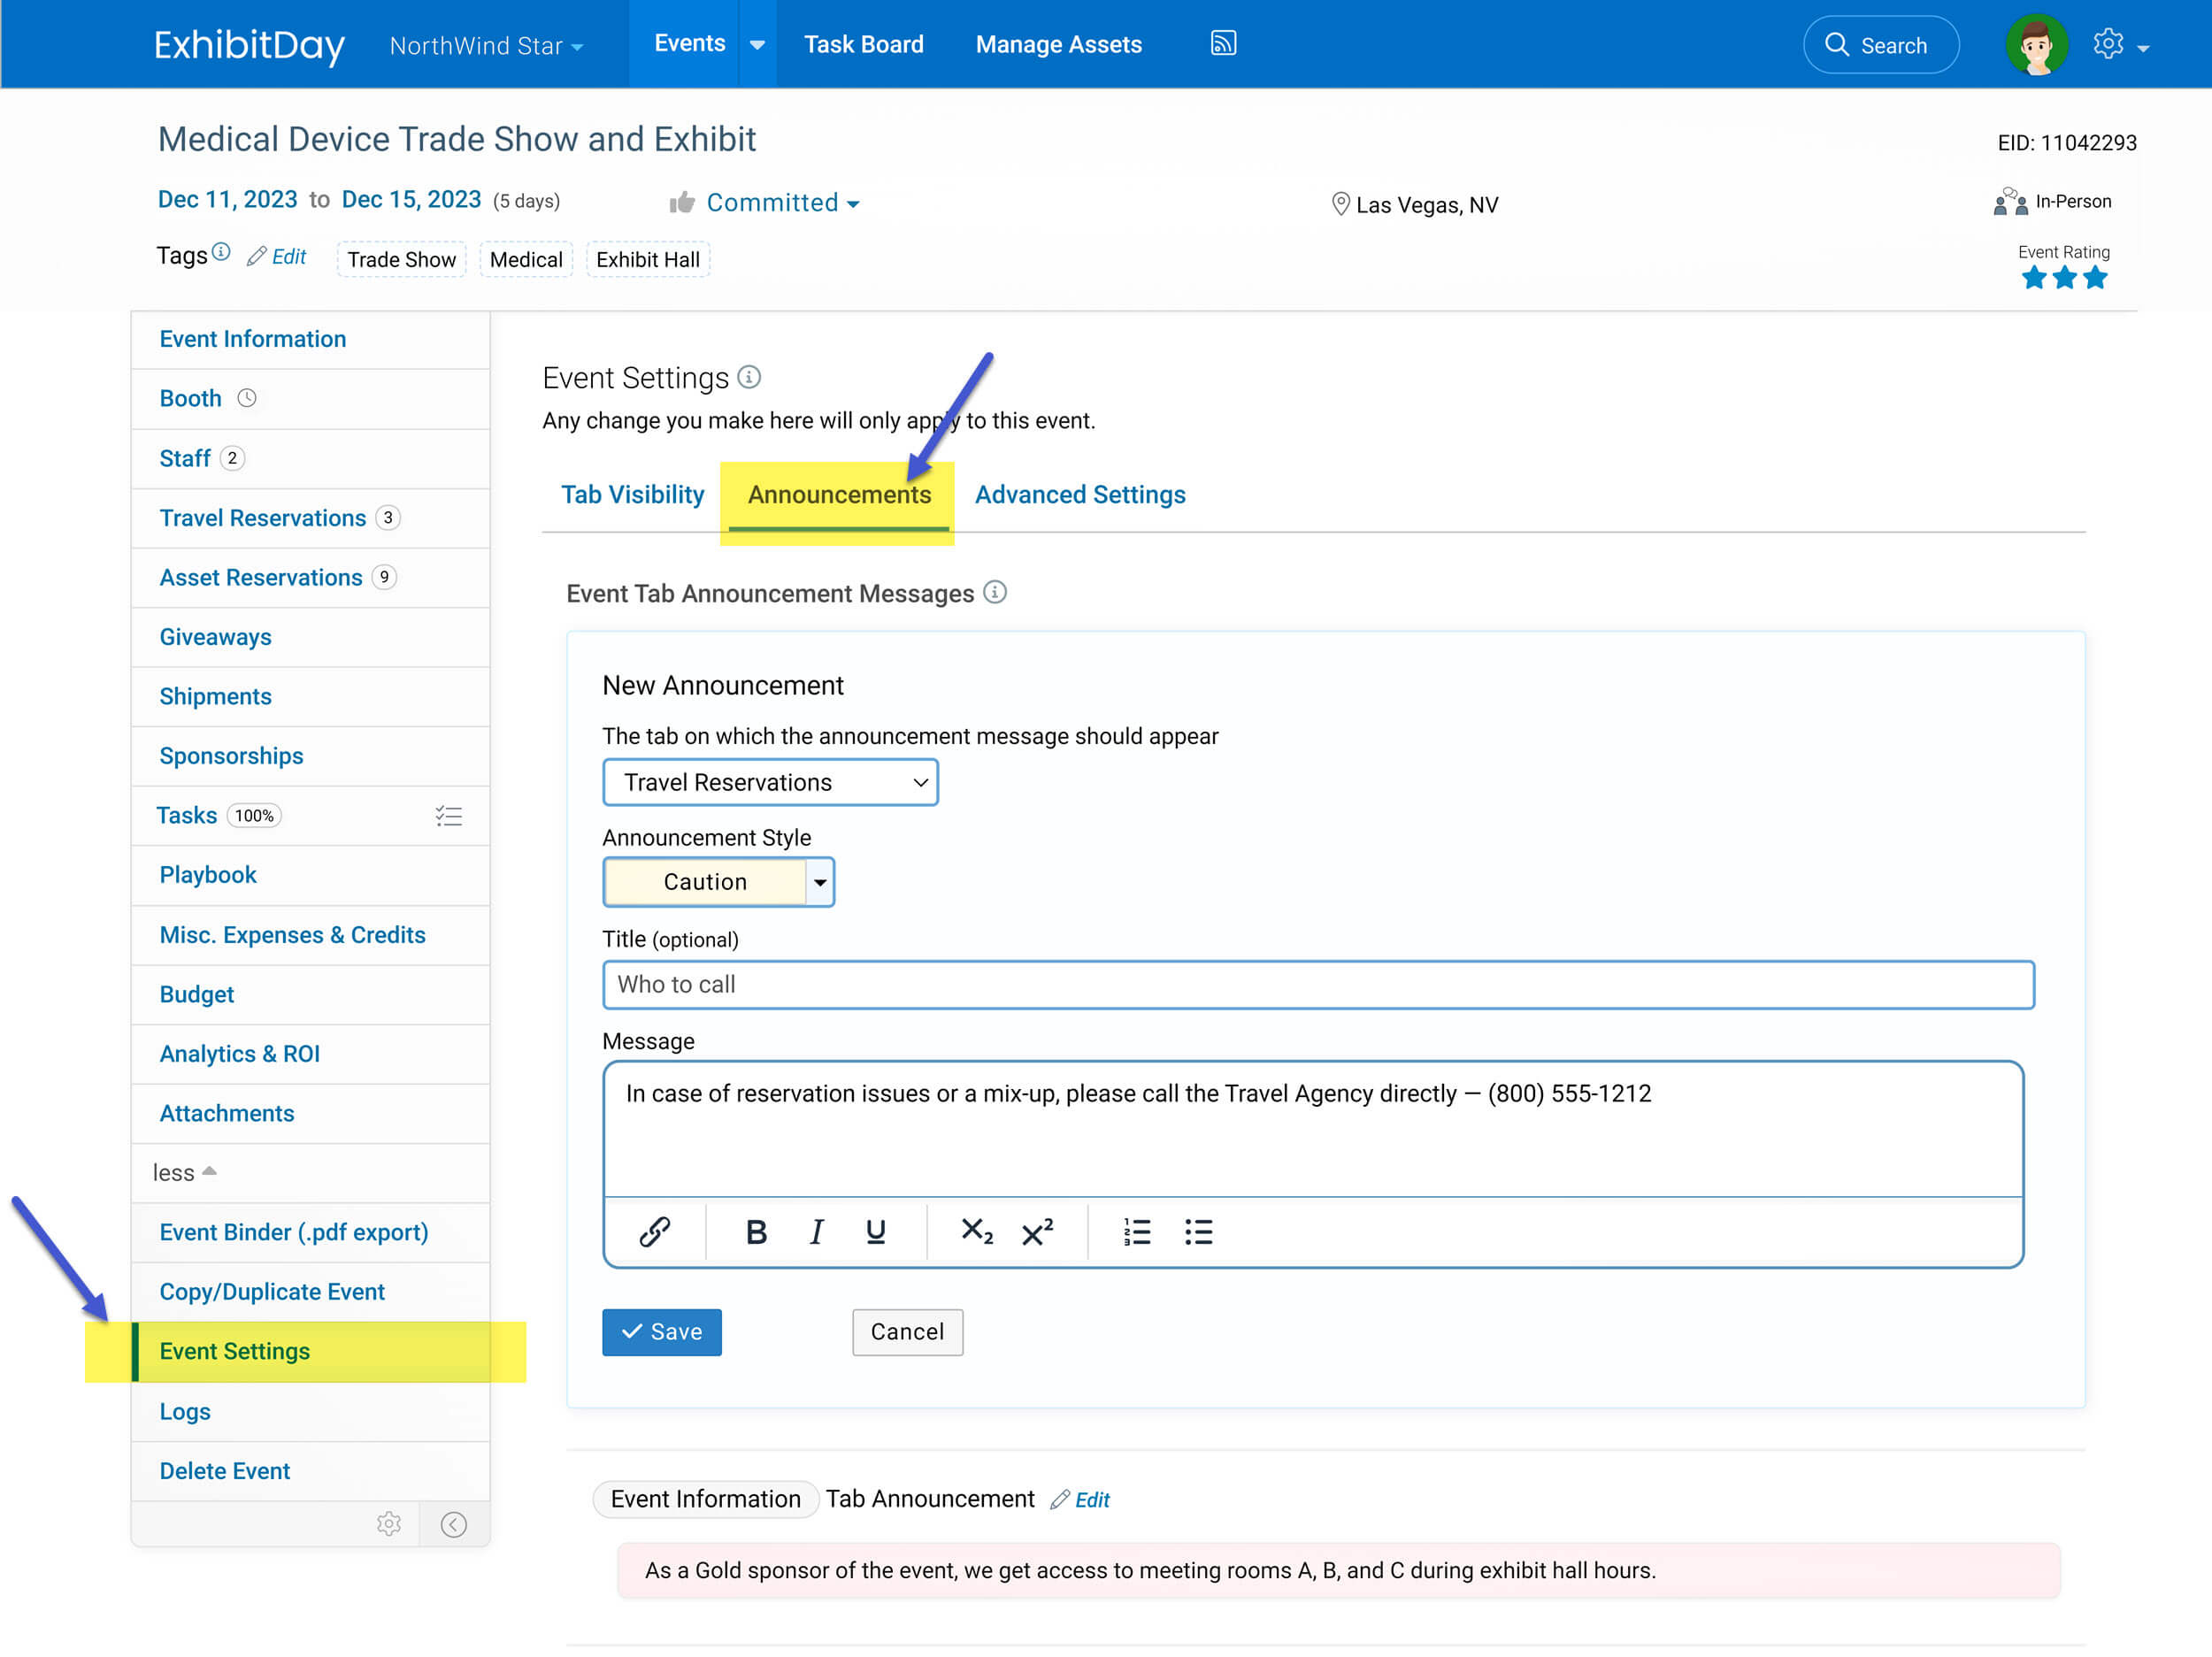
Note: Any announcement message that you add to a tab of a particular event appears for that event only; it will not appear for other events in your workspace.
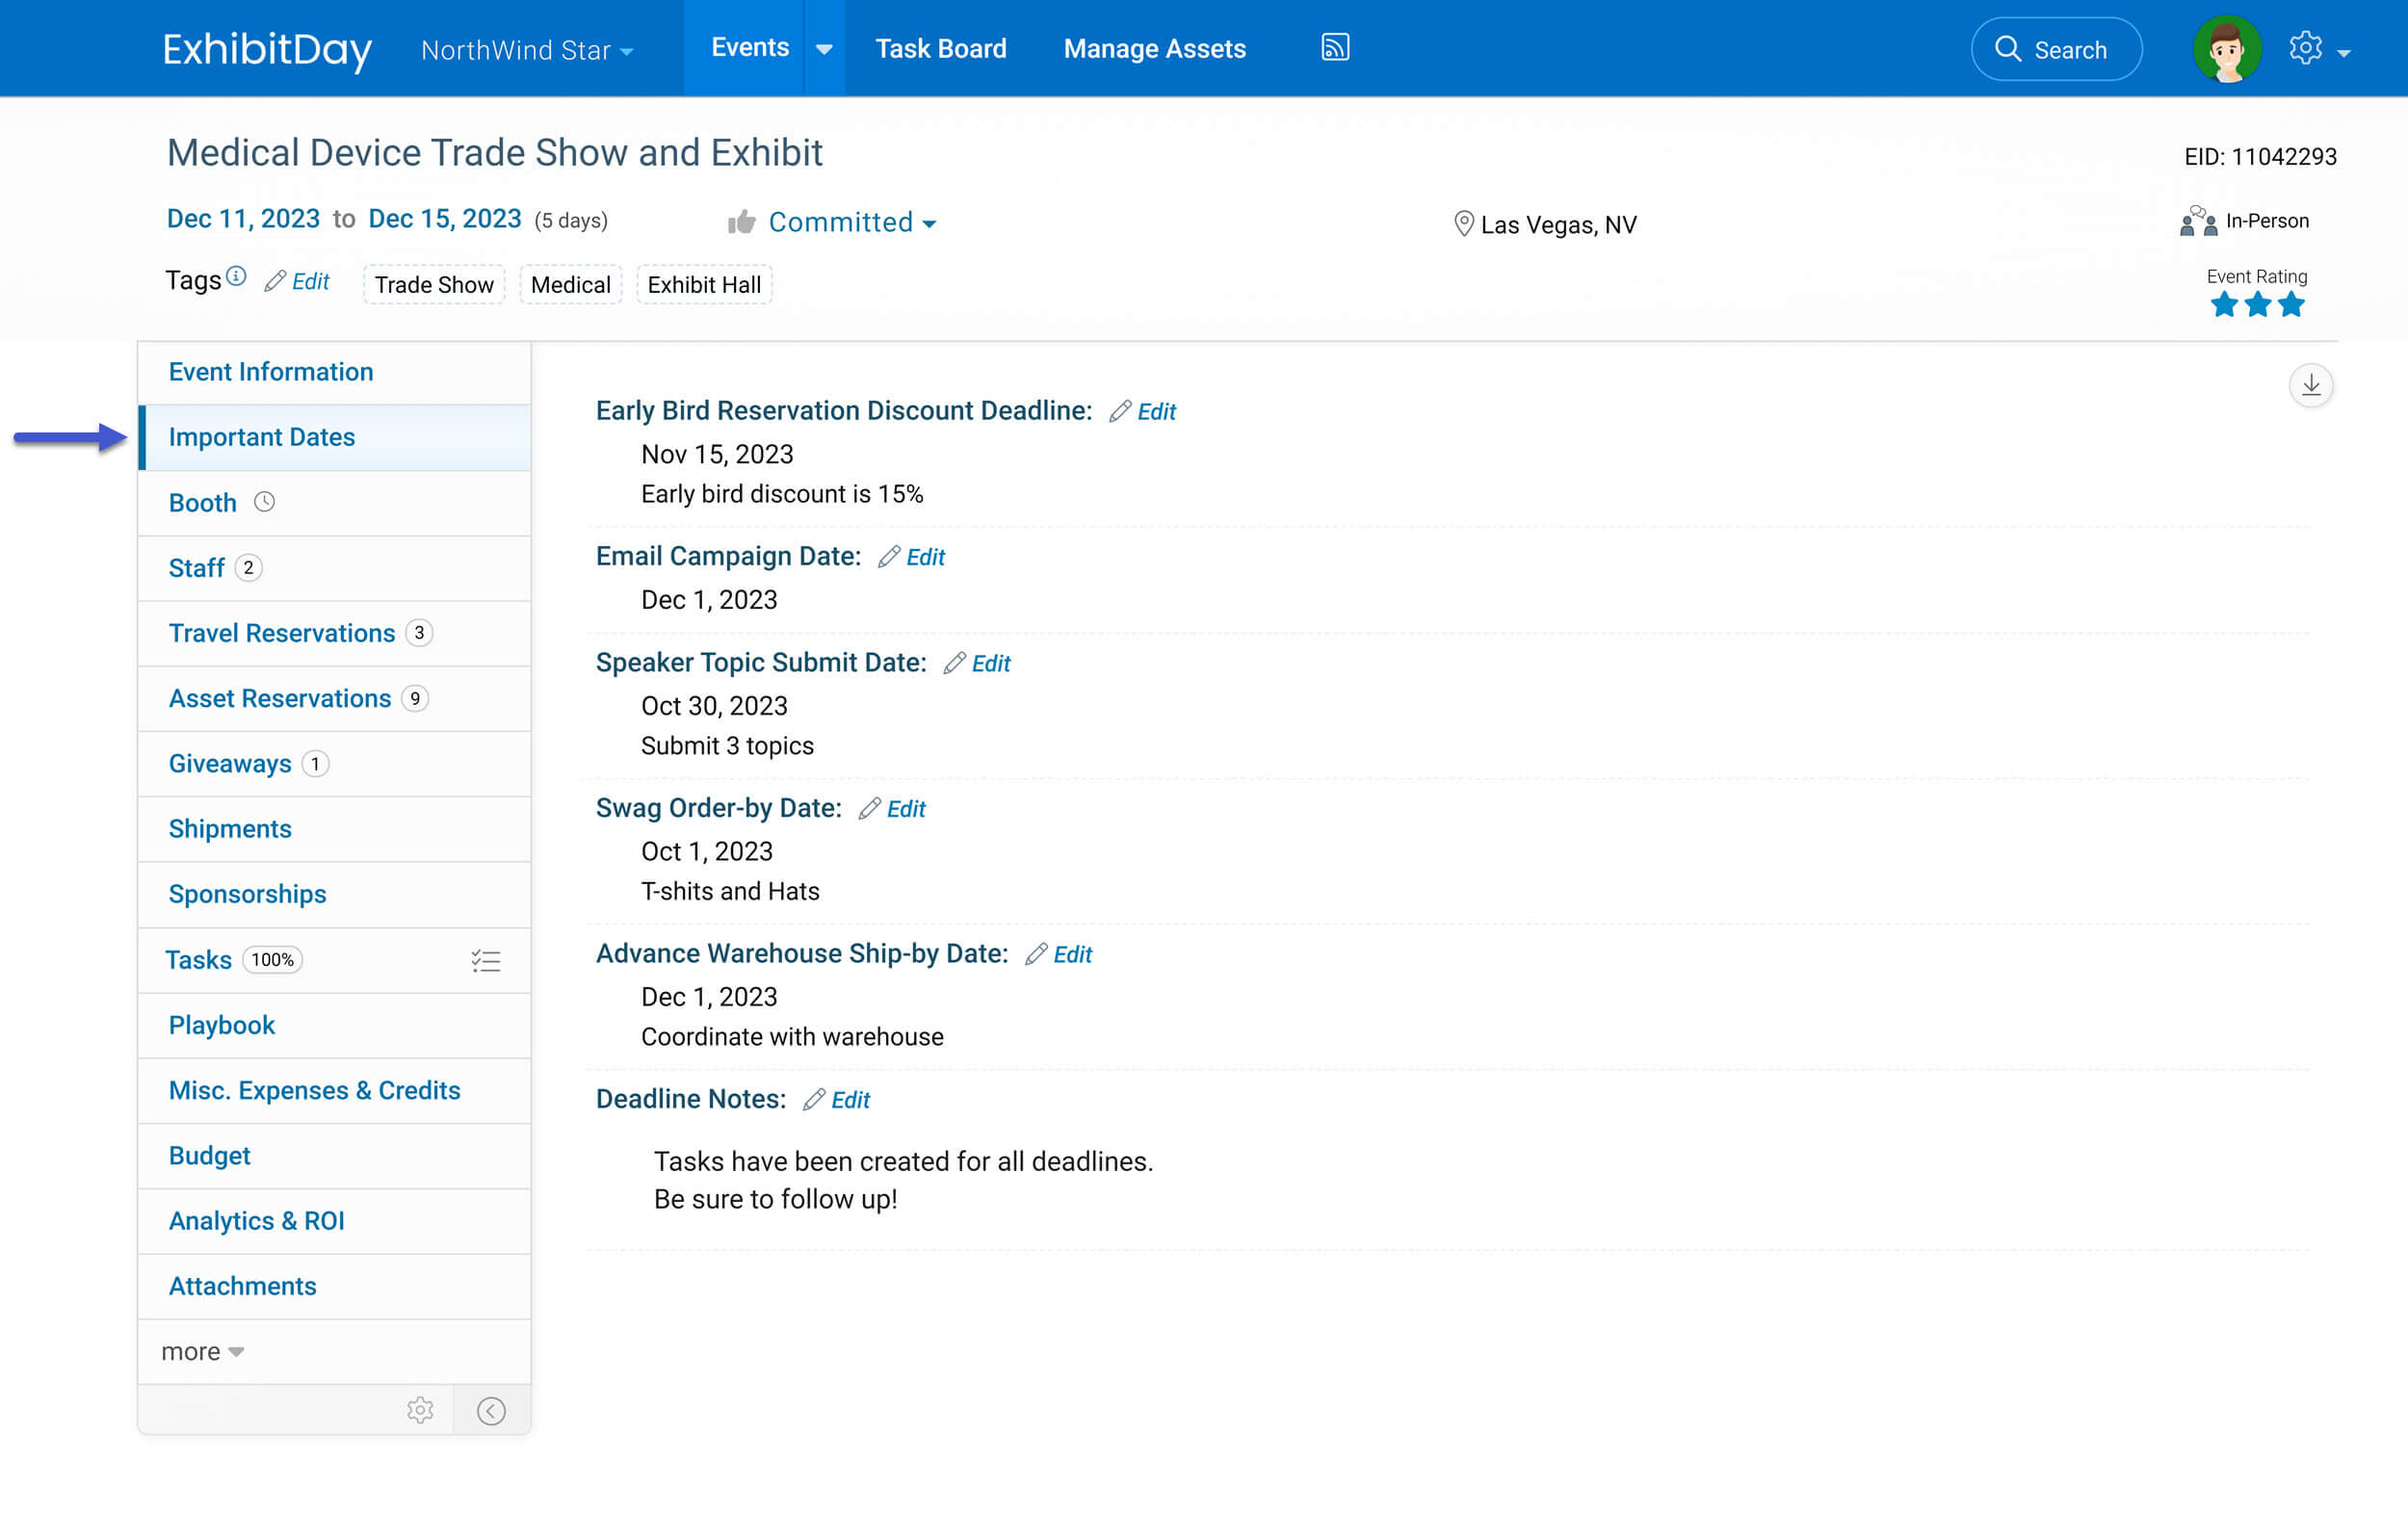
Viewing Announcement Messages on Event Tabs
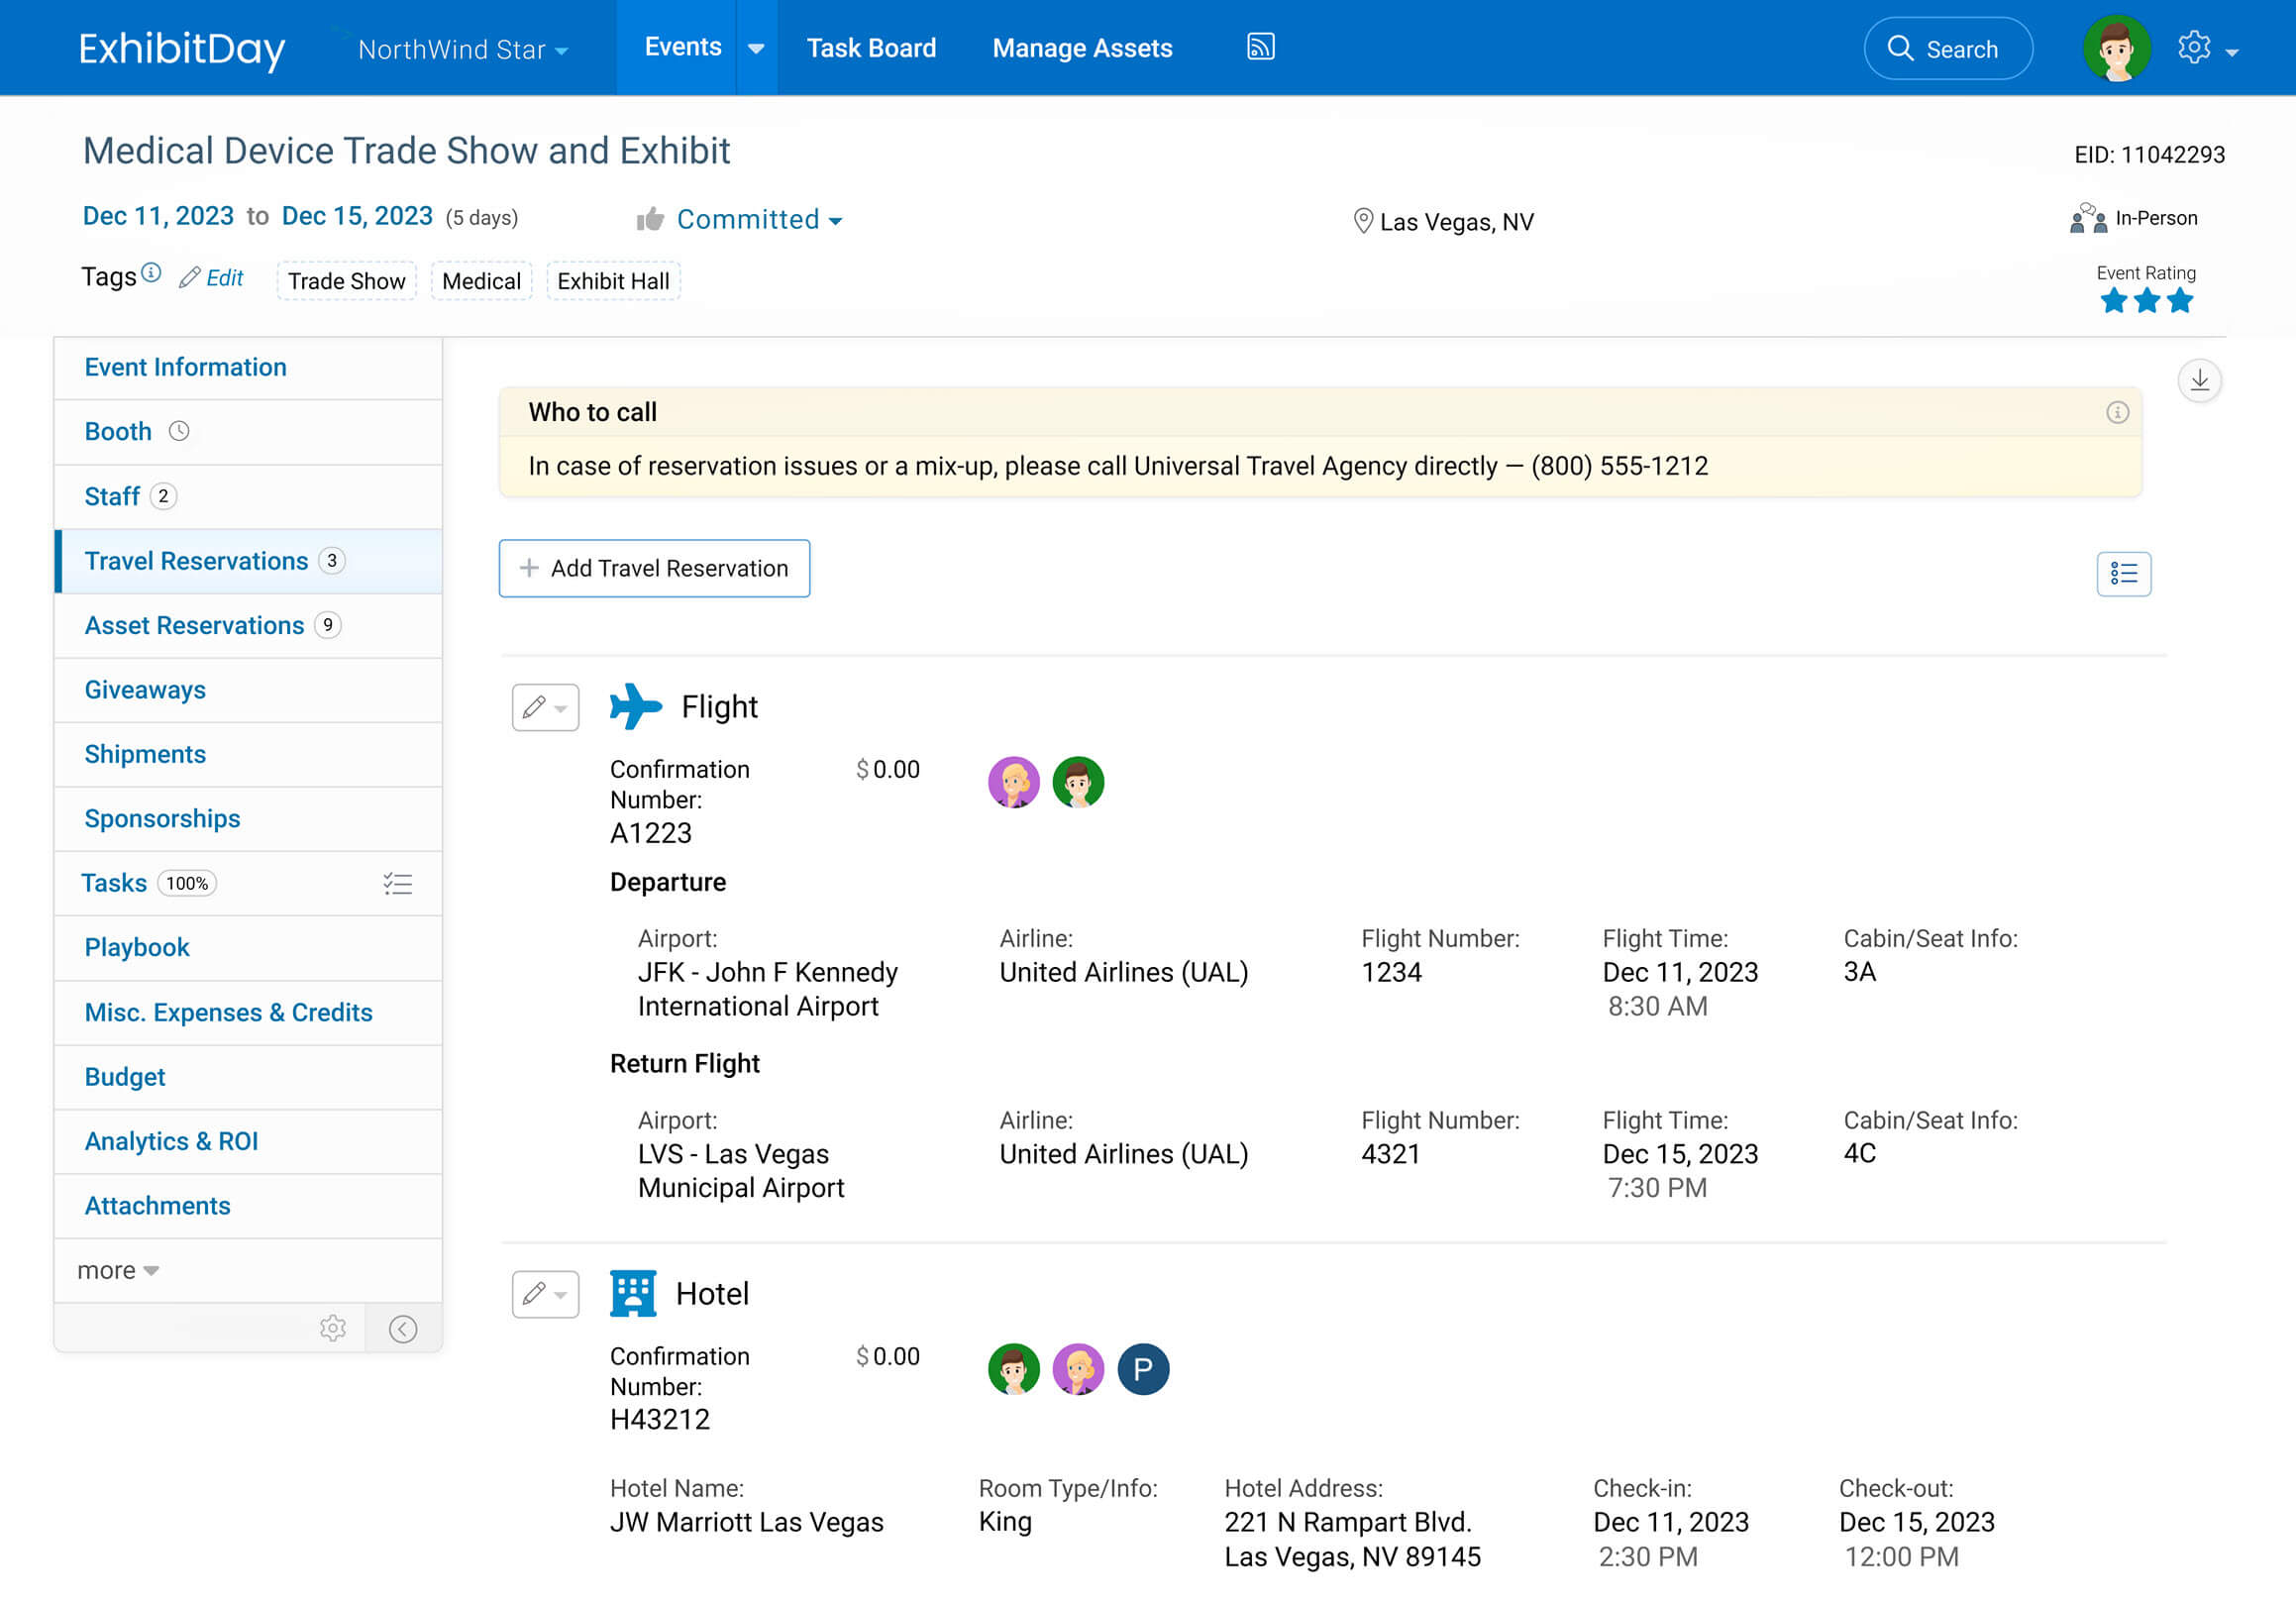
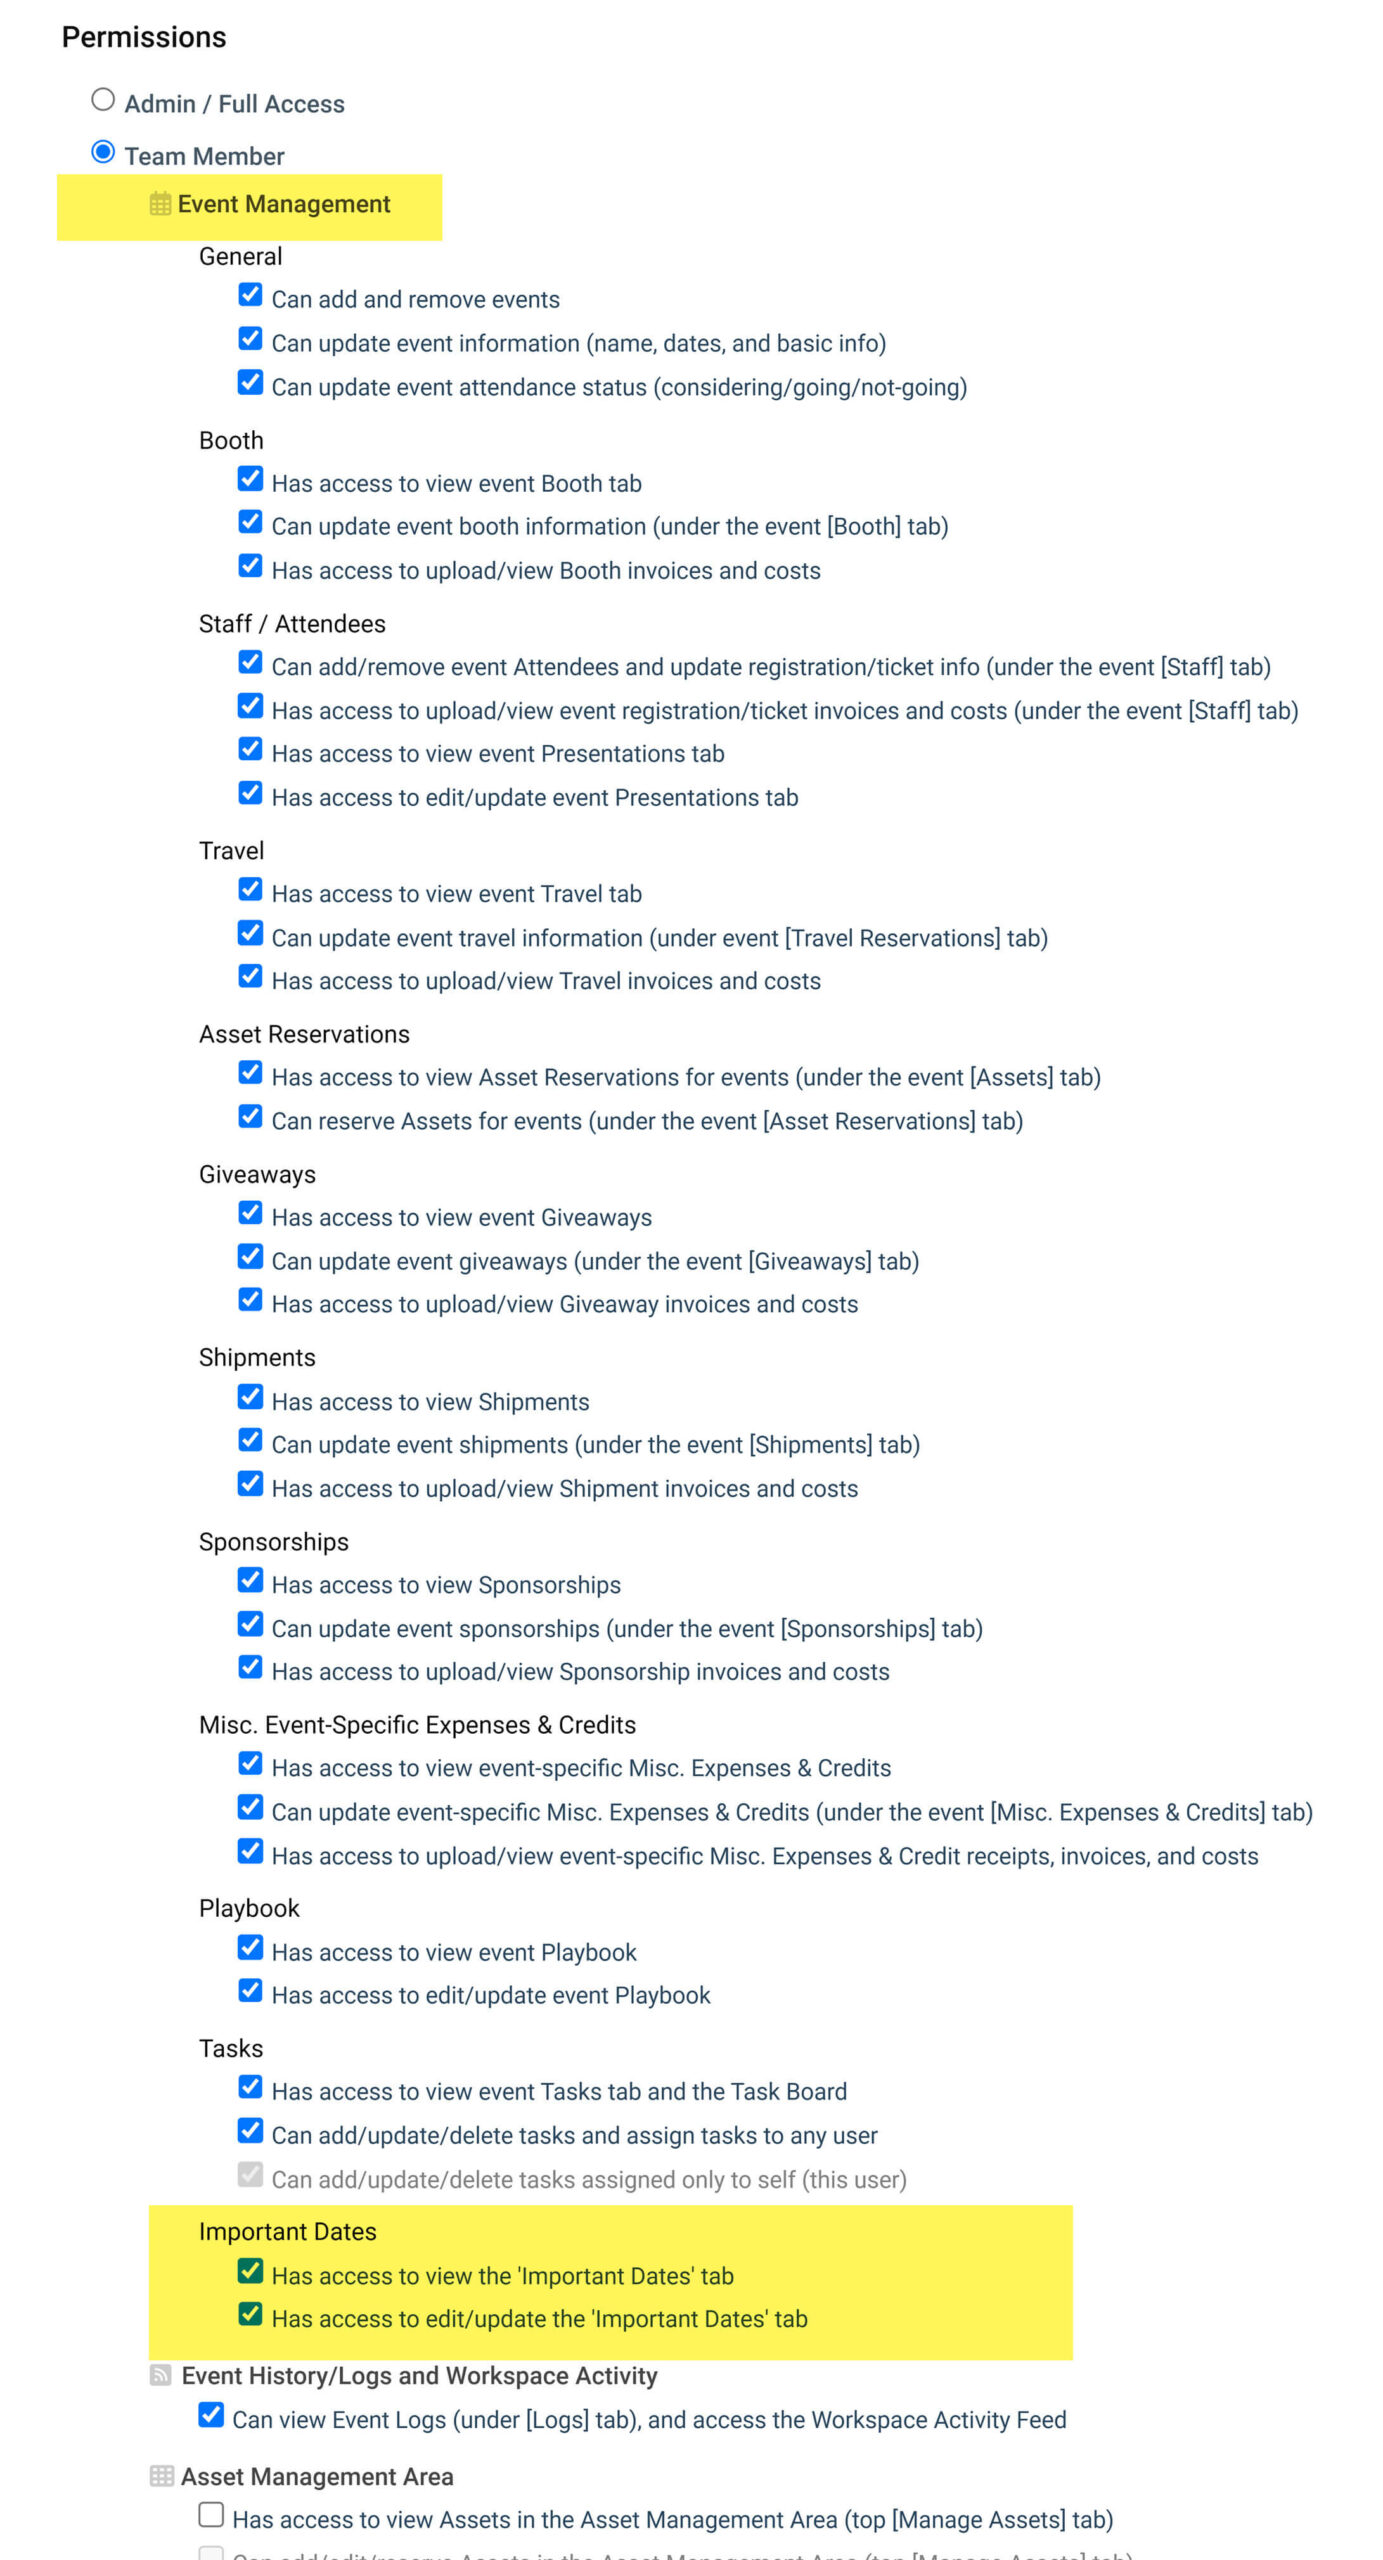
Once an announcement has been added to an event tab, it will appear at the top of the tab you placed it on. All of the users in your workspace (who have access to that tab) will see the announcement when they visit that particular tab of that particular event.
Pro-tip:
When you copy/duplicate an event, all announcement messages for the event will also get copied over to the new event. So, for future events that require the same announcement messages, you can simply make a copy of an event with the desired announcement messages.
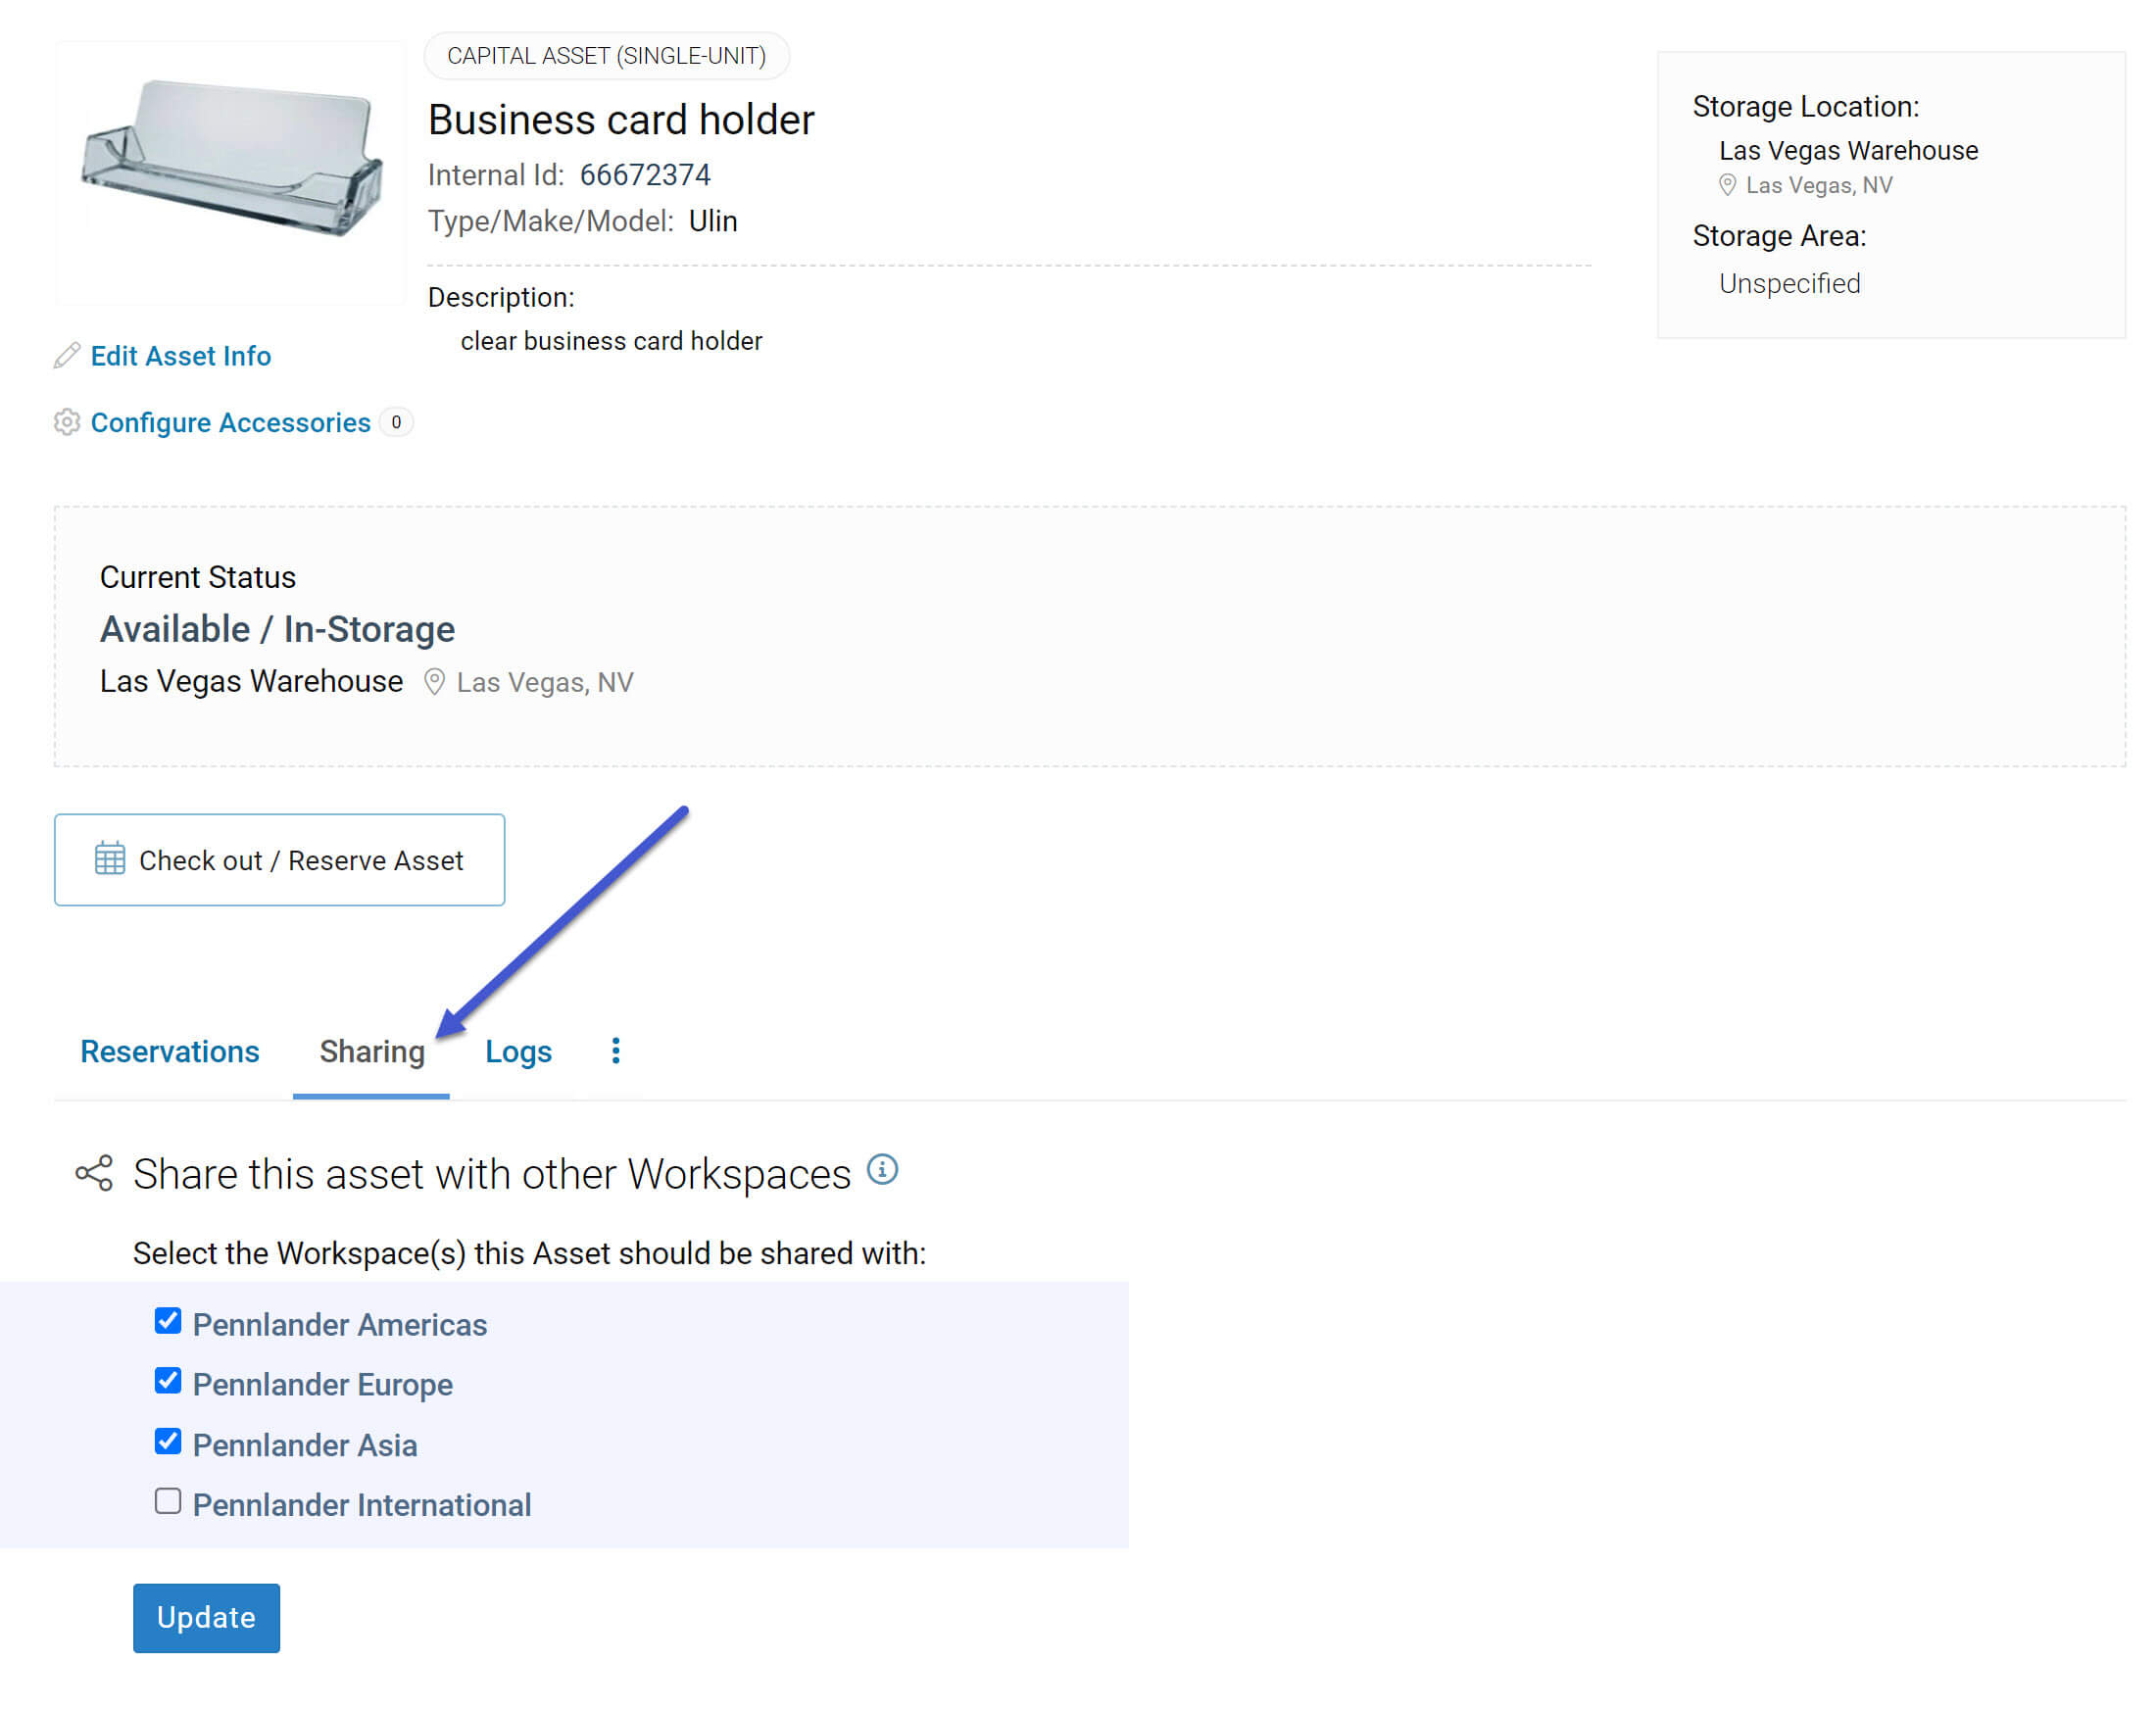
 is displayed in front of the names of shared assets.