The event Attendee Double-book Warning is a visual indicator (a warning icon) that is displayed next to the attendee’s name (under the Event Staff tab) in case they are tagged as an attendee of another overlapping event – an event with at least one overlapping day based on the event start/end dates. This indicator helps you identify potential scheduling conflicts for attendees who may have accidentally been tagged in more than one event during the same period.
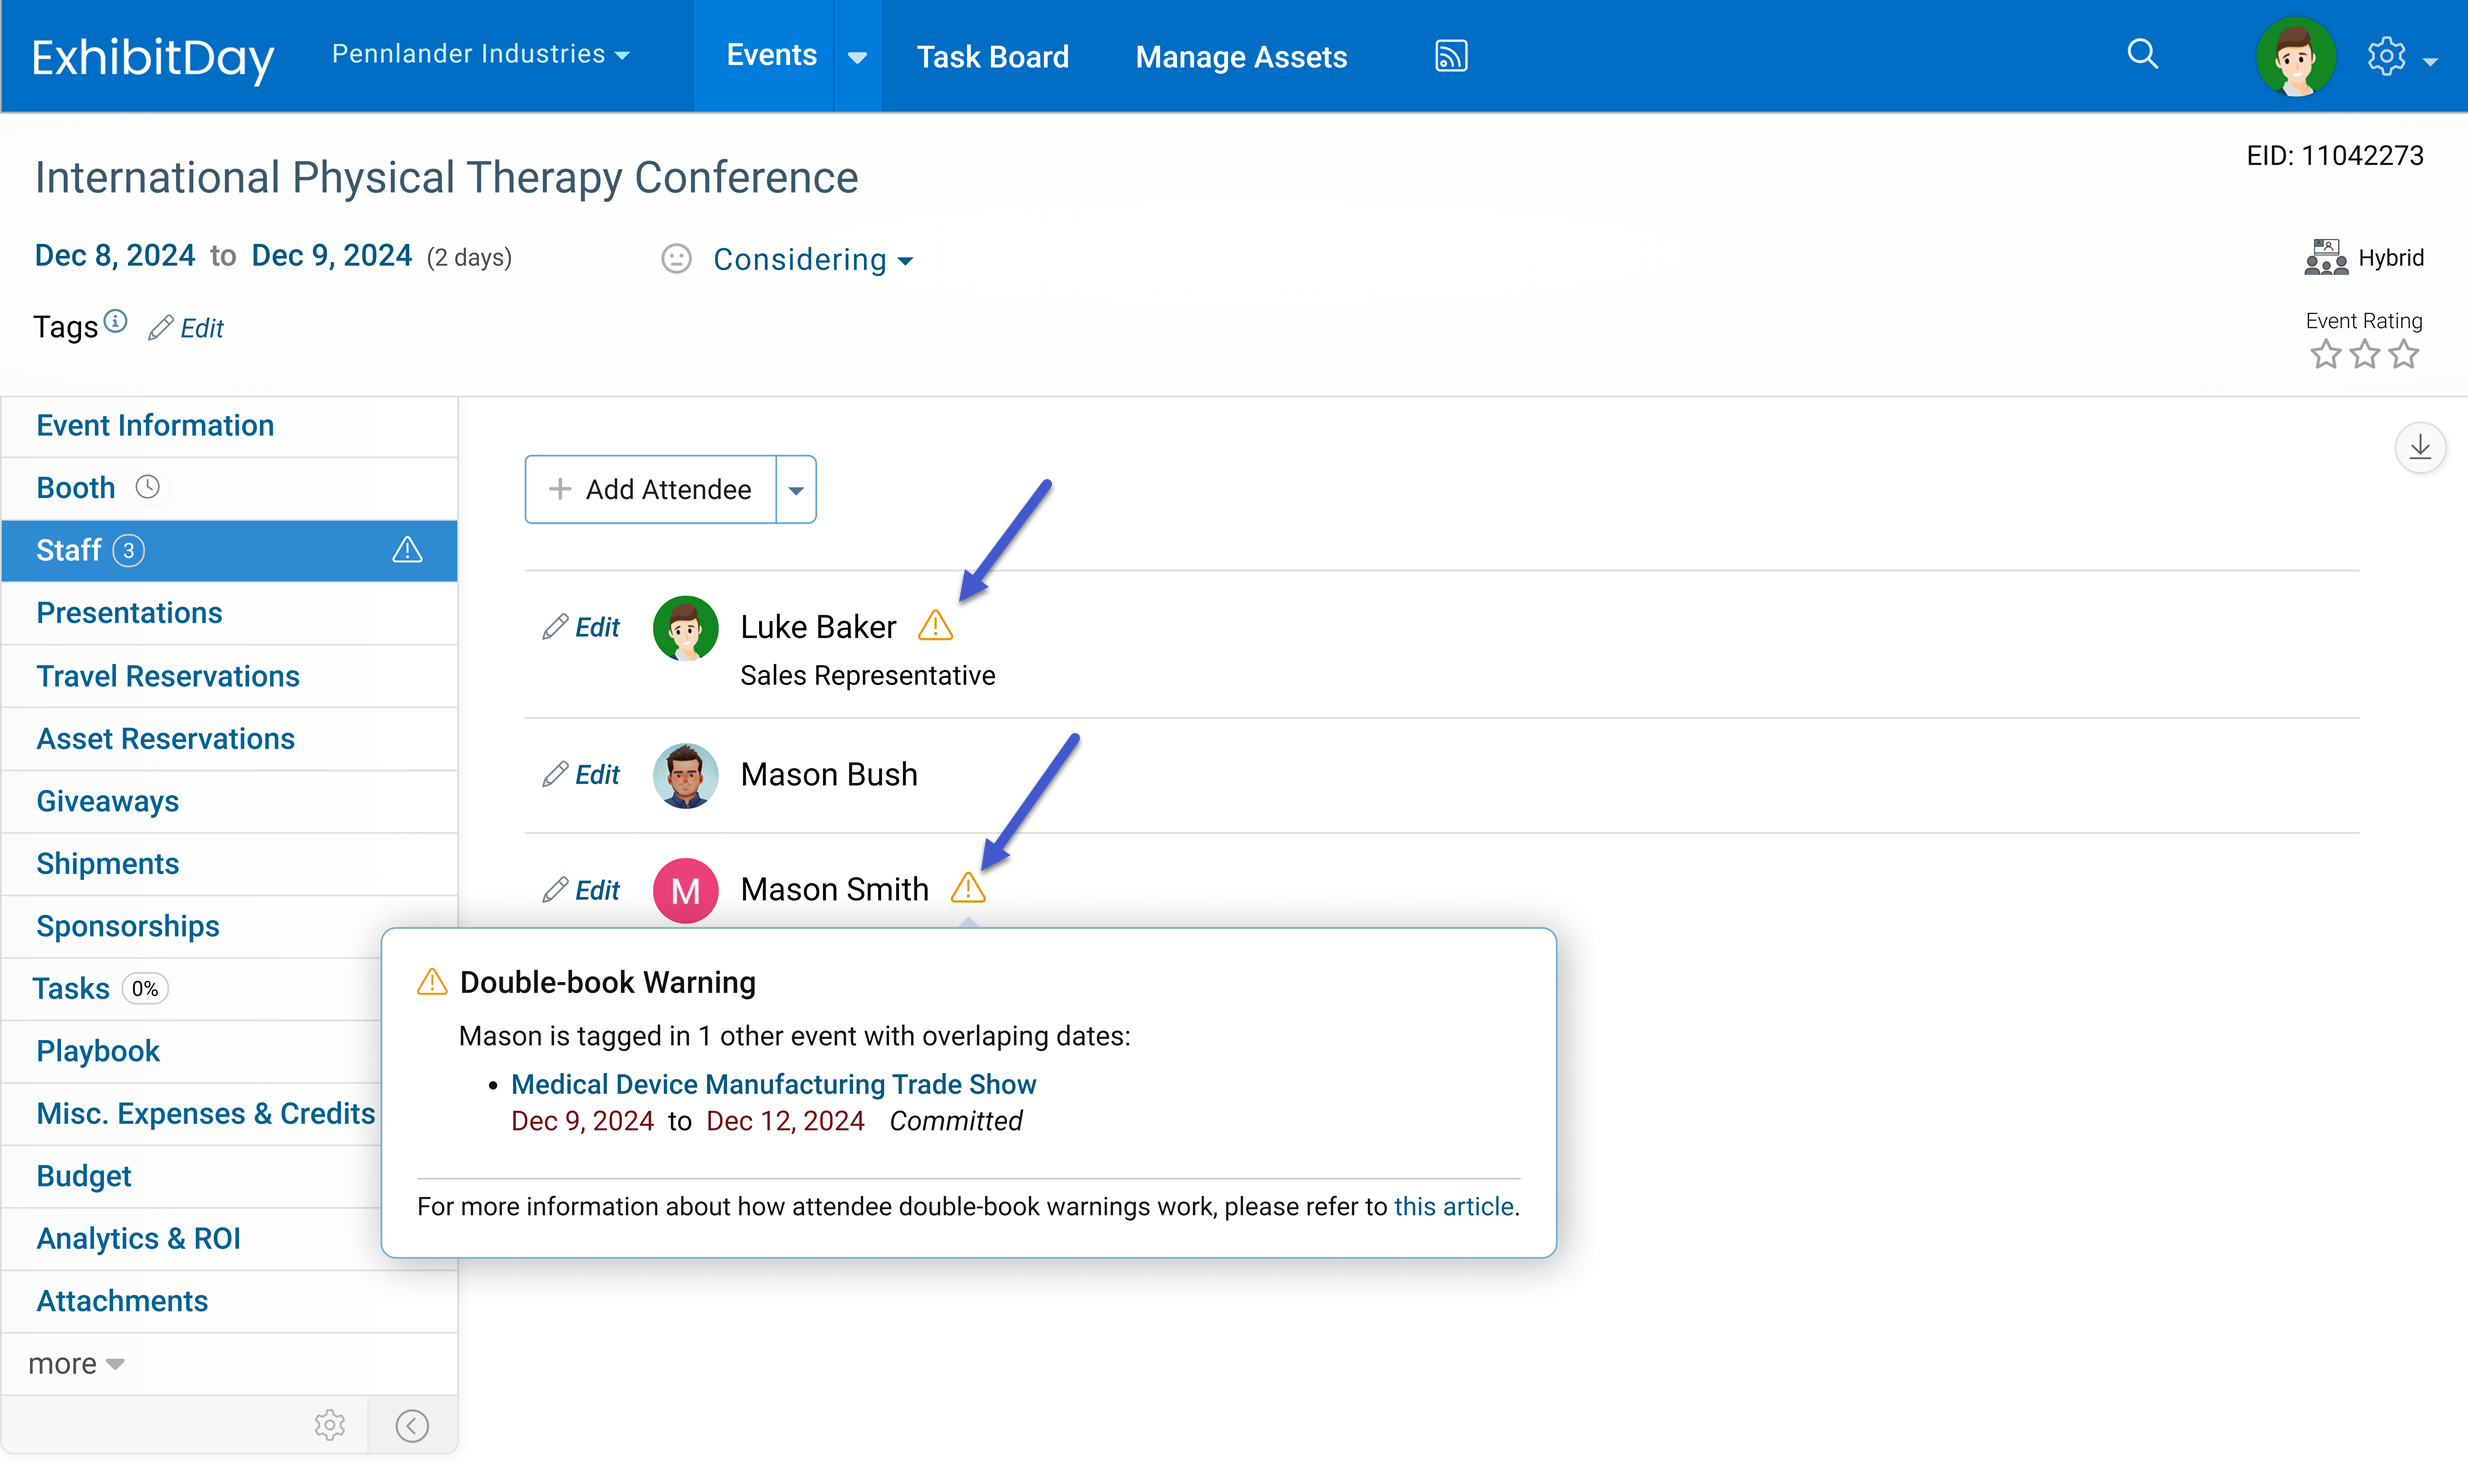
When you click on the warning icon next to an attendee’s name, a tooltip dialog will pop open and display the event(s) causing the conflict.
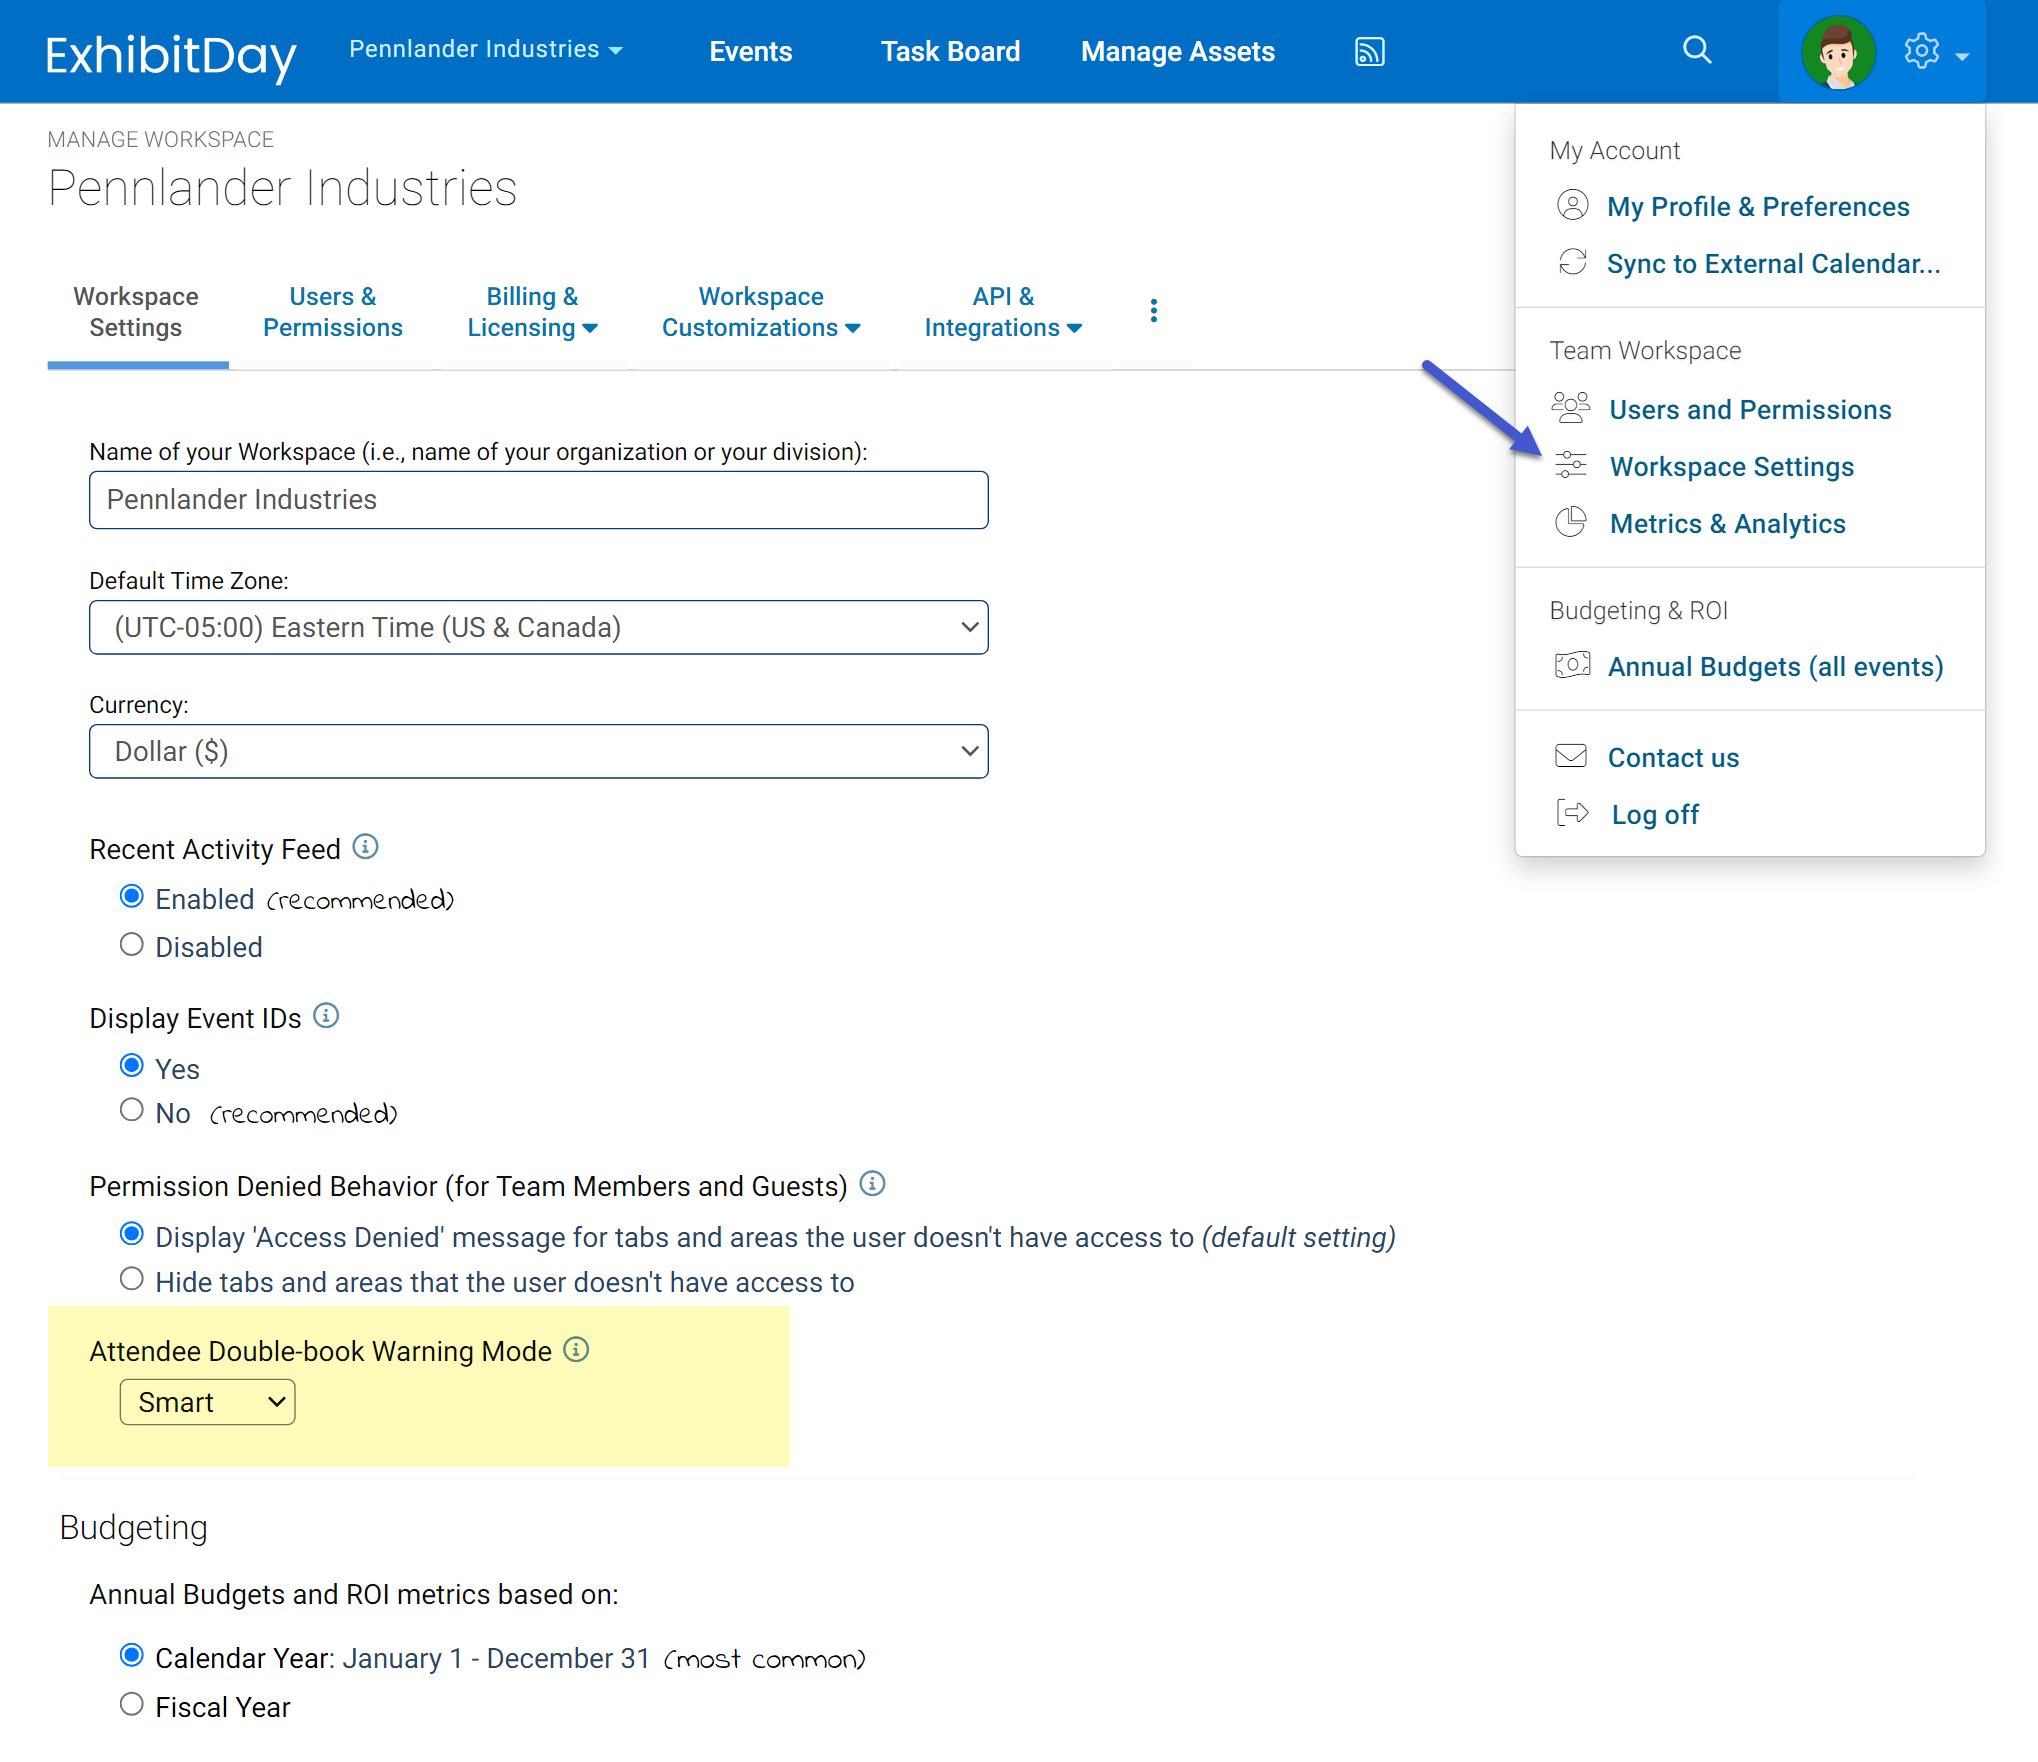
Customizing the Double-book Warning Behavior
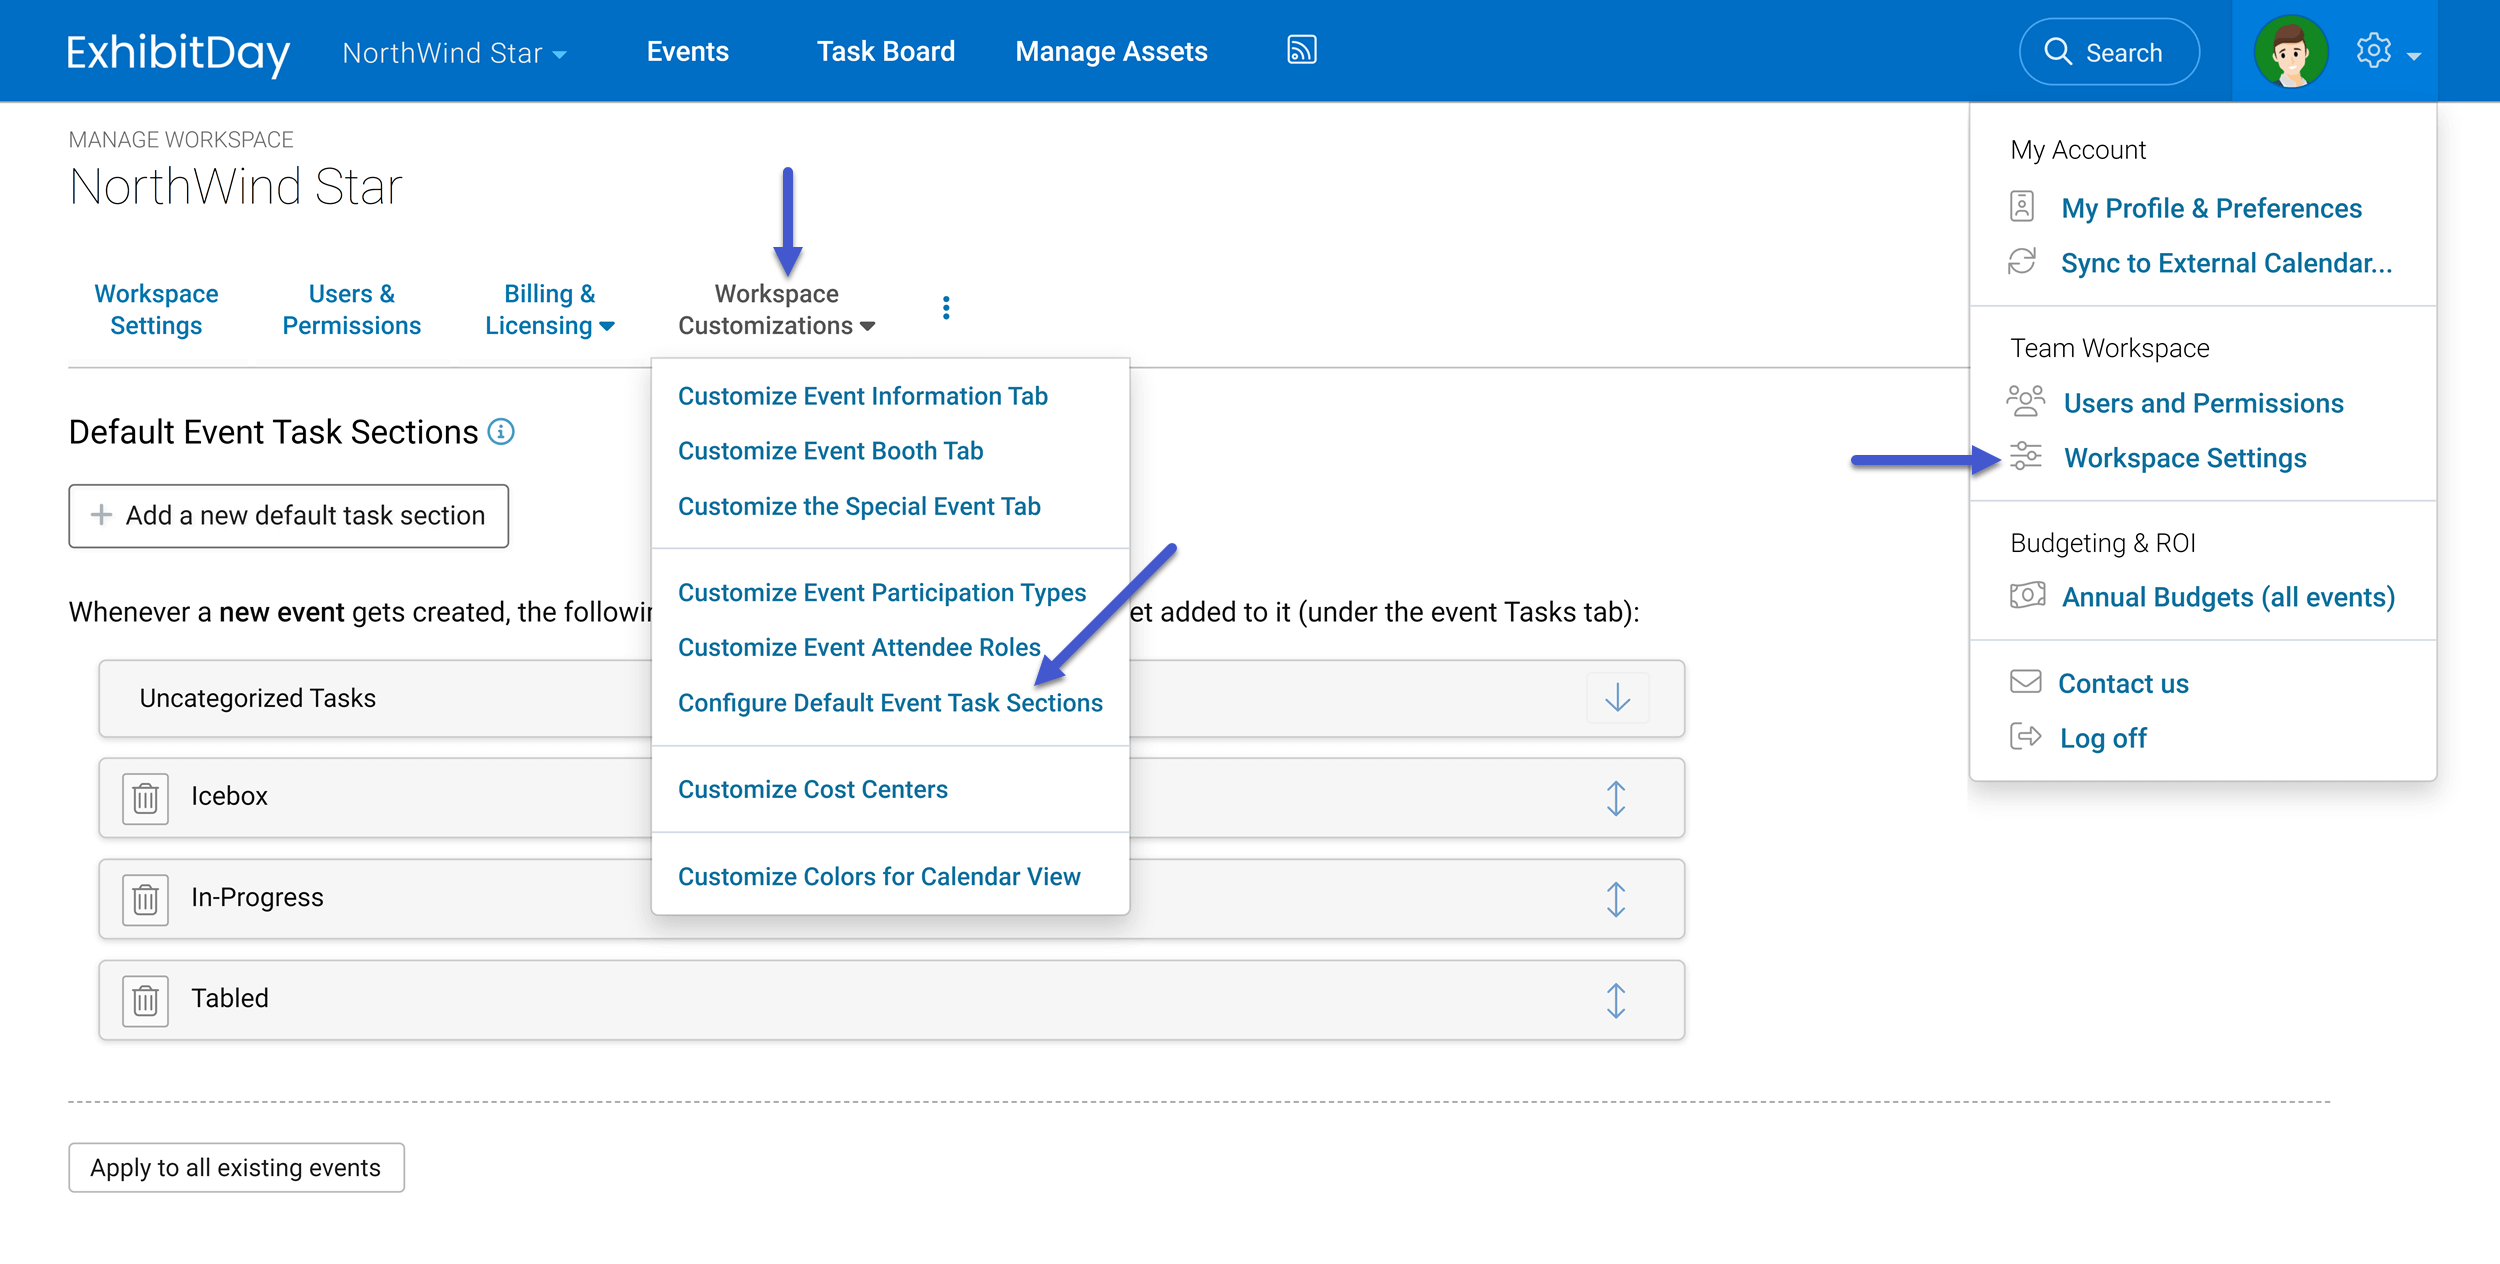
You can customize the way you’d like to have Attendee Double-book Warnings work by going to Workspace Settings > “Attendee Double-book Warning Mode”.
Smart Mode (default setting)
When Smart mode is enabled, the system considers the event’s Participation Type to determine if double-book warnings should be displayed in case of attendee scheduling conflicts.
Specifically:
When viewing the event Staff tab, if a given attendee is also tagged in another event with at least one overlapping day (based on the event start/end dates), a warning icon is displayed next to the attendee’s name. This warning is only displayed if:
1) The event you are viewing is NOT marked as “Not Going”, and,
2) The other event that causes the conflict is marked as “Committed” (or marked with a custom event Participation Type).
Consider the following example:
John Doe is tagged as an attendee of Event A (which is marked as “Committed”). You create a new event, Event B, that has overlapping days with Event A. You go to Event B and mark it as “Considering” and you tag John Doe as an Attendee. The system will display a double-book warning icon next to John’s name when viewing the Staff tab of Event B (because John is already tagged in another event that is marked as “Committed”). Note: in this scenario, if you view the Staff tab of Event A, the system will not display a double-book warning icon next to John’s name (because the other overlapping event that John is tagged in, Event B, is marked as “Considering”). Let’s say you proceed to mark Event B as “Committed”; now, the system will display a double-book warning next to John Doe’s name when viewing the Staff tab of either Event A or Event B (because no matter which event you view, the other overlapping event John is tagged in is marked as “Committed”).
Strict Mode
When Strict Mode is enabled, the system displays double-book warnings for all event staff scheduling conflicts — regardless of the event’s Participation Type. Under any given event’s Staff tab, if any given attendee is also tagged as an attendee of another event with at least one overlapping day (based on the event start/end dates), a warning icon is displayed next to that attendee’s name.
Disabled
If Disabled is selected, the system will never display a double-book warning icon next to attendee names under the event Staff tab.