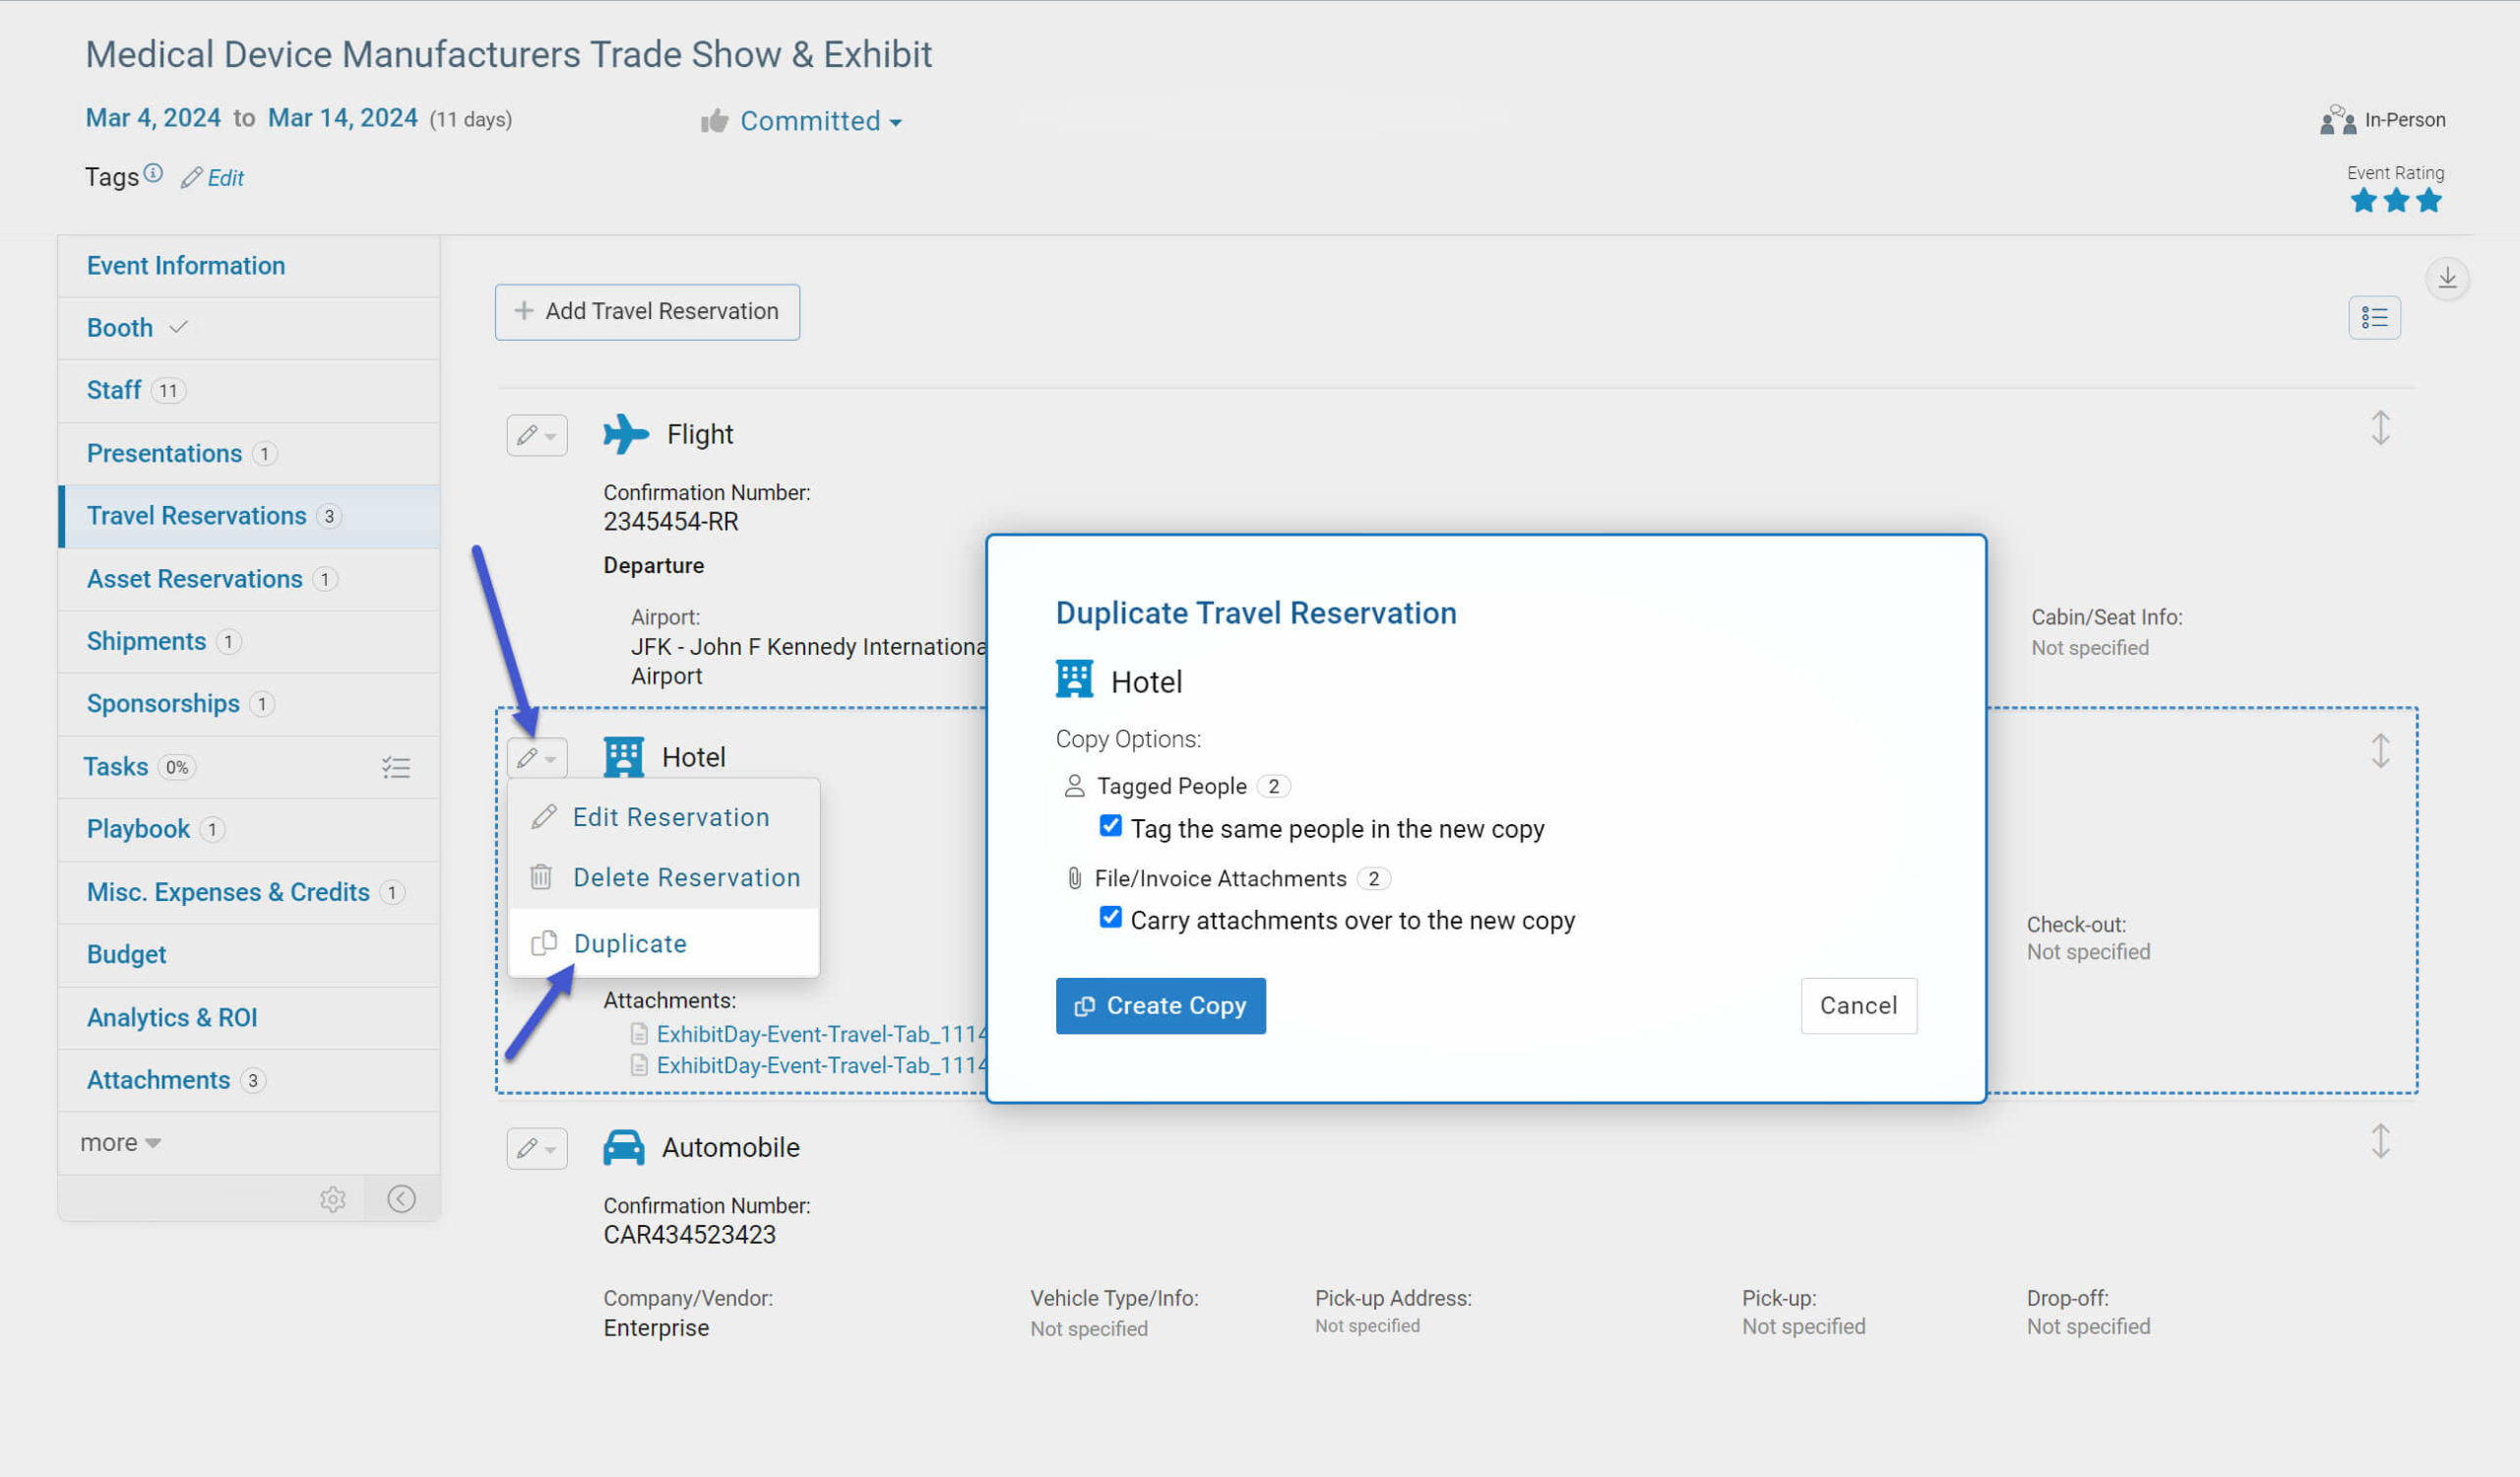
You can easily create a copy of an existing travel reservation (under the event travel tab).
To create a duplicate copy of an existing travel reservation, click on the “Duplicate” option in the “Edit” menu of the reservation you’d like to copy.
Once the “Duplicate Travel Reservation” dialog appears, you can choose to copy the same tagged people and file attachments (if any) over to the new copy.
Finally, click the “Create Copy” button to complete the process.
Note: The ability to copy/duplicate travel reservations is only offered with ExhibitDay’s paid plans.
If you have a multi-workspace configuration (offered under the ExhibitDay Enterprise plan), you can share Assets between your ExhibitDay workspaces.
What is a Shared Asset?
A shared asset is any asset that has been shared with another workspace. When an asset is shared with another workspace, it can get reserved for events in that workspace (via the Event “Asset Reservations” tab of the workspace it is shared with).
How do I share an Asset with another workspace?
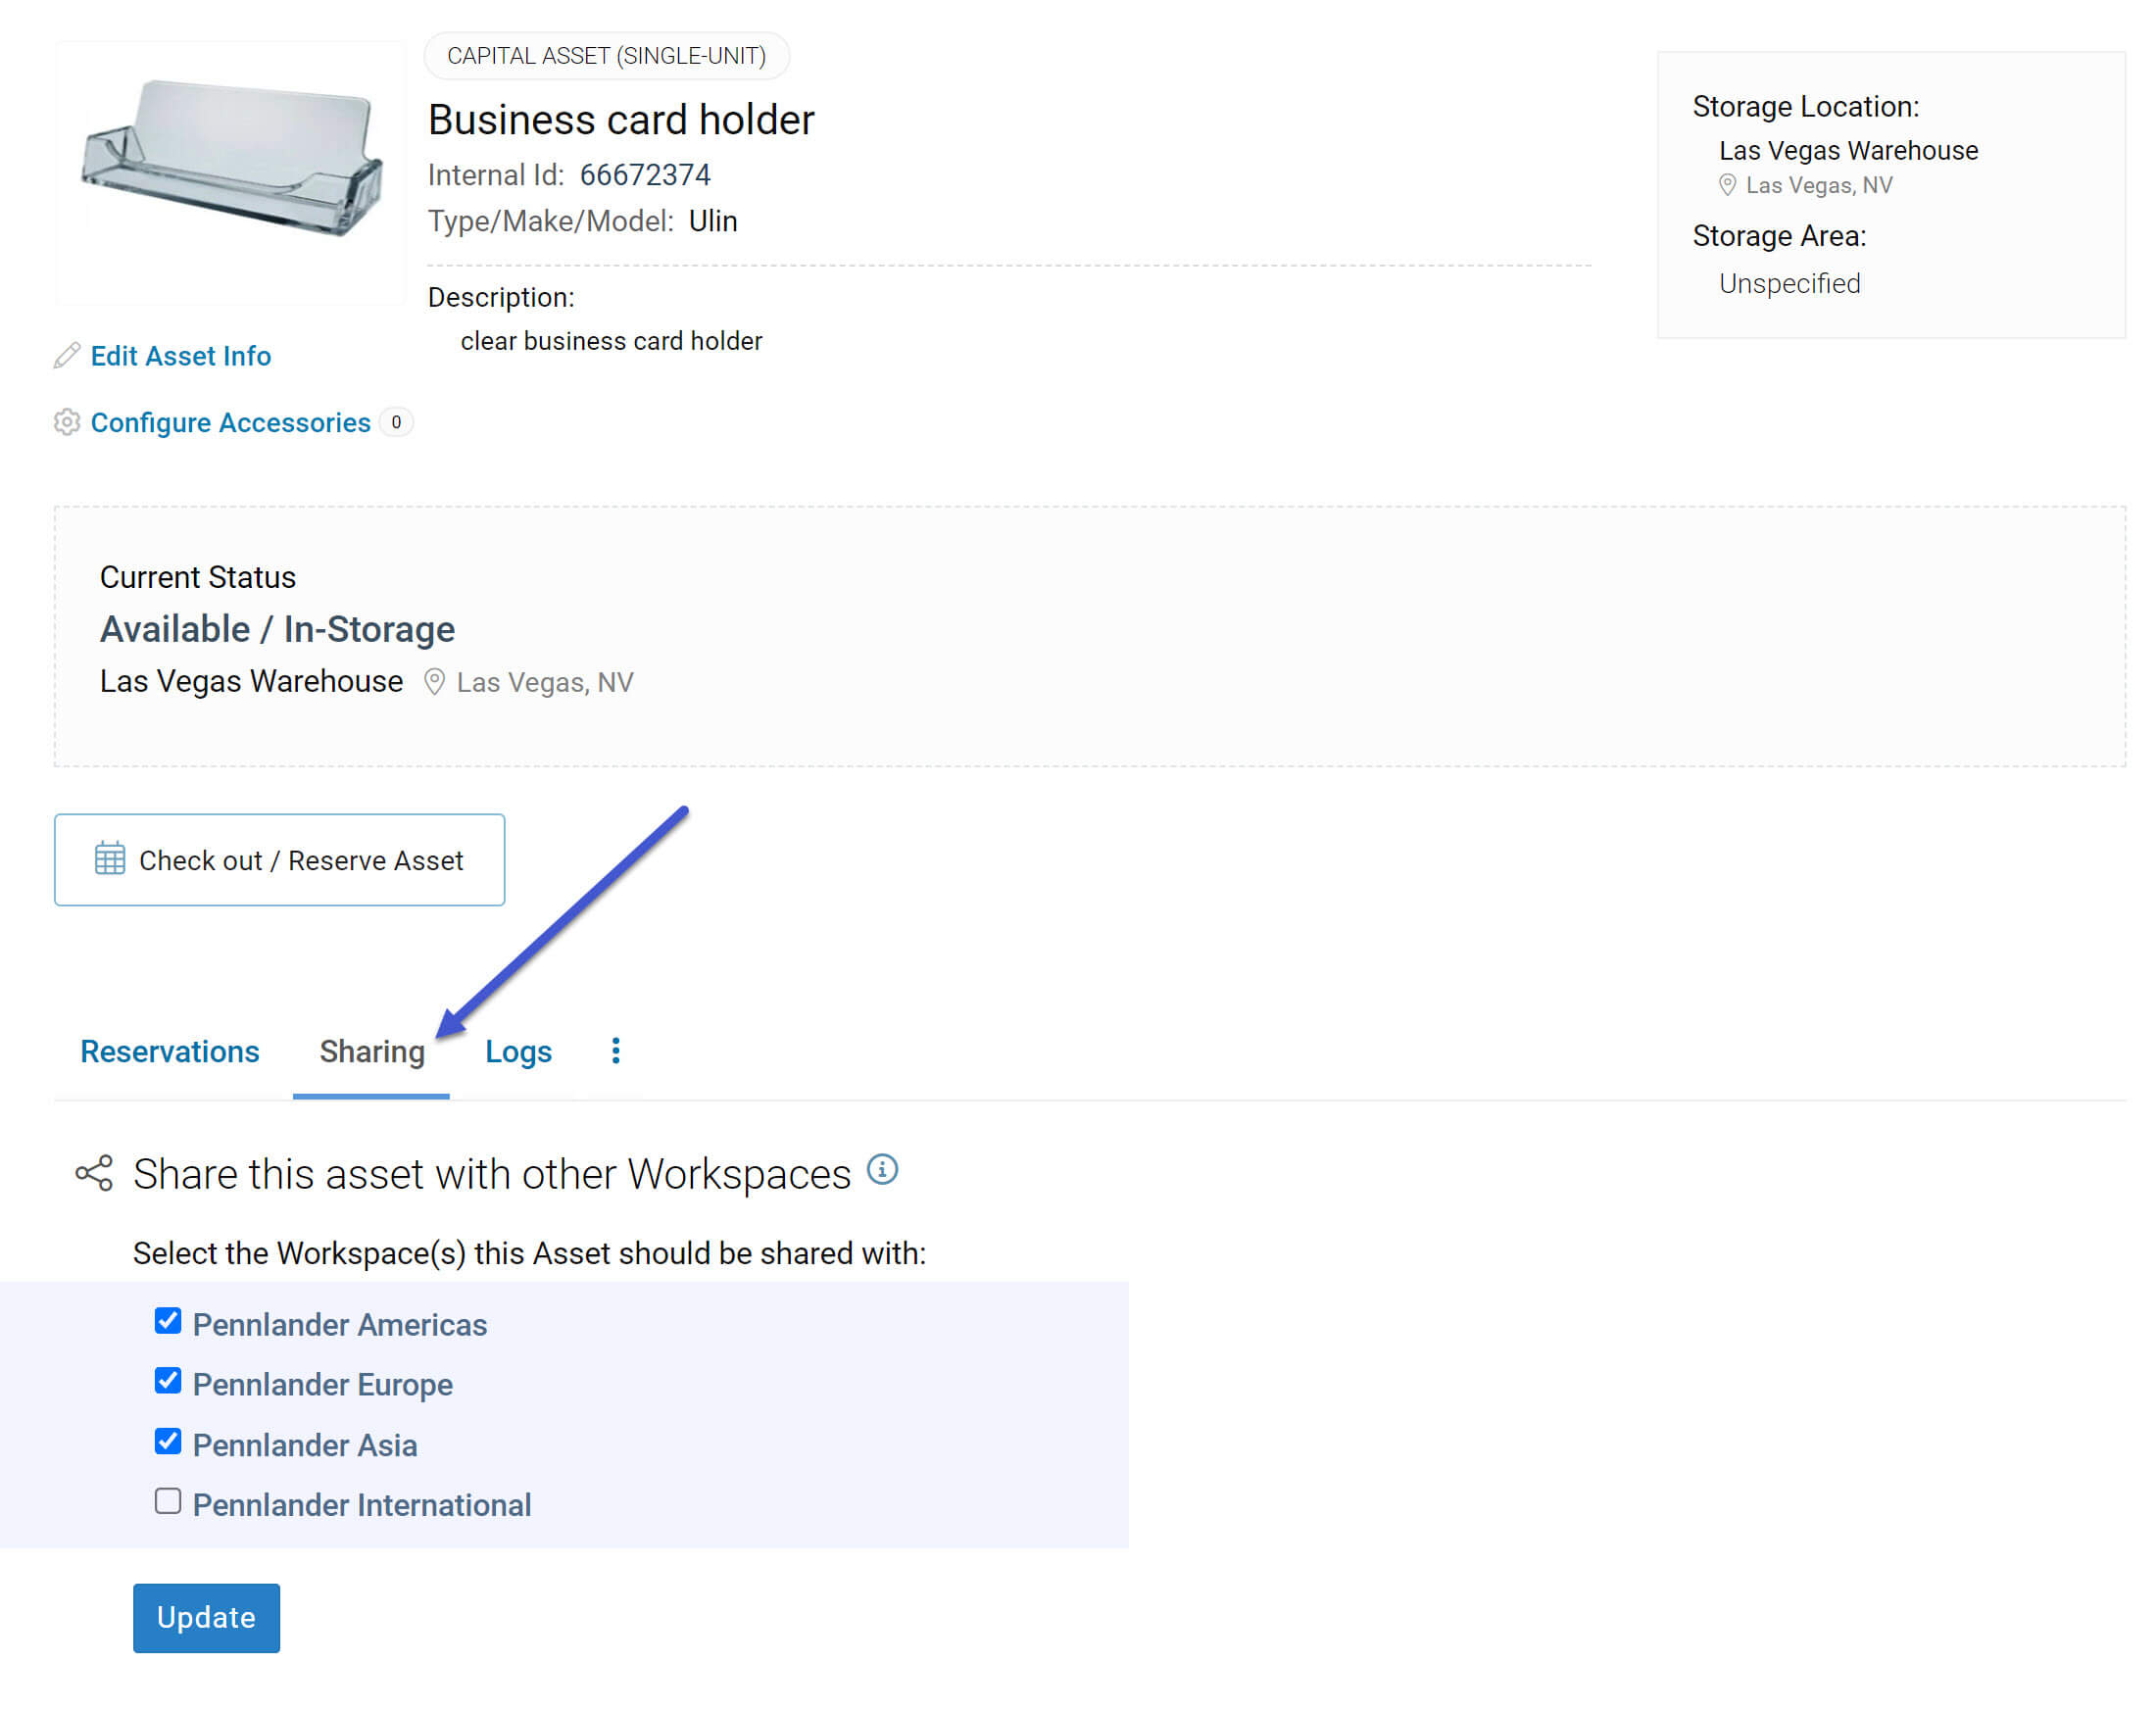
If you are on the ExhibitDay Enterprise plan and have multiple workspaces, when you view an asset (in the “Manage Assets” area), you’ll see a “Sharing” tab. Under the “Sharing” tab you can specify which of your other workspace(s) the asset should be shared with.
Where do Shared Assets Appear?
Shared assets will be made available under the Event “Asset Reservations” tab of the workspaces they are shared with. Shared assets will not appear in the “Manage Assets” area of the workspace they are shared with. For example, if you share an asset from workspace A with another workspace, B, then any event in workspace B can reserve the shared asset; however, the asset will not appear under the “Manage Assets” area of workspace B. Any change to the asset itself (like changes to the asset name, model number, image, etc.) must be made in the asset’s origin workspace (workspace A).
A share icon is displayed in front of the names of shared assets.
Can Users of the Workspace the Asset is Shared With See the Cost of the Asset?
The Cost of an asset can be set when adding/editing the asset (in the Manage Assets area). When you share an asset with another workspace, you have the option to specify whether or not the users of that workspace can see the cost of the shared asset. Note: The cost of an asset is shown as a reference when tagging an asset in a giveaway for an event (in order to help calculate the cost of the giveaway); for more information about tagging assets in giveaways of an event, please refer to this article.
What Happens When a Shared Asset is Unshared?
Unsharing (i.e., disabling sharing of) an asset that has already been shared with another workspace prevents new reservations of the asset from the workspace it was shared with — any existing reservations that may have already been made while the asset was shared will not get canceled.
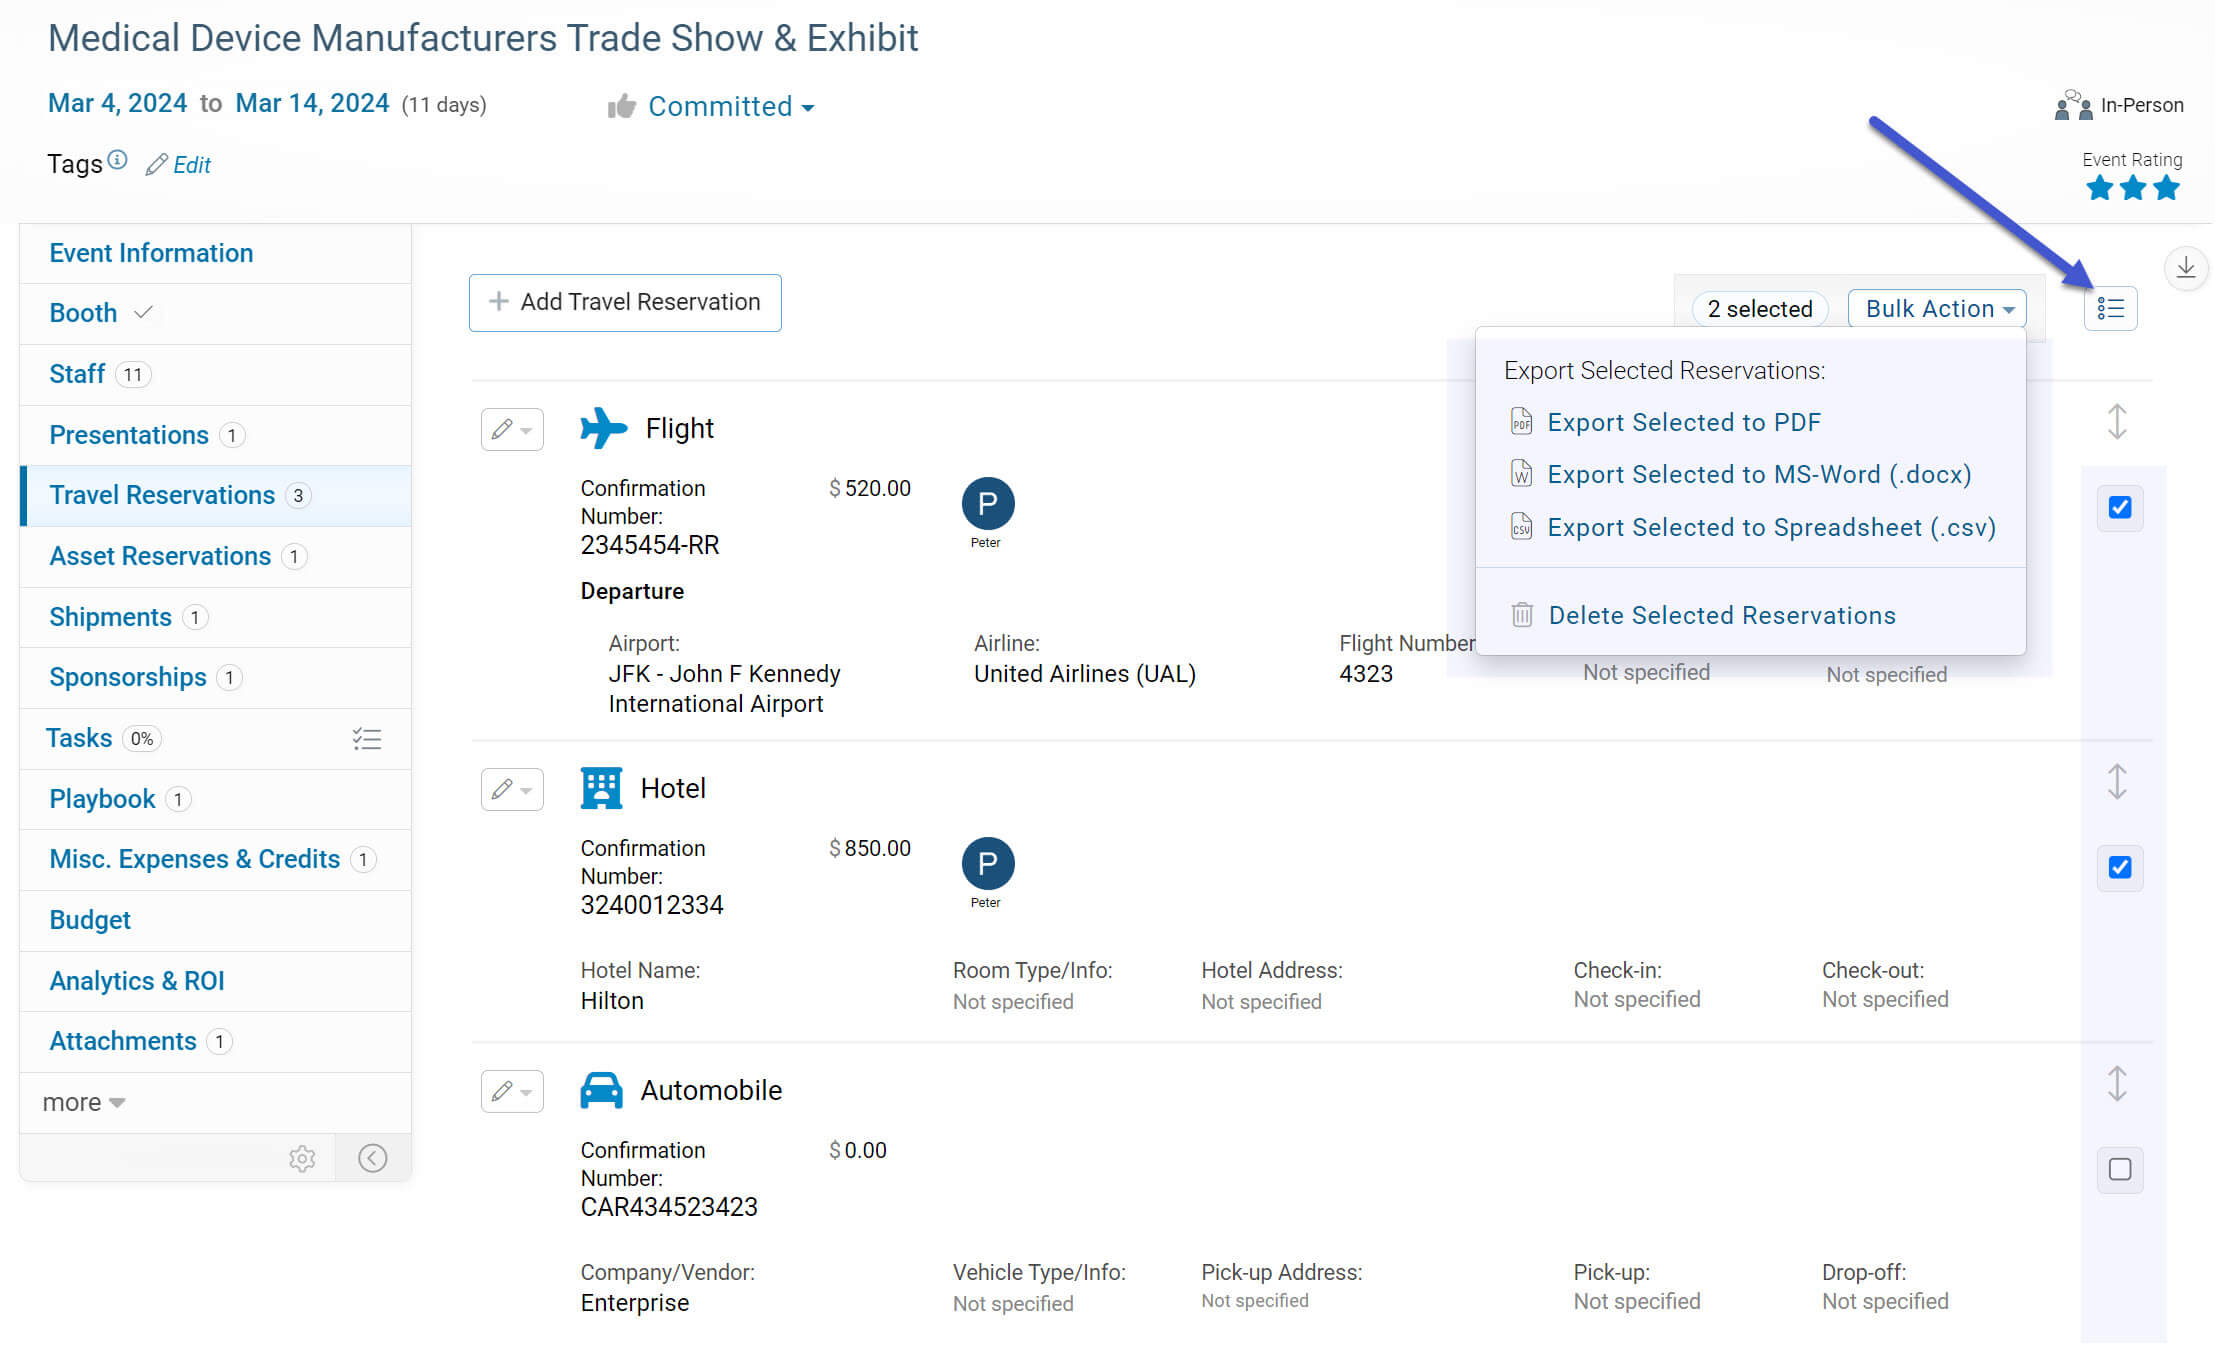
You can selectively choose multiple travel reservations to export or delete.
In order to enable multi-select, click on the multi-select button located at the top-right of the event Travel Reservations tab; when the checkboxes appear (to the right of each travel reservation), choose the reservation(s) that you’d like to export or delete. Then, click on the “Bulk Action” dropdown button and choose the action you’d like to apply to your selection.
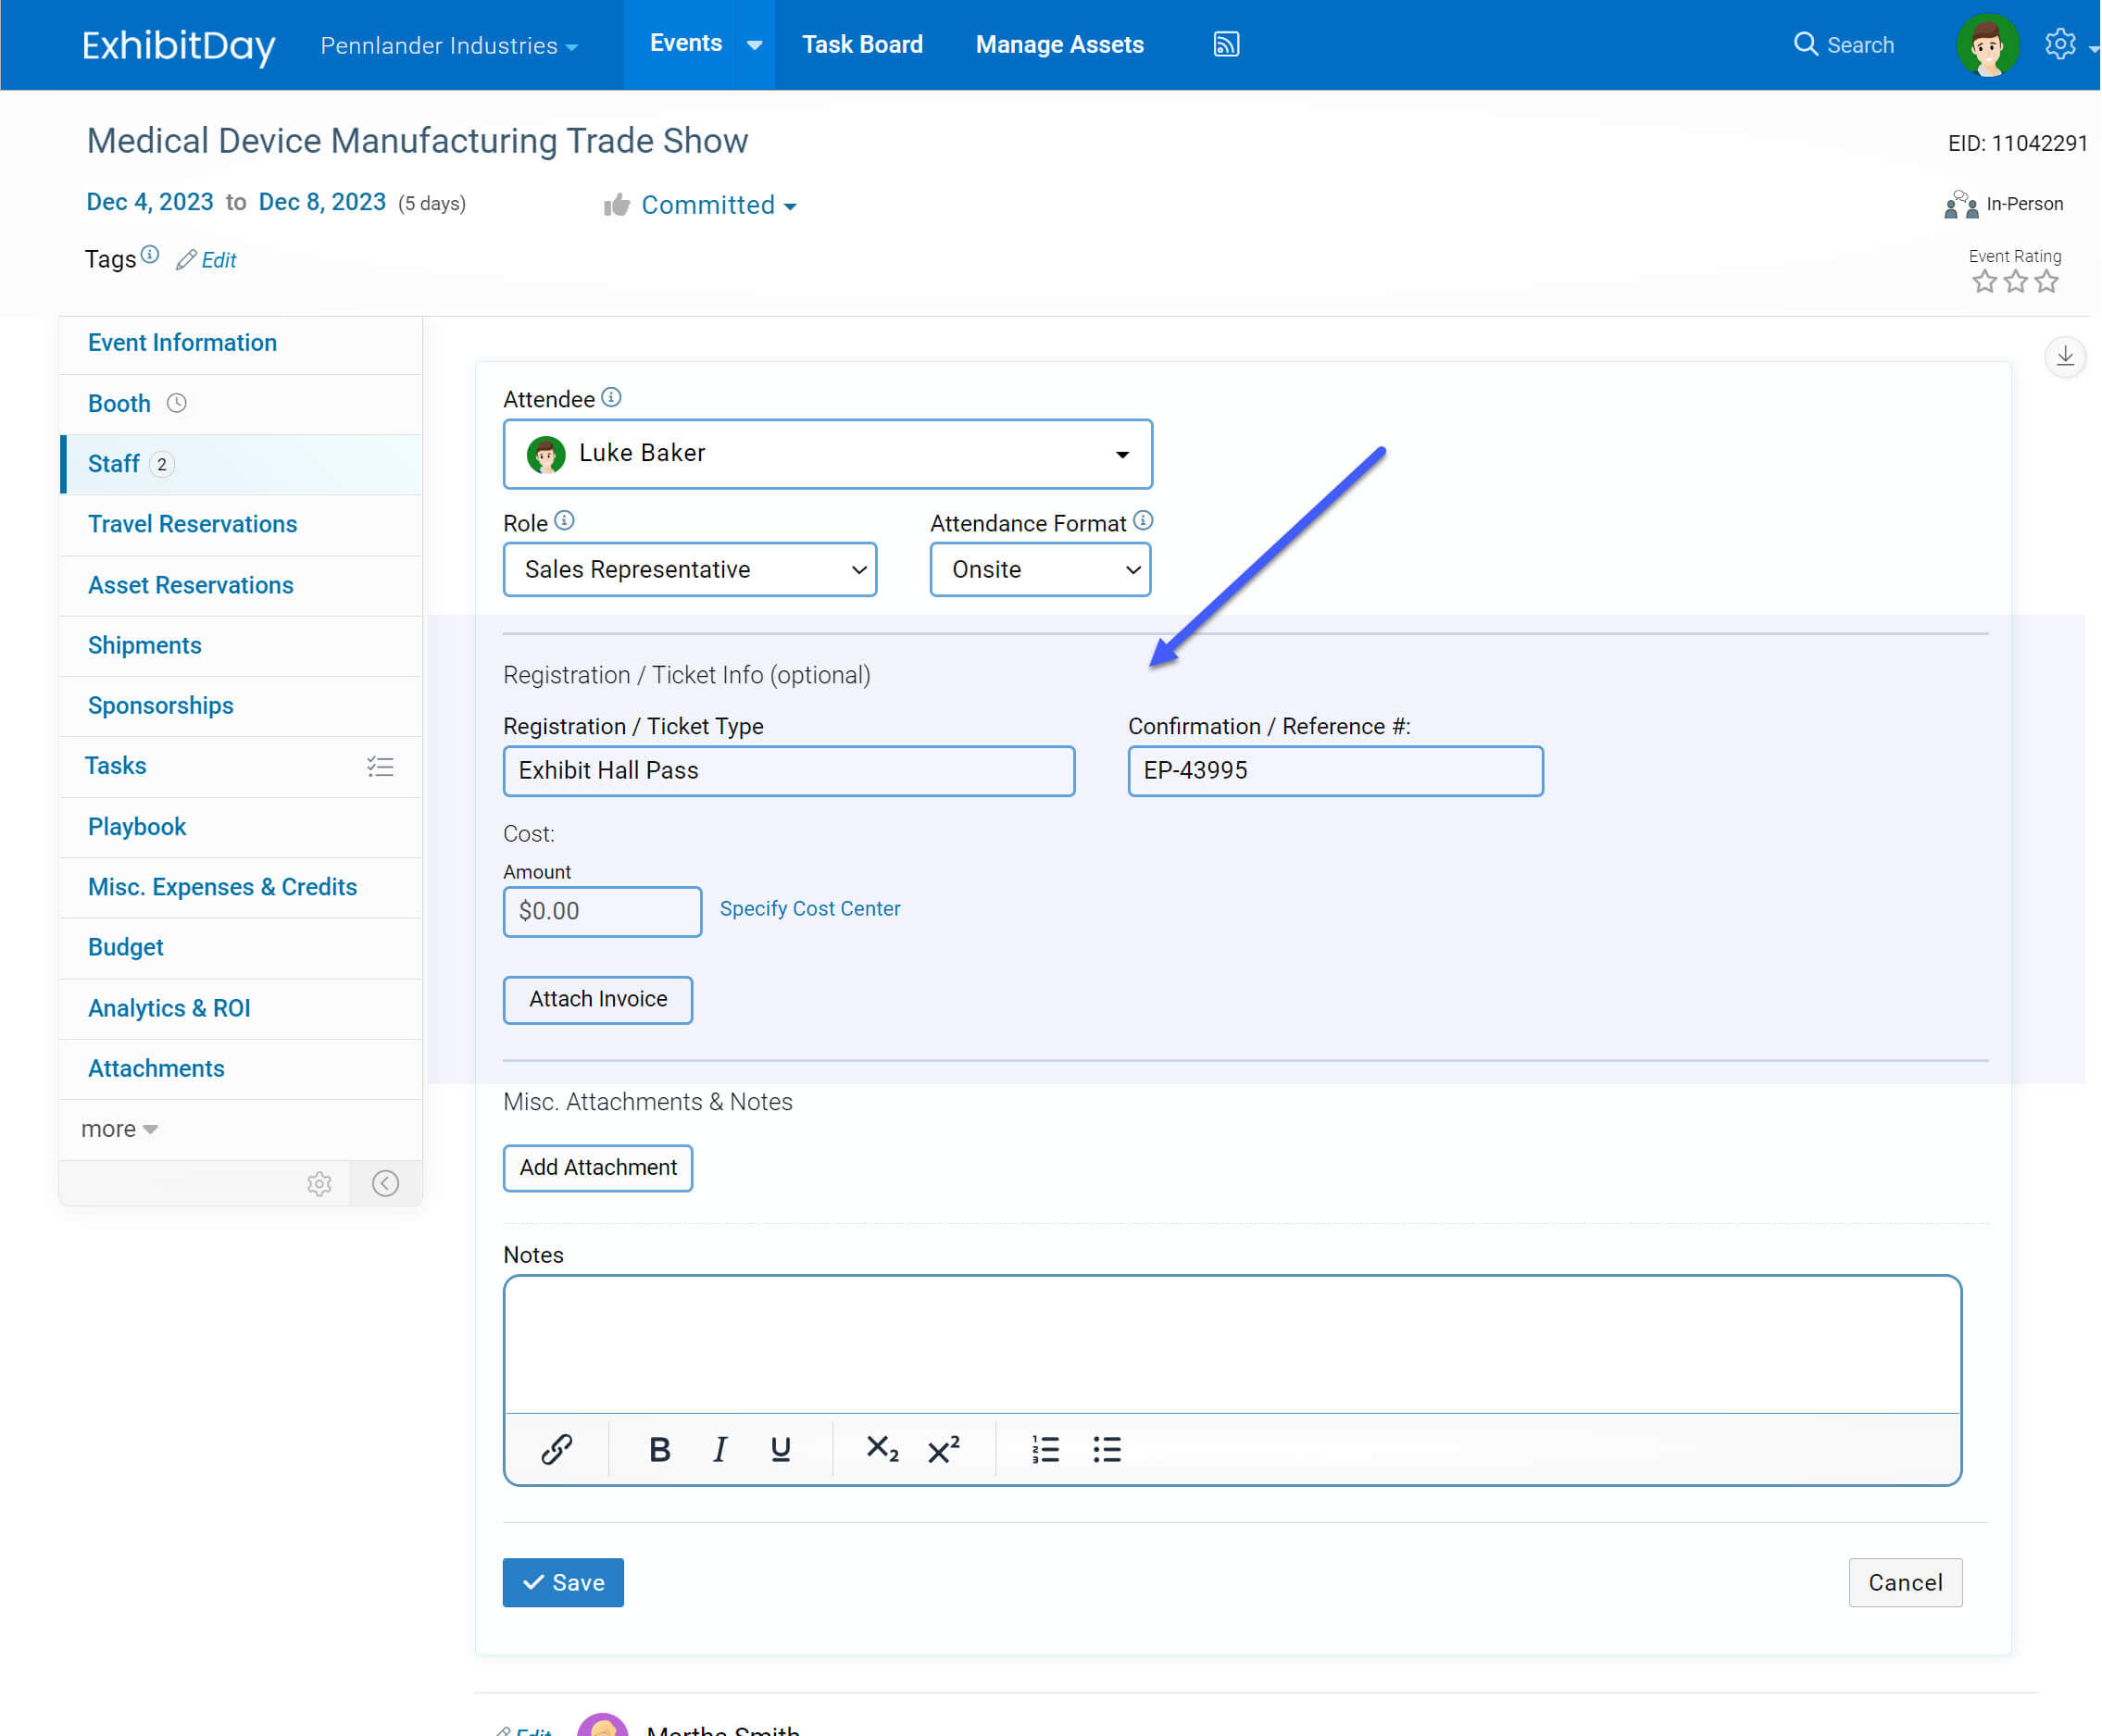
You can track event registration information for your staff who attend your events (under the “Registration / Ticket info” section when adding an attendee via the event “Staff” tab).
Pro-tip
If you have already committed to an event (i.e. purchased tickets, etc.), but you don’t know who’s going to attend yet, you can still create an “untagged attendance record” (by simply adding an attendee record without actually choosing a particular person in the Attendee dropdown). Once you determine who’ll be attending, you can come back and edit that record to tag the actual attendee.
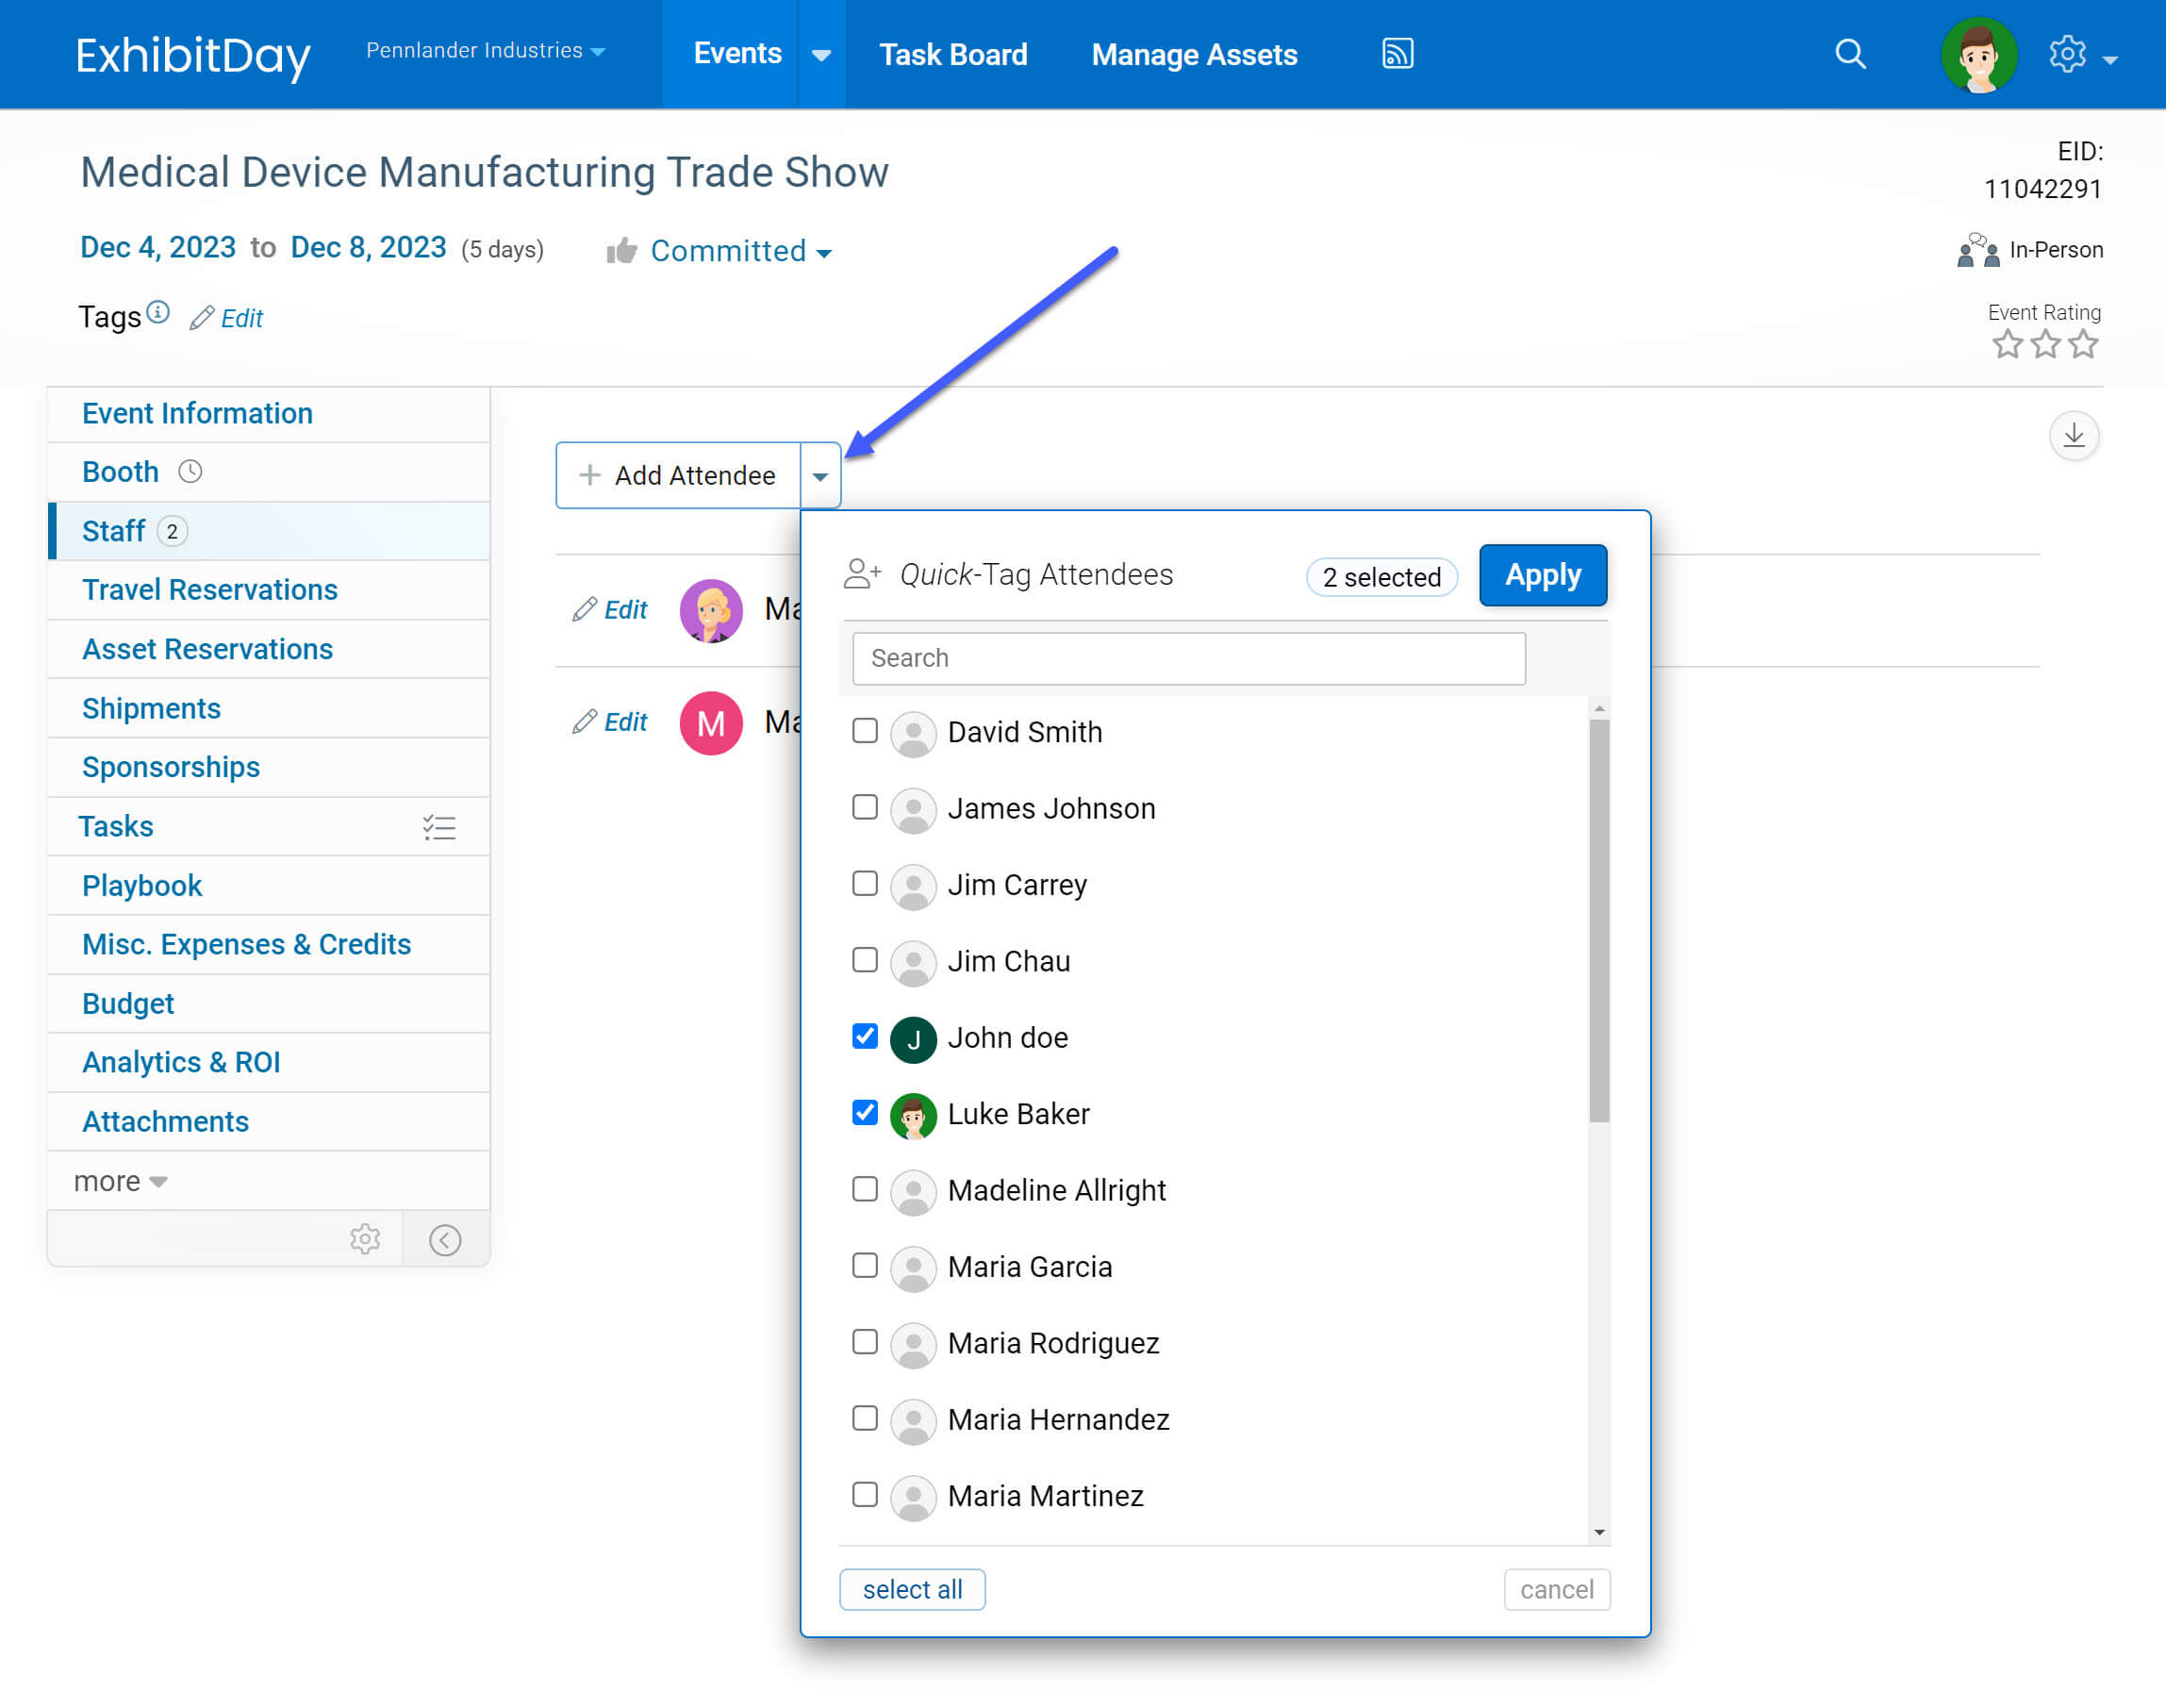
Quick-Tag Attendees
With just a few clicks, you can quickly tag attendees under the Event Staff tab. Use the dropdown menu (to the right of the “Add Attendee” button) to open the Quick-Tag dialog, then select the Attendee(s) you’d like to tag and click “Apply”.
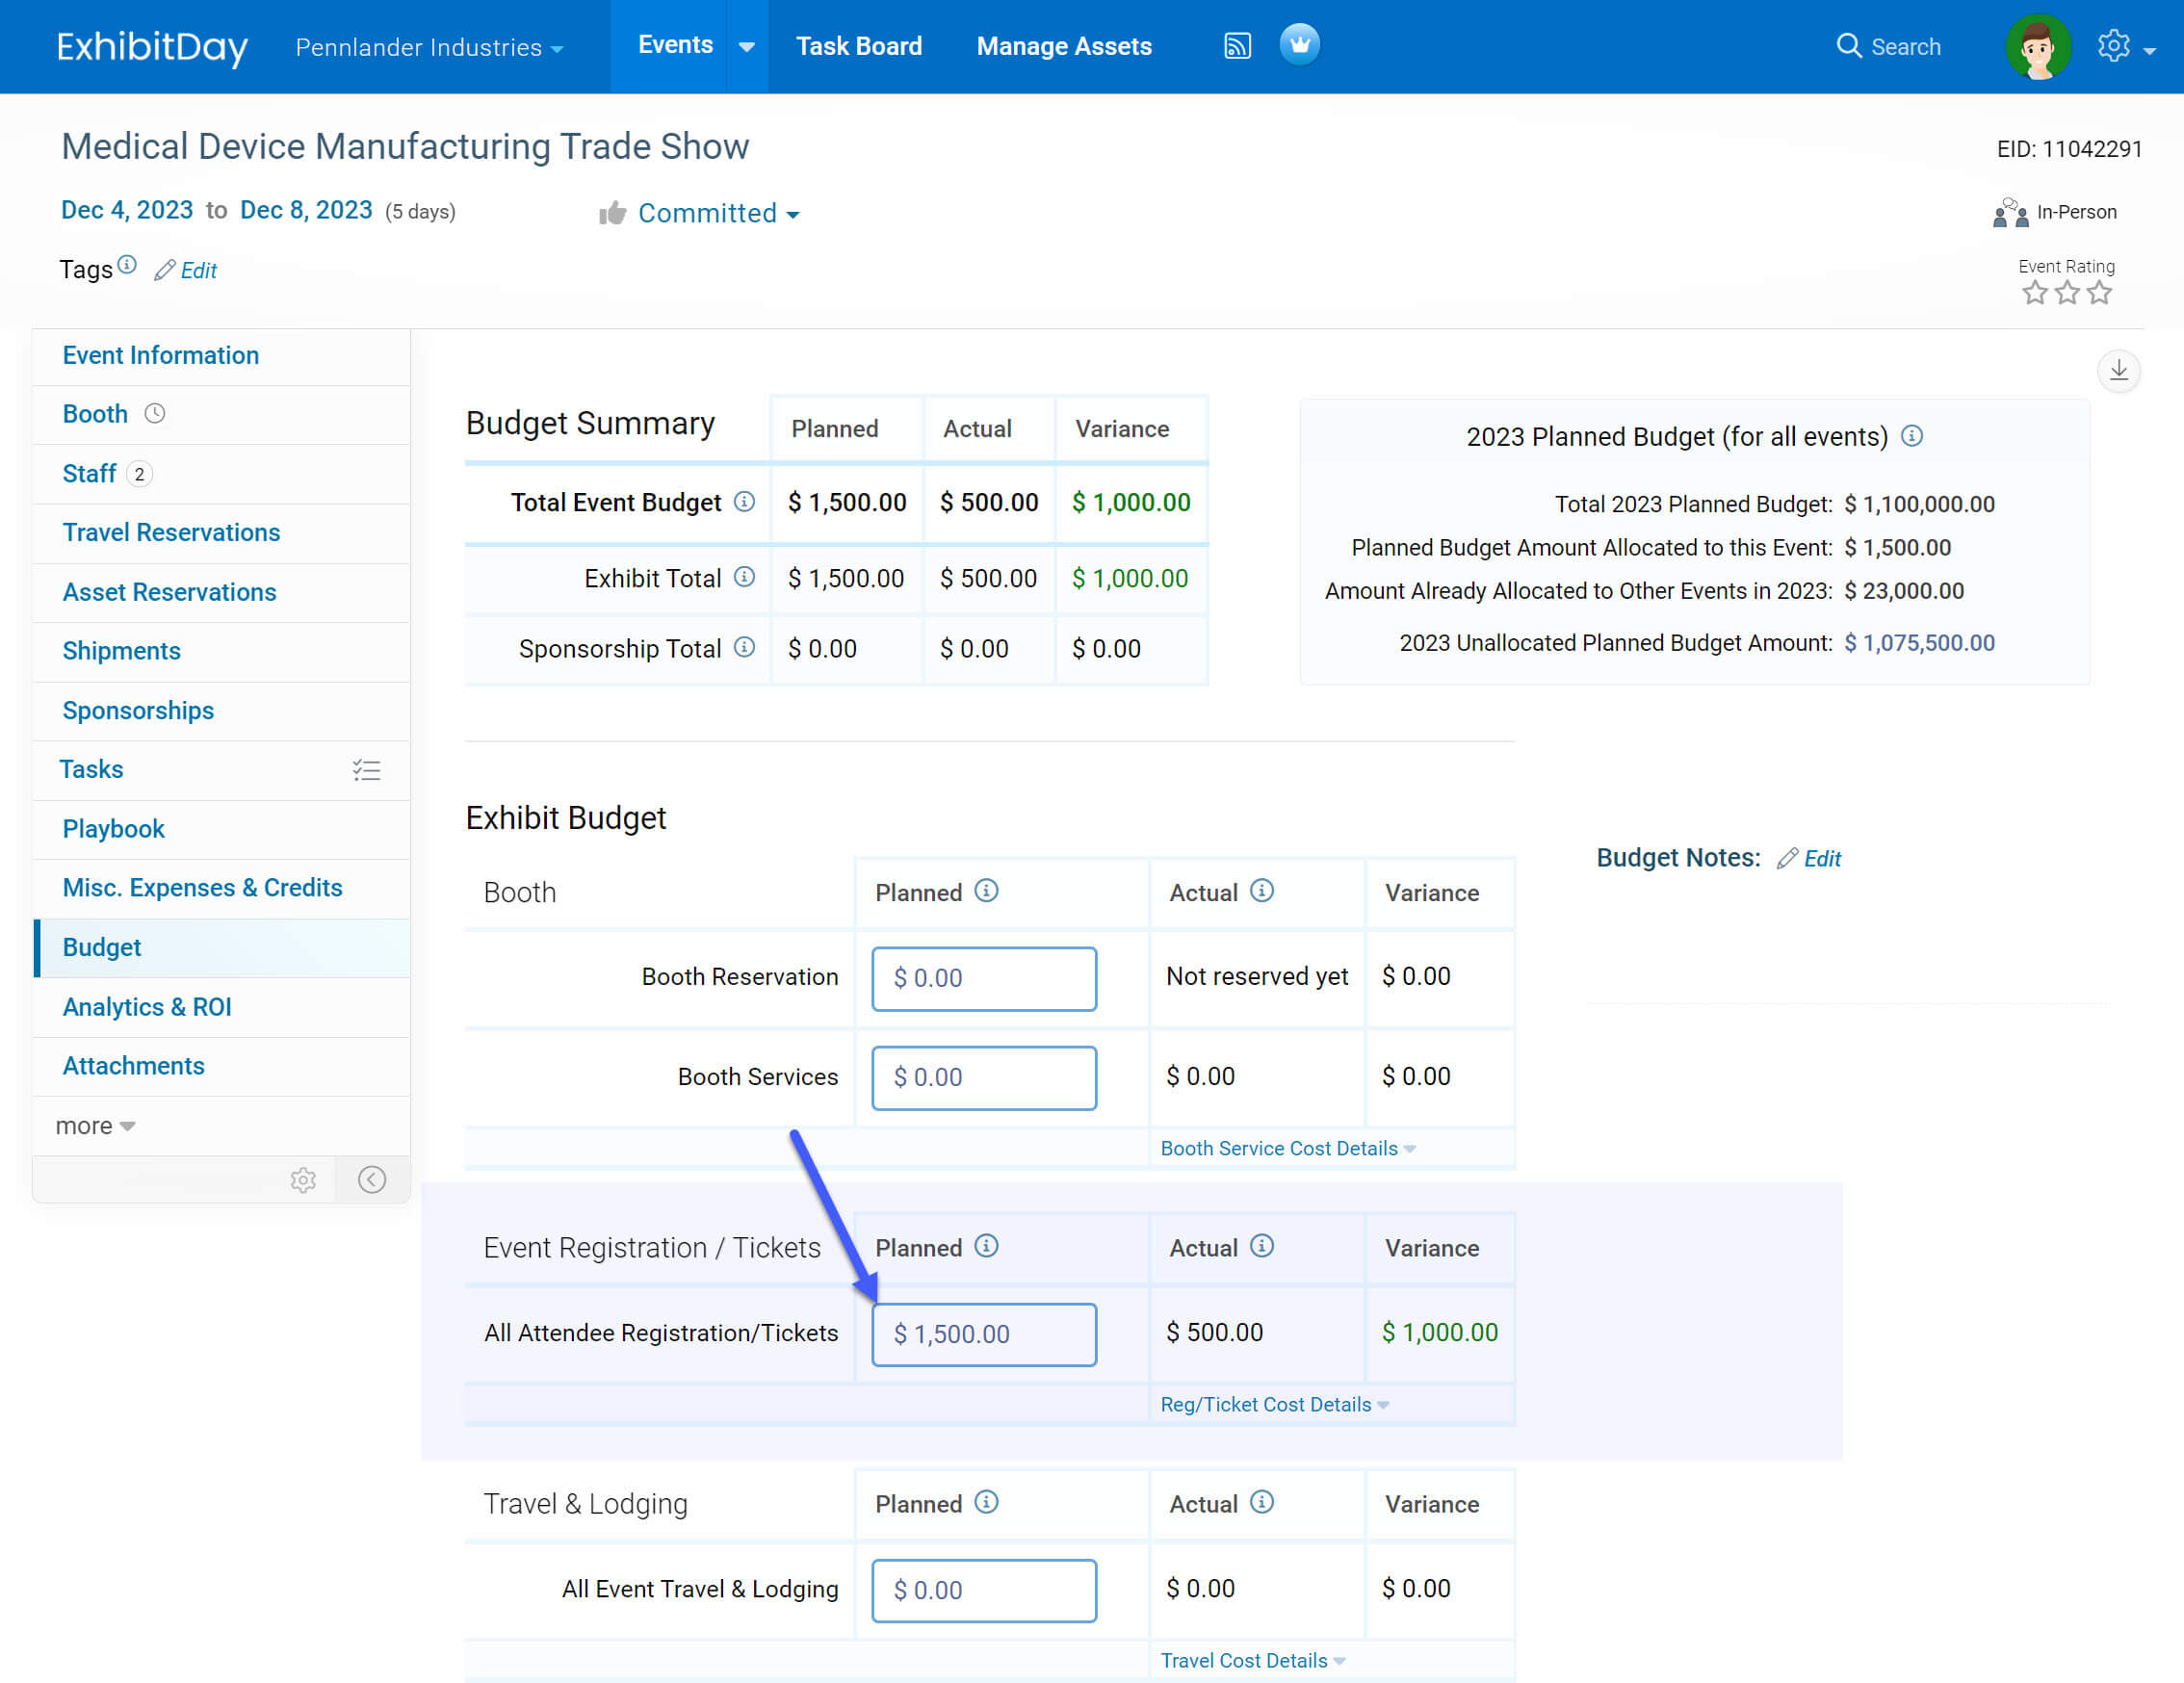
Planned Budget for Attendee Registration / Tickets
You can enter your planned budget for Attendee Registration under the “All Attendee Registration/Tickets” section of the Event Budget tab.
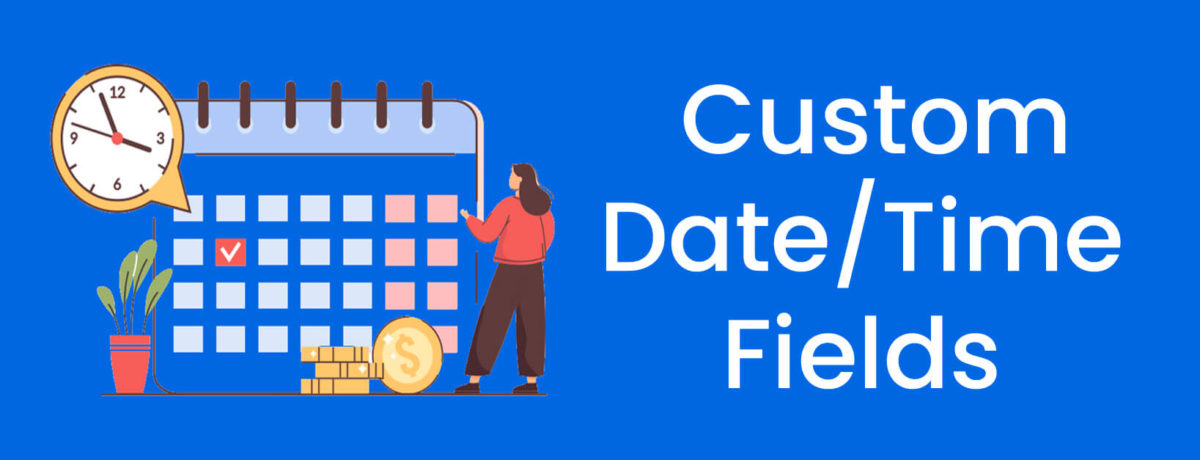
You can now add custom Date/Time fields to the “Info” and “Booth” tabs of your Events in ExhibitDay.
Custom Date/Time Field Types
There are 6 different Date/Time field types that you can add to your events.
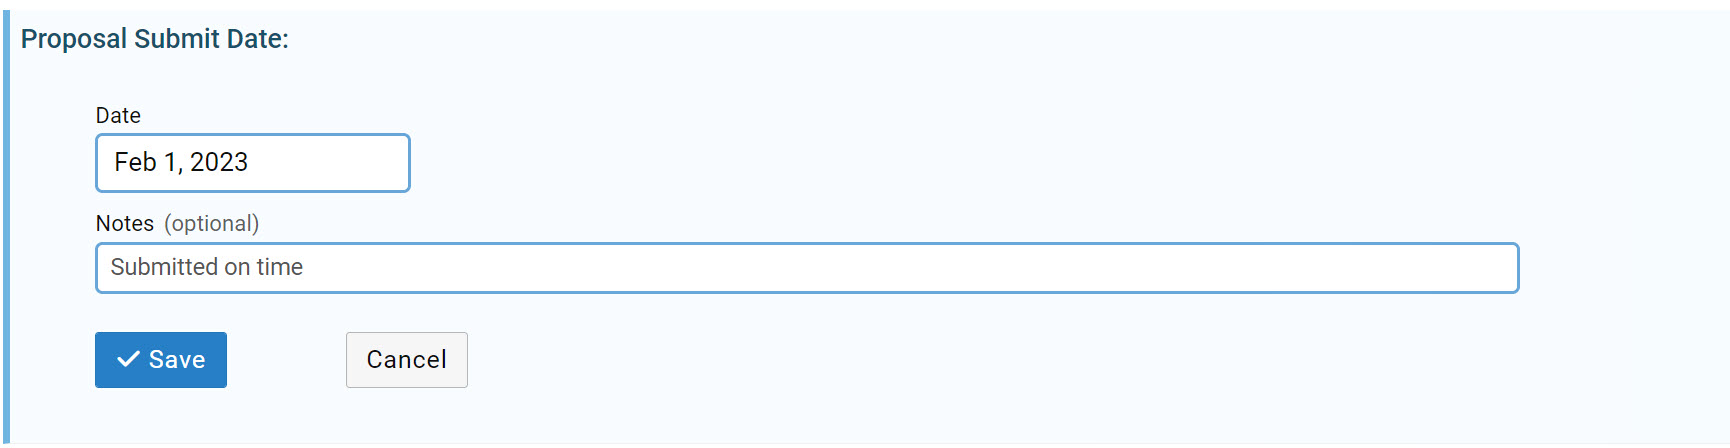
1. Date
The Date field adds a Calendar control to your events. There is also an optional Notes field that can be used to add notes about the selected date.
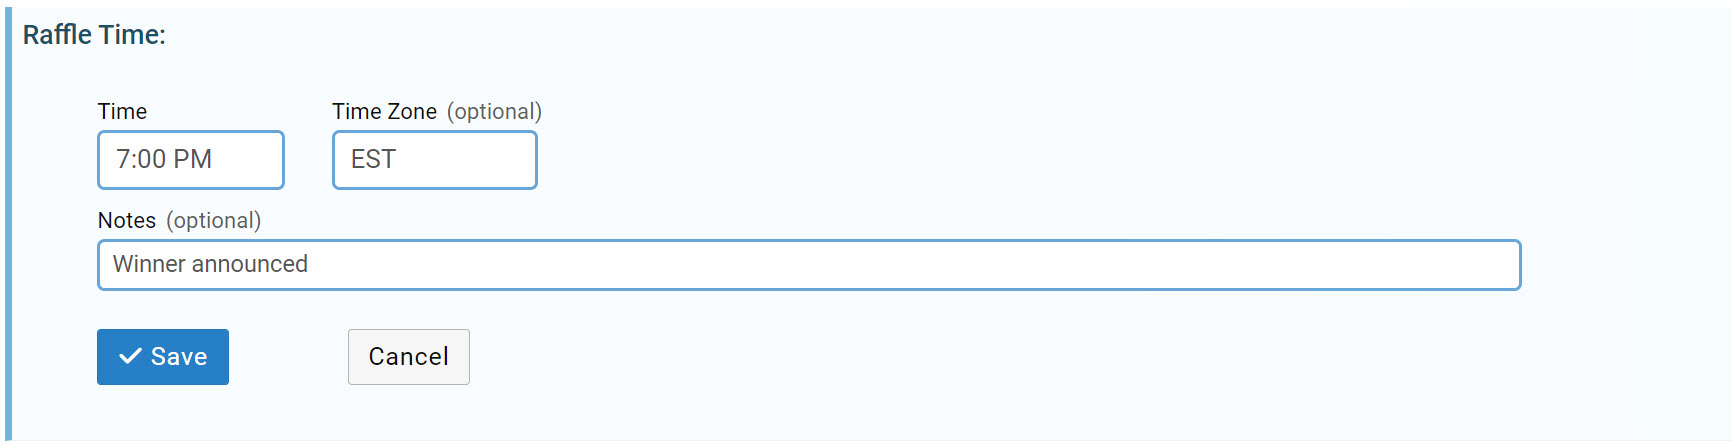
2. Time
The Time field adds a time-selector control to your events. The custom Time field also comes with an optional Time Zone field and an optional Notes field.
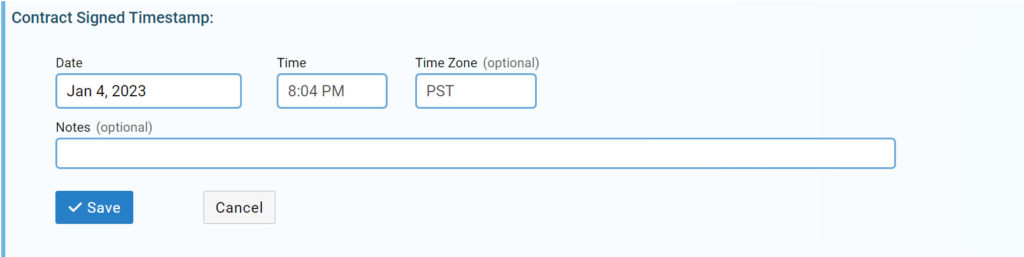
3. Date + Time
The “Date + Time” custom field lets you specify a date and a time (i.e. a timestamp). This field provides a calendar control for selecting a date and a time-selector control for specifying a time. This custom field also comes with an optional Time Zone field and an optional Notes field.
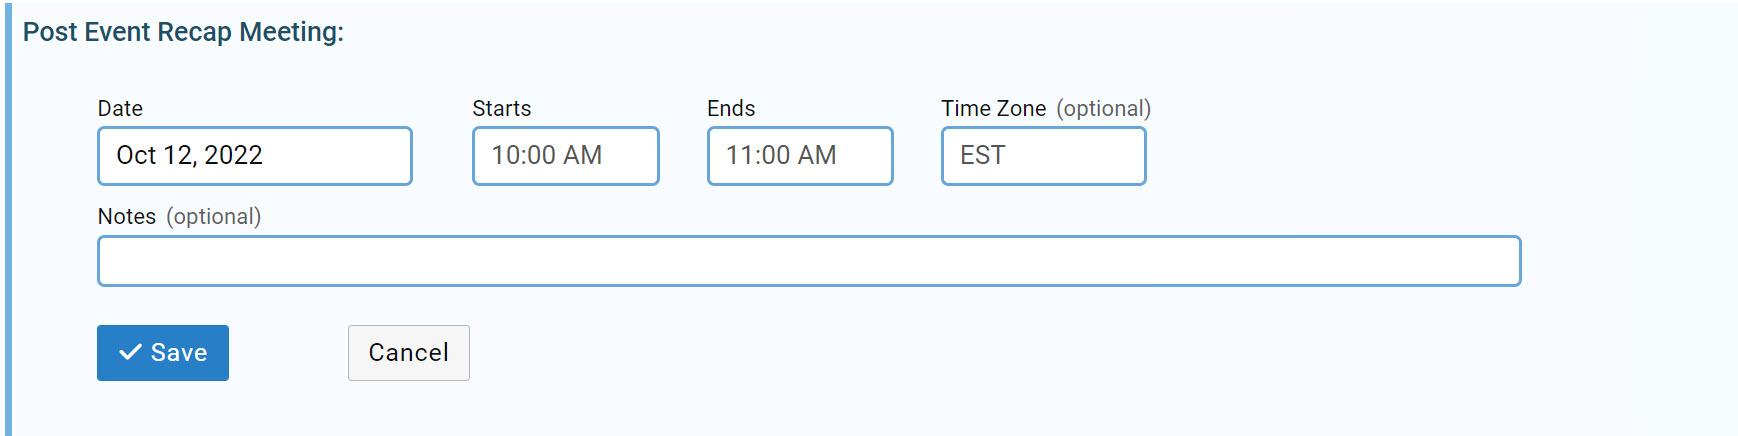
4. Date + Time Period
The “Date + Time Period” custom field lets you specify a date and start/end times. This field provides a calendar control for selecting a date and time-selector controls for specifying a start time and an end time. This custom field also comes with an optional Time Zone field and an optional Notes field.
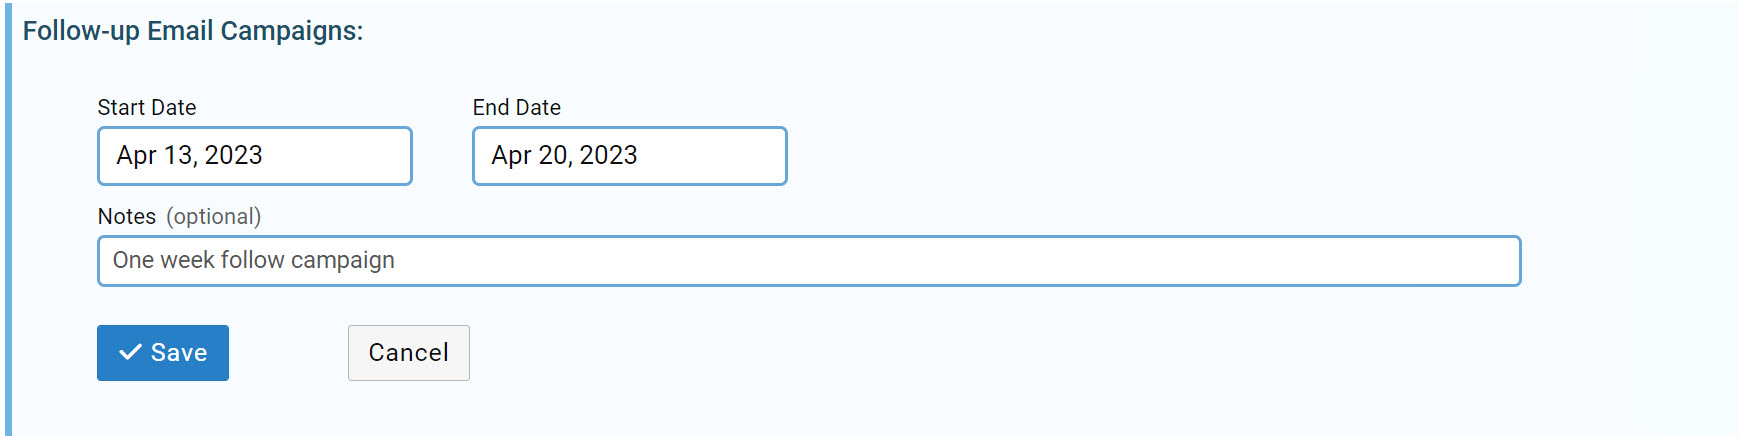
5. Date Range
The “Date Range” custom field lets you specify a start date and an end date using calendar controls. This custom field also comes with an optional Notes field.
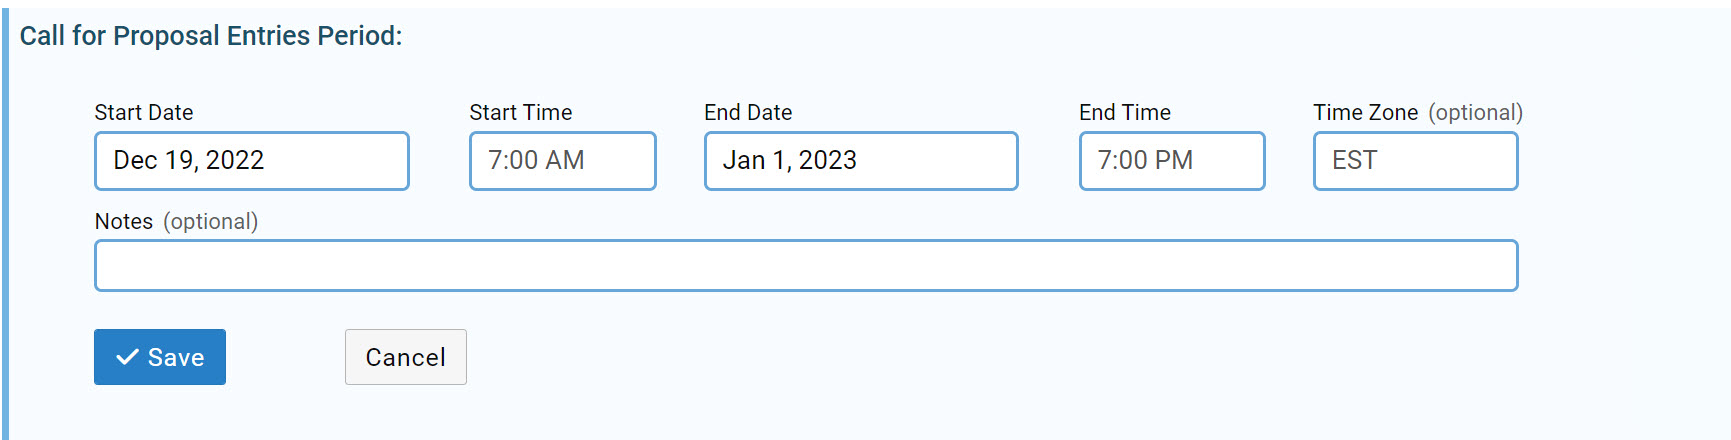
5. Date Range with Time
The “Date Range with Time” custom field lets you specify a start date/time and an end date/time using calendar and time-selector controls. This custom field also comes with an optional Time Zone field and an optional Notes field.
 is displayed in front of the names of shared assets.