Event objectives are predefined goals your organization aims to achieve by participating in events. Some examples include: Lead Generation, Sales, Brand Awareness, Customer Retention, Networking, etc.
|
Tutorial Video (2 mins)
Getting Started With Objectives & ROO
|
Specifying Objectives for your Events
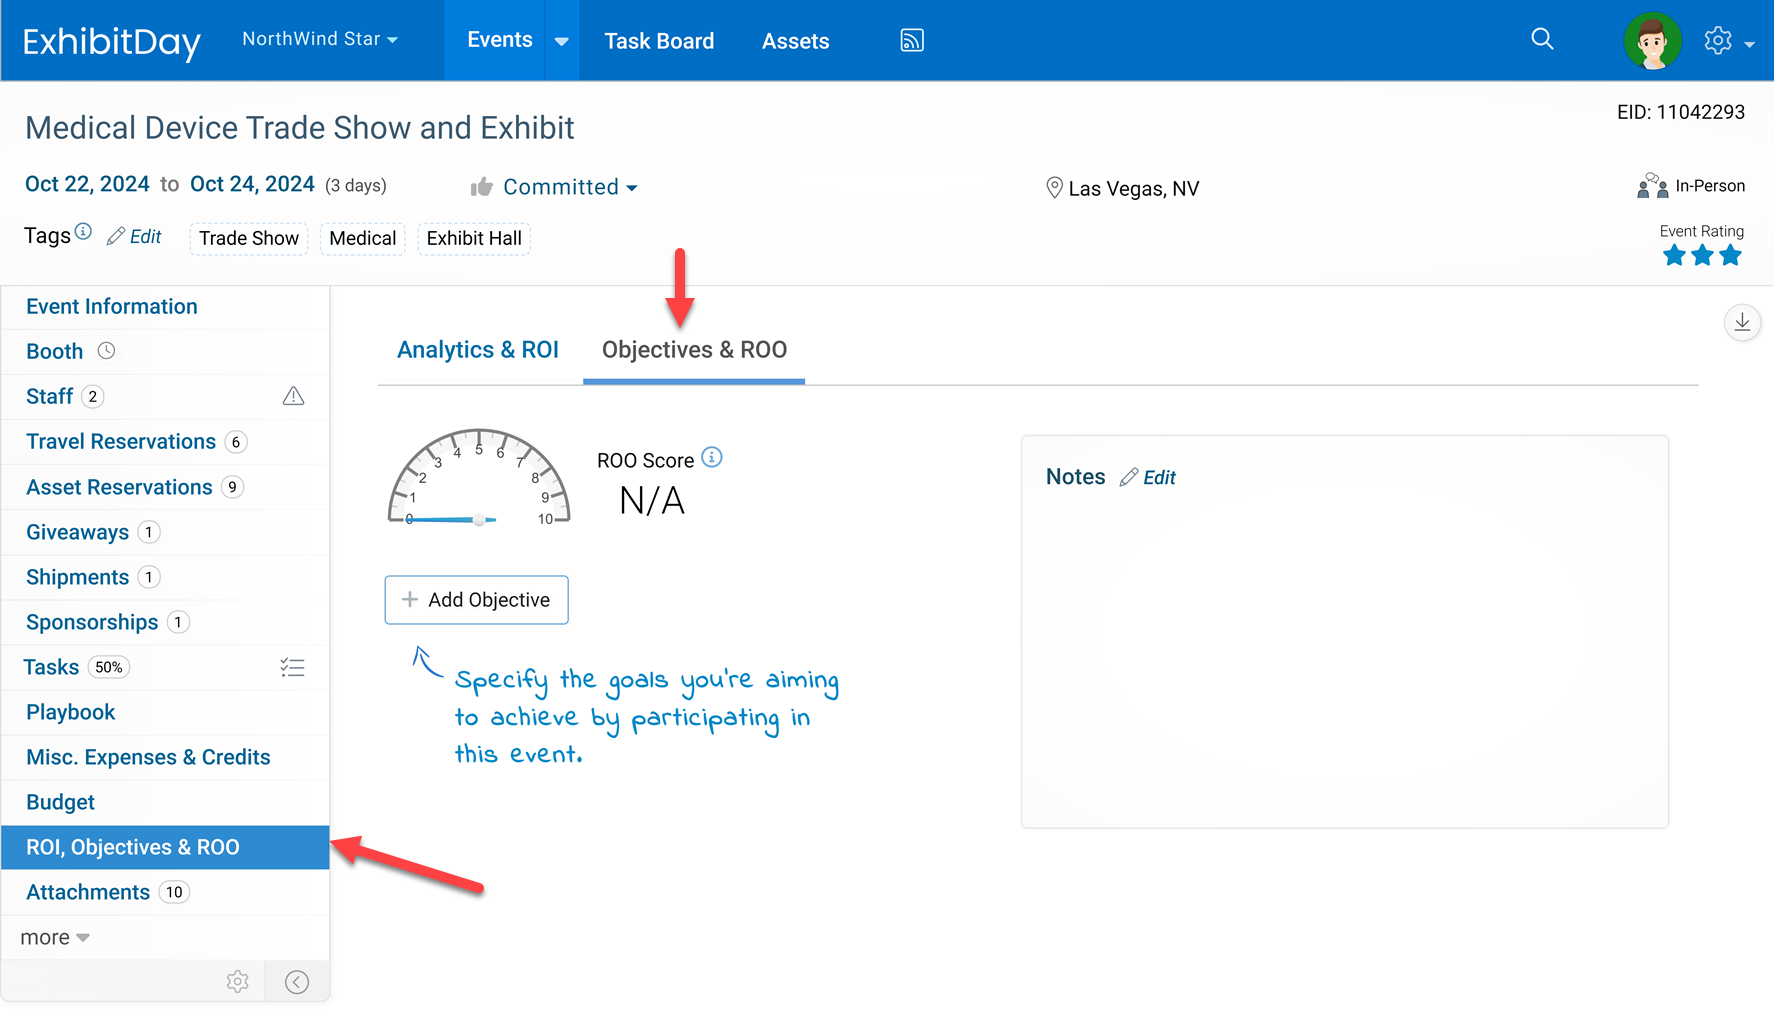
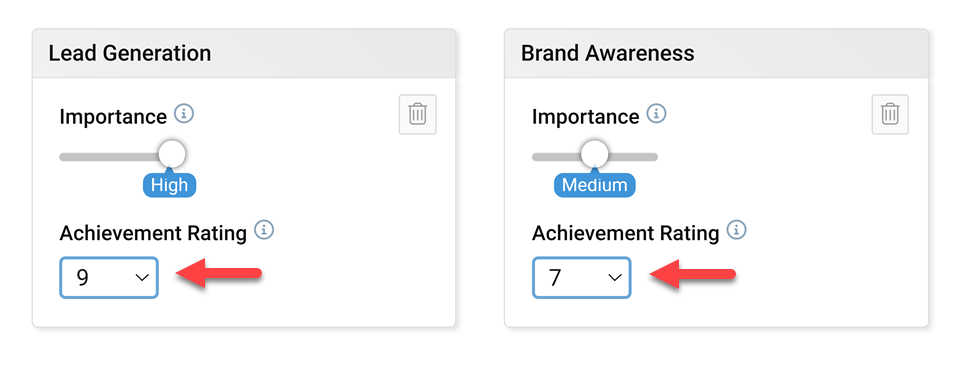
Objectives for an event are entered under the “Objectives & ROO” section of the event’s “ROI, Objectives & ROO” tab in ExhibitDay.
Objective Importance and Achievement Rating
You can specify a level of Importance and Achievement Rating for each objective.
Objective Importance
The specified level of importance for an objective is a reflection of its significance to your organization for the event. It also plays a factor in the calculation of the event’s ROO Score:
- Objectives marked as High importance carry a weight factor of 3x in the calculation of the ROO Score.
- Objectives marked as Medium importance carry a weight factor of 2x in the calculation of the ROO Score.
- Objectives marked as Low importance carry a weight factor of 1x in the calculation of the ROO Score.
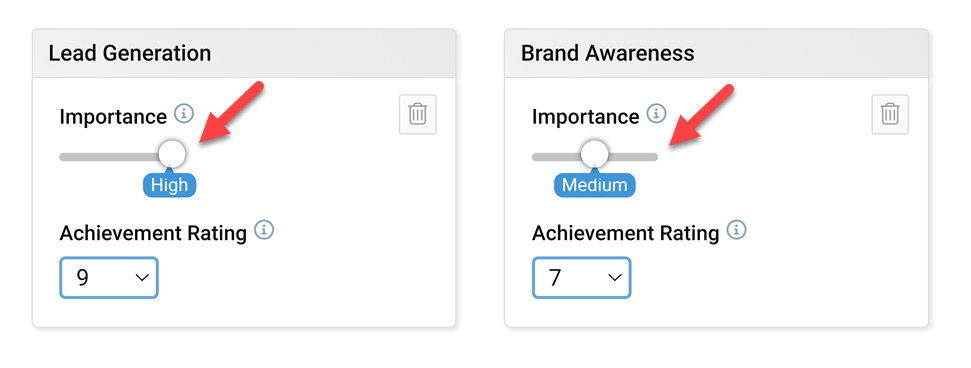
Objective Achievement Rating
The objective Achievement Rating (0-10) reflects your assessment of how well you believe the event objective was met. A rating of 10 indicates that the objective was fully achieved, while a rating of 0 indicates that the objective was not achieved at all. The rating for each objective counts toward the overall event ROO Score.
Note: Unrated objectives (i.e., the ones that have an achievement rating of TBD) don’t count toward the event’s ROO Score.
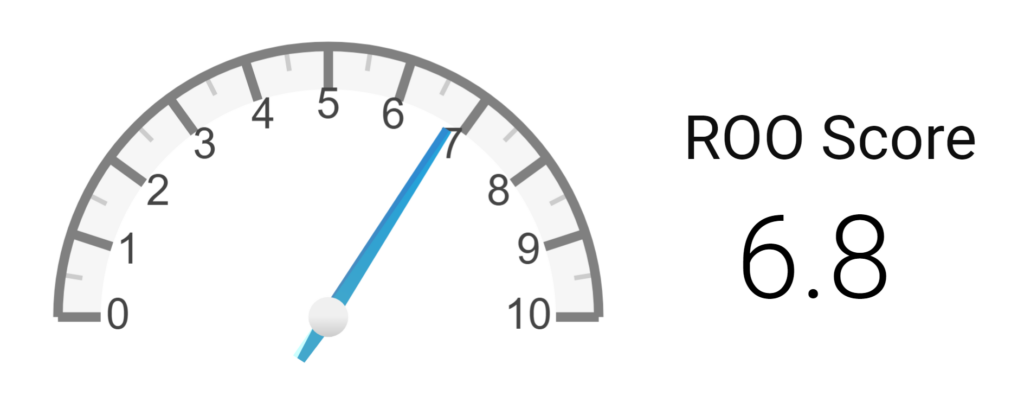
The ROO Score
The Return on Objective Score is a metric used to evaluate the success of an event based on how well it meets its predefined objectives. It is a number between 0 and 10, calculated as the weighted average of objective achievement ratings.
Example
Consider an event with the following 4 objectives:
- Brand Awareness: High importance, achievement rating of 8 (out of 10)
- Competition Research: Medium importance, achievement rating of 6 (out of 10)
- Lead Generation: Low importance, achievement rating of 5 (out of 10)
- Product Launch: Low importance, achievement rating TBD (not specified)
The event’s ROO Score is calculated based on the achievement rating combined with the weight factor of each objective’s level of importance:
- Brand Awareness (High): 8 x 3 = 24 (out of 30)
- Competition Research (Medium): 6 x 2 = 12 (out of 20)
- Lead Generation (Low): 5 x 1 = 5 (out of 10)
- Product Launch (Low): doesn’t count toward the ROO Score because it’s achievement rating is marked as TBD (not specified).
|
ROO Score = 10 x
|
Weighted sum of achievement ratings
Weighted sum of maximum possible achievement ratings
|
|
|
ROO Score = 10 x
|
(24 + 12 + 5)
(30 + 20 + 10)
|
= 6.8
|
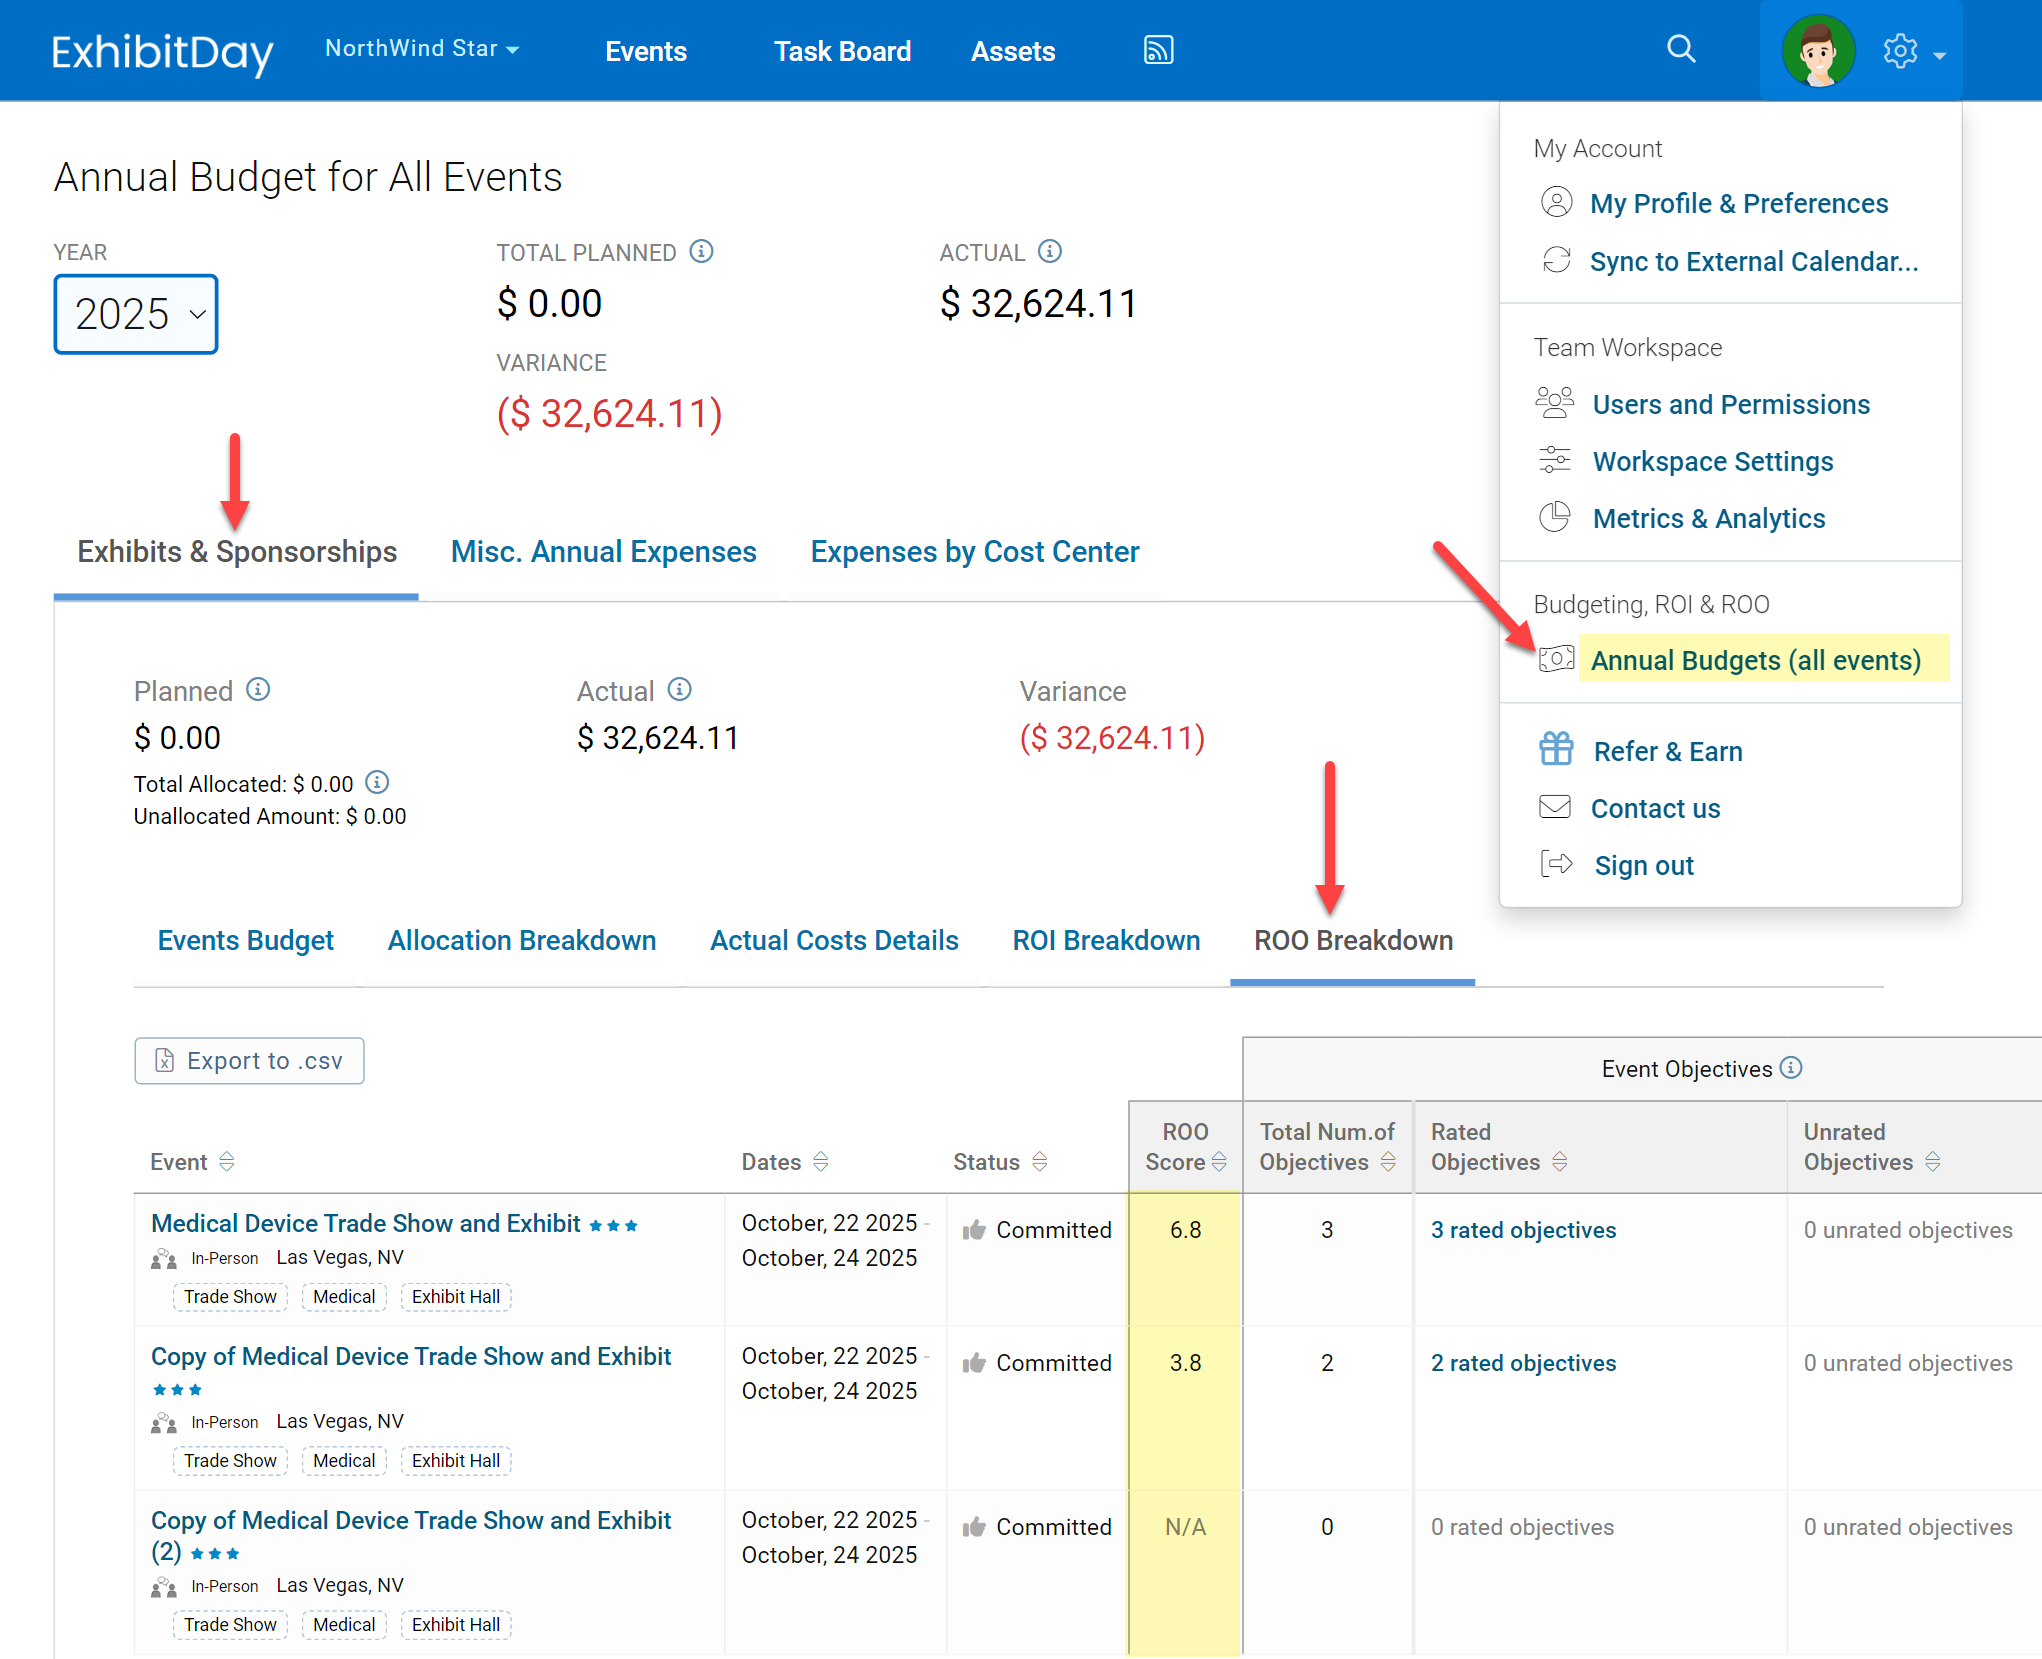
Comparing ROO Score across your events
You can compare the ROO Score across all your events in a given year from the “ROO Breakdown” section of the “Exhibits & Sponsorships” tab of the Annual Budgets page.
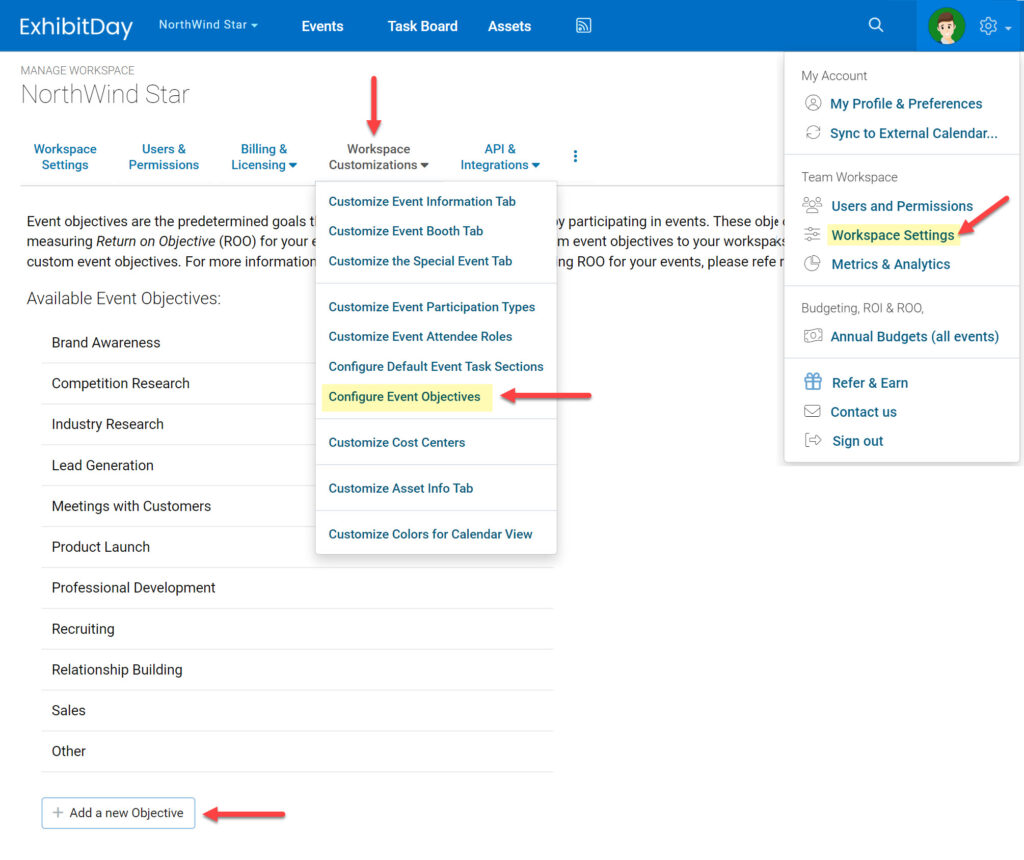
Adding your own custom objectives
By default, ExhibitDay provides a list of most commonly used event objectives (e.g., Lead Generation, Sales, Brand Awareness, Customer Retention, Networking, etc.).
If the objective you’re looking to track is not listed, you have two options:
- Option 1: When adding a new objective, simply select “Other” from the objective dropdown list and type in the name of your objective.
- Option 2: Add a Custom Event Objective to your workspace so that it’s always available as an option in the dropdown.
You can add up to 10 Custom Event Objectives to your ExhibitDay workspace. To add Custom Event Objective, go to Workspace Settings > Workspace Customizations > Configure Event Objectives.