If you have a multi-workspace configuration (offered under the ExhibitDay Enterprise plan), you can share Assets between your ExhibitDay workspaces.
What is a Shared Asset?
A shared asset is any asset that has been shared with another workspace. When an asset is shared with another workspace, it can get reserved for events in that workspace (via the Event “Asset Reservations” tab of the workspace it is shared with).
How do I share an Asset with another workspace?
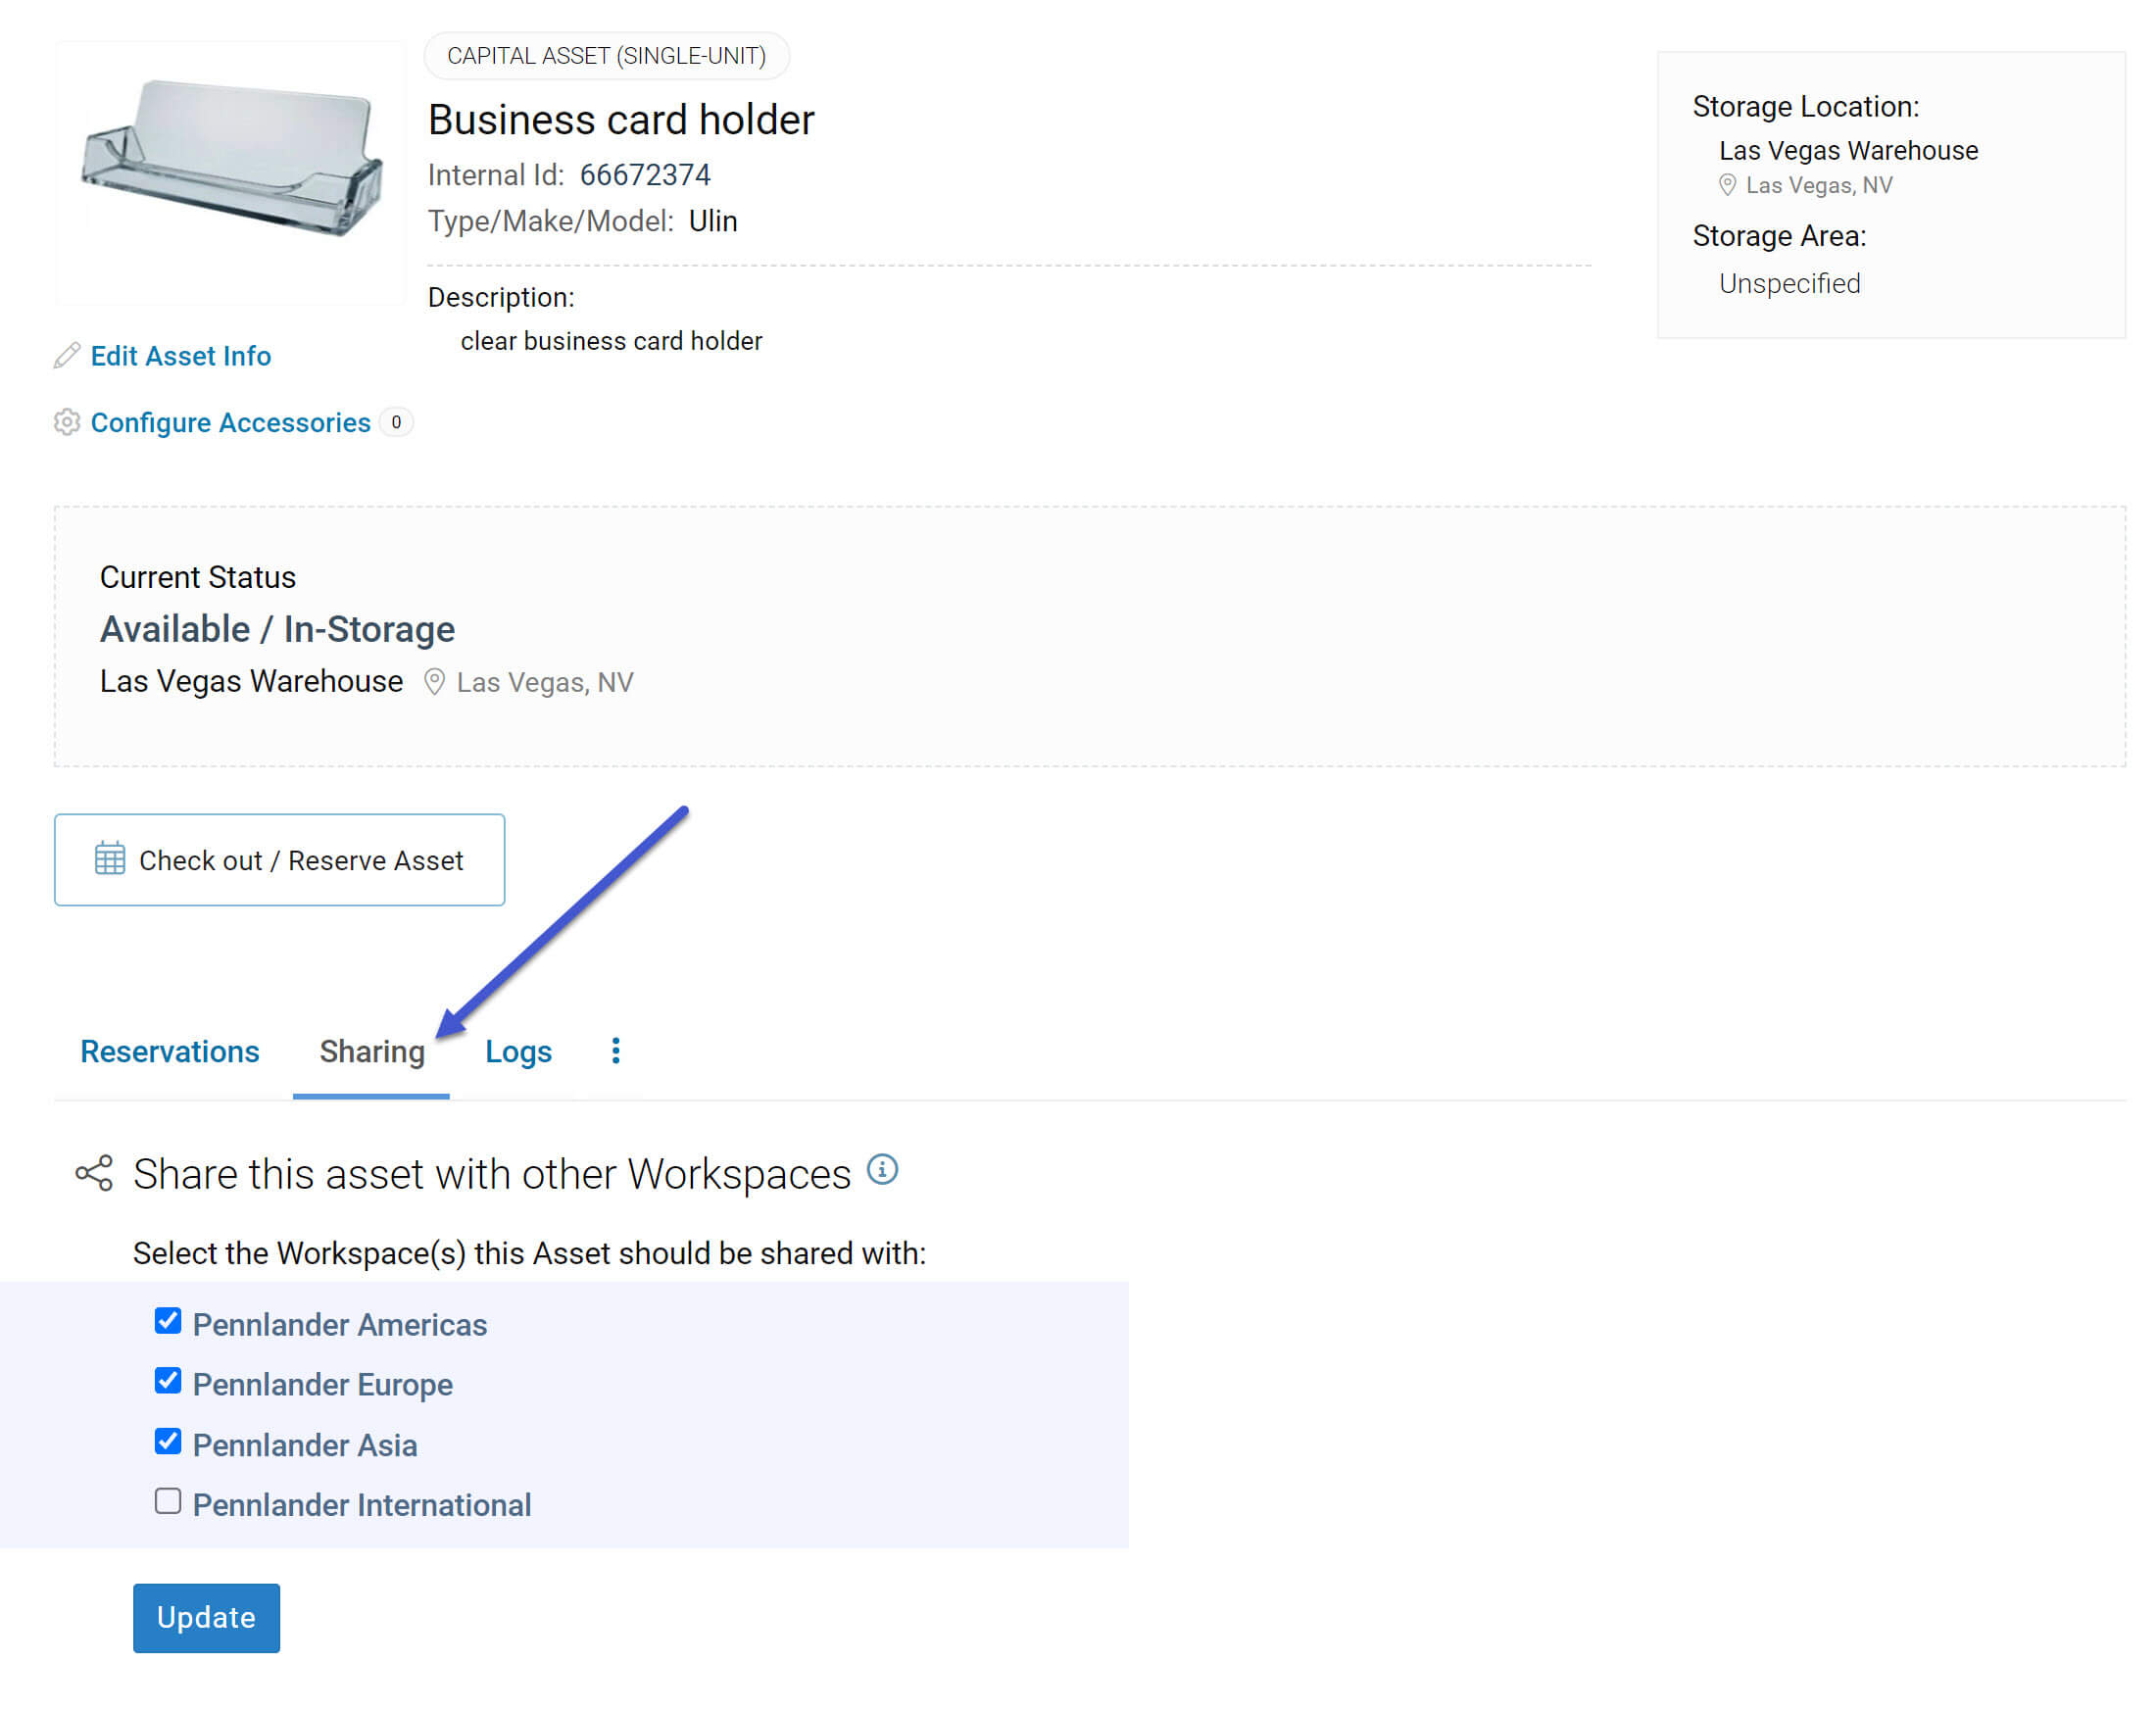
If you are on the ExhibitDay Enterprise plan and have multiple workspaces, when you view an asset (in the “Manage Assets” area), you’ll see a “Sharing” tab. Under the “Sharing” tab you can specify which of your other workspace(s) the asset should be shared with.
Where do Shared Assets Appear?
Shared assets will be made available under the Event “Asset Reservations” tab of the workspaces they are shared with. Shared assets will not appear in the “Manage Assets” area of the workspace they are shared with. For example, if you share an asset from workspace A with another workspace, B, then any event in workspace B can reserve the shared asset; however, the asset will not appear under the “Manage Assets” area of workspace B. Any change to the asset itself (like changes to the asset name, model number, image, etc.) must be made in the asset’s origin workspace (workspace A).
A share icon  is displayed in front of the names of shared assets.

Can Users of the Workspace the Asset is Shared With See the Cost of the Asset?
The Cost of an asset can be set when adding/editing the asset (in the Manage Assets area). When you share an asset with another workspace, you have the option to specify whether or not the users of that workspace can see the cost of the shared asset.
Note: The cost of an asset is shown as a reference when tagging an asset in a giveaway for an event (in order to help calculate the cost of the giveaway); for more information about tagging assets in giveaways of an event, please refer to this article.
What Happens When a Shared Asset is Unshared?
Unsharing (i.e., disabling sharing of) an asset that has already been shared with another workspace prevents new reservations of the asset from the workspace it was shared with — any existing reservations that may have already been made while the asset was shared will not get canceled.