You can view metrics and analytics for your events using the Workspace Metrics & Analytics page. To view the Workspace Metrics & Analytics page, click on the “Metrics & Analytics” link in the dropdown menu of the top navigation bar.

ExhibitDay is the all-in-one Software-as-a-Service solution to track and manage your trade shows.
You can view metrics and analytics for your events using the Workspace Metrics & Analytics page. To view the Workspace Metrics & Analytics page, click on the “Metrics & Analytics” link in the dropdown menu of the top navigation bar.
A Shareable Event Board is an automatically generated page that displays a list of events in your workspace based on the predetermined filter criteria that you select.
Each Event Board has a unique URL (web address) that can be used to view the board without having to log into ExhibitDay. You can share this URL with people interested in the events you’re attending, or publish it on your organization’s website to inform your customers about your upcoming shows.
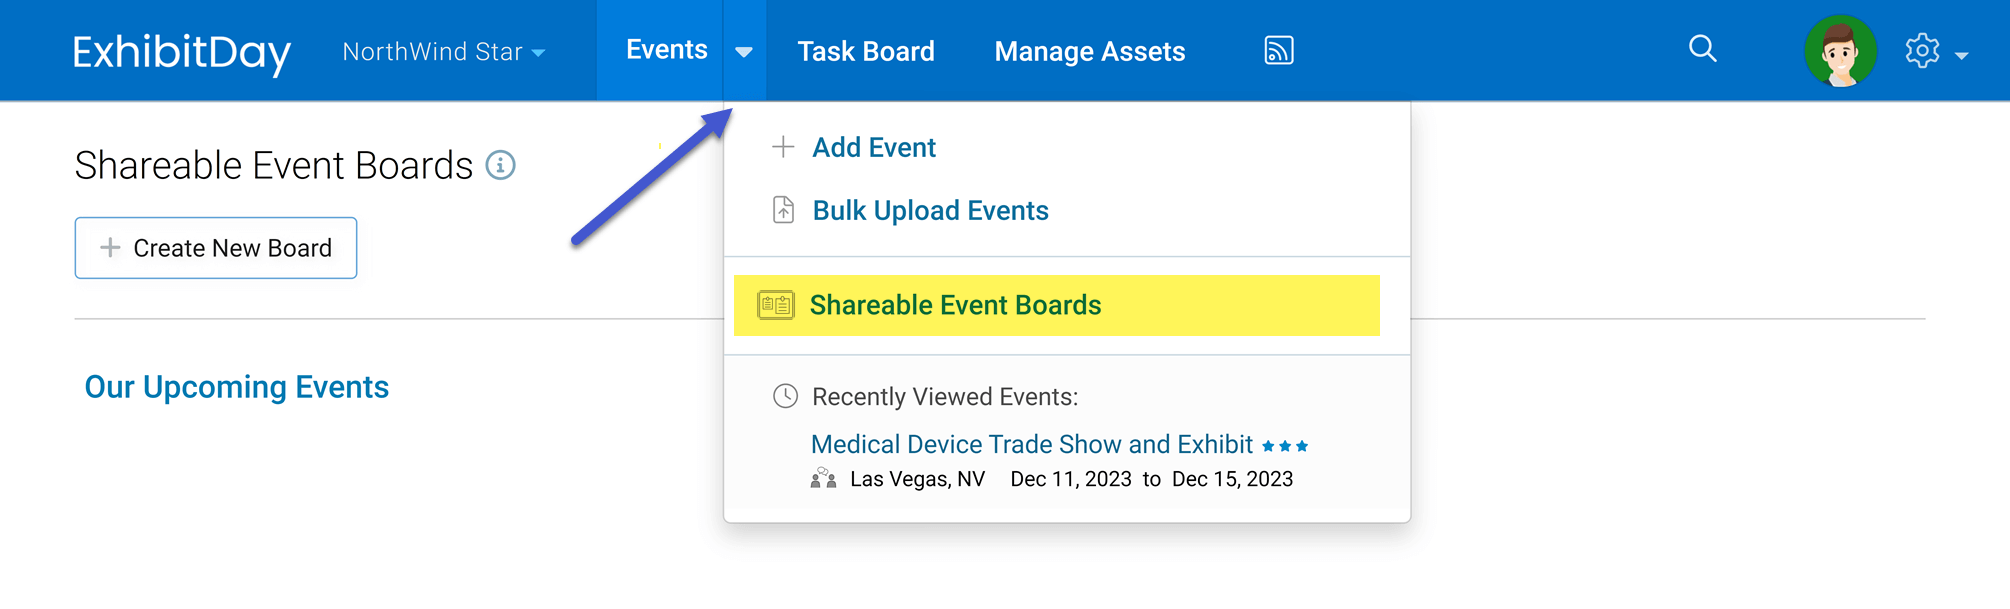
You can get to the Event Board Management Area from the dropdown menu of the Events tab.
Once you create a board, you can configure it to be filtered down based on various criteria. You can also select the information you would like to have displayed on the board about each event.
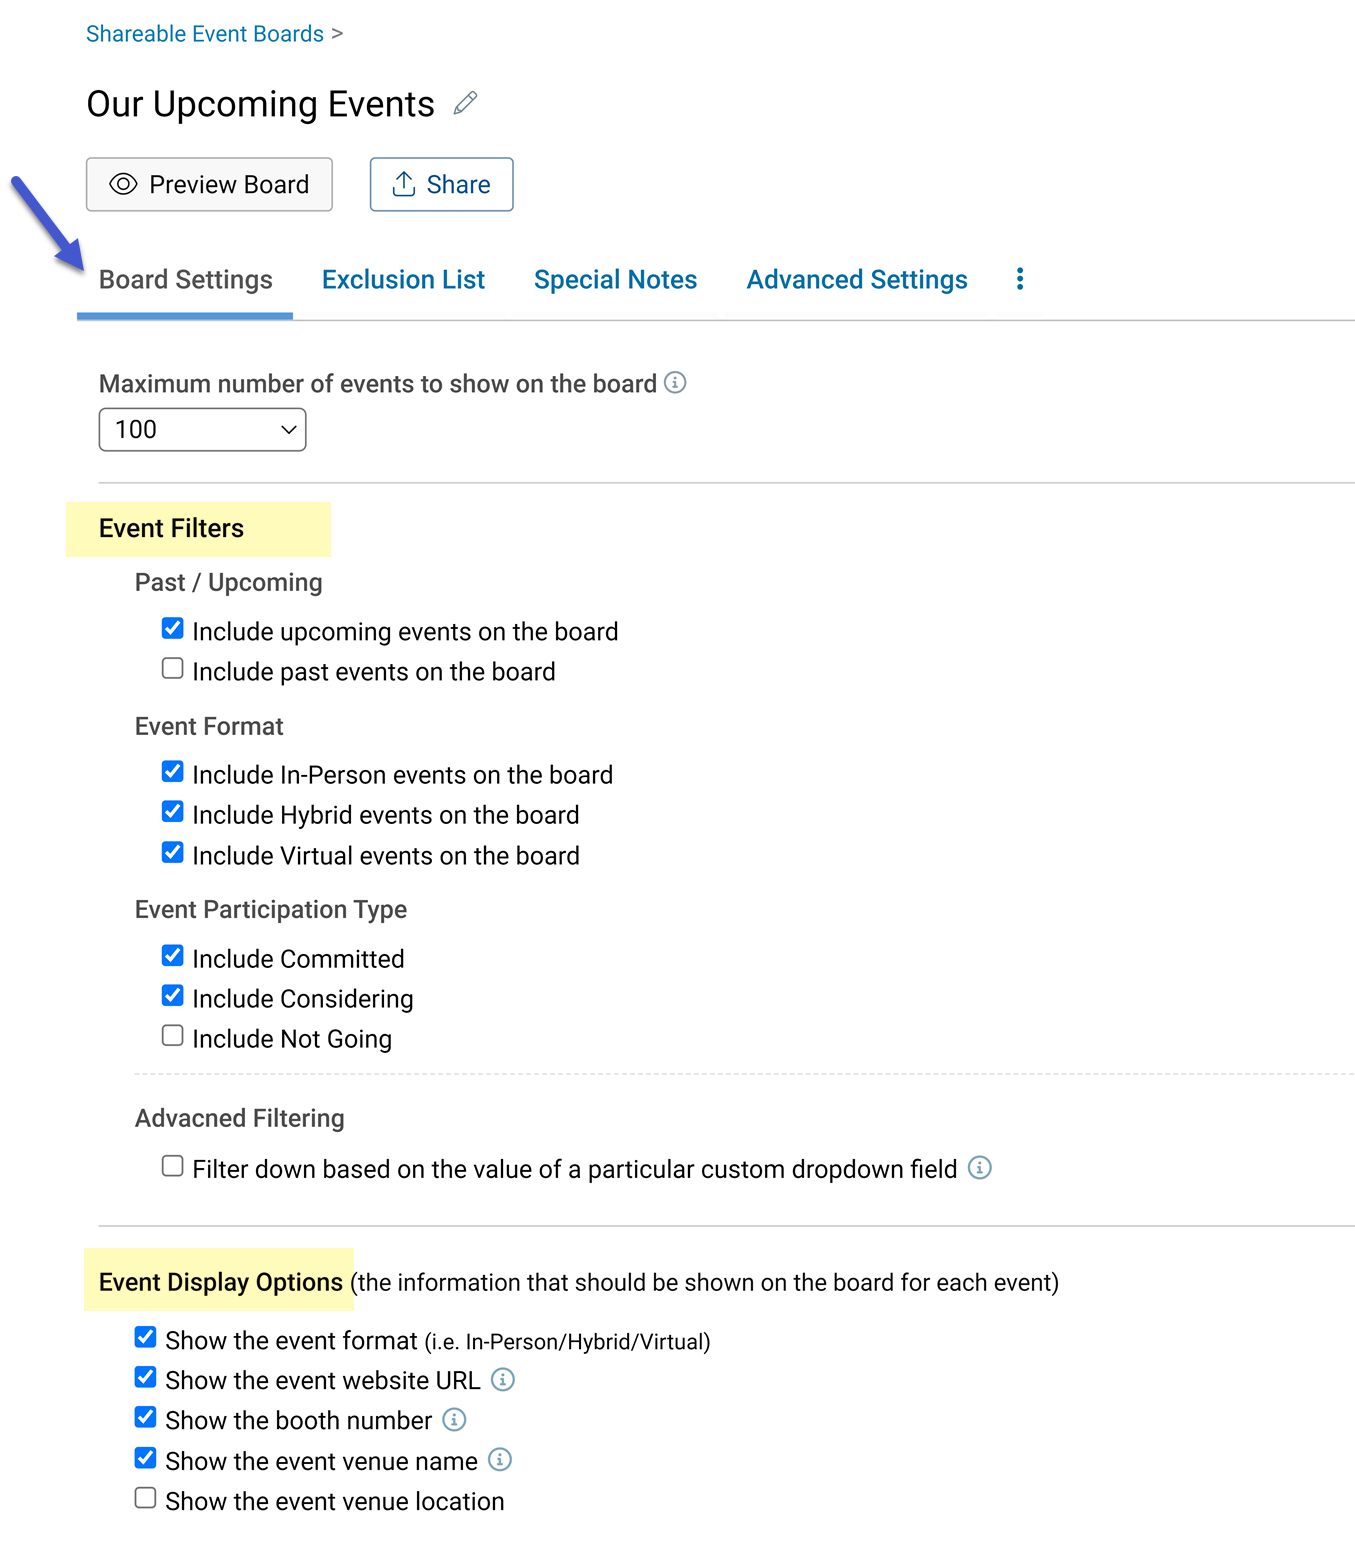
Under the “Advanced Filtering” section of the “Board Settings” tab, you can configure your event board to be filtered down based on the value of any Custom Dropdown field.

Example:
You can add a custom dropdown field to your events and name it “Publish this event to the Event Board?” (with the available options: ‘Yes’ and ‘No’). Then, you can configure your board to be filtered down to events that have the value ‘Yes’ selected for that dropdown.
Once you’re done making configuration changes to your event board, you can click the “Preview Board” button to see what your event board looks like when you share its URL with someone or embed it in a web page.
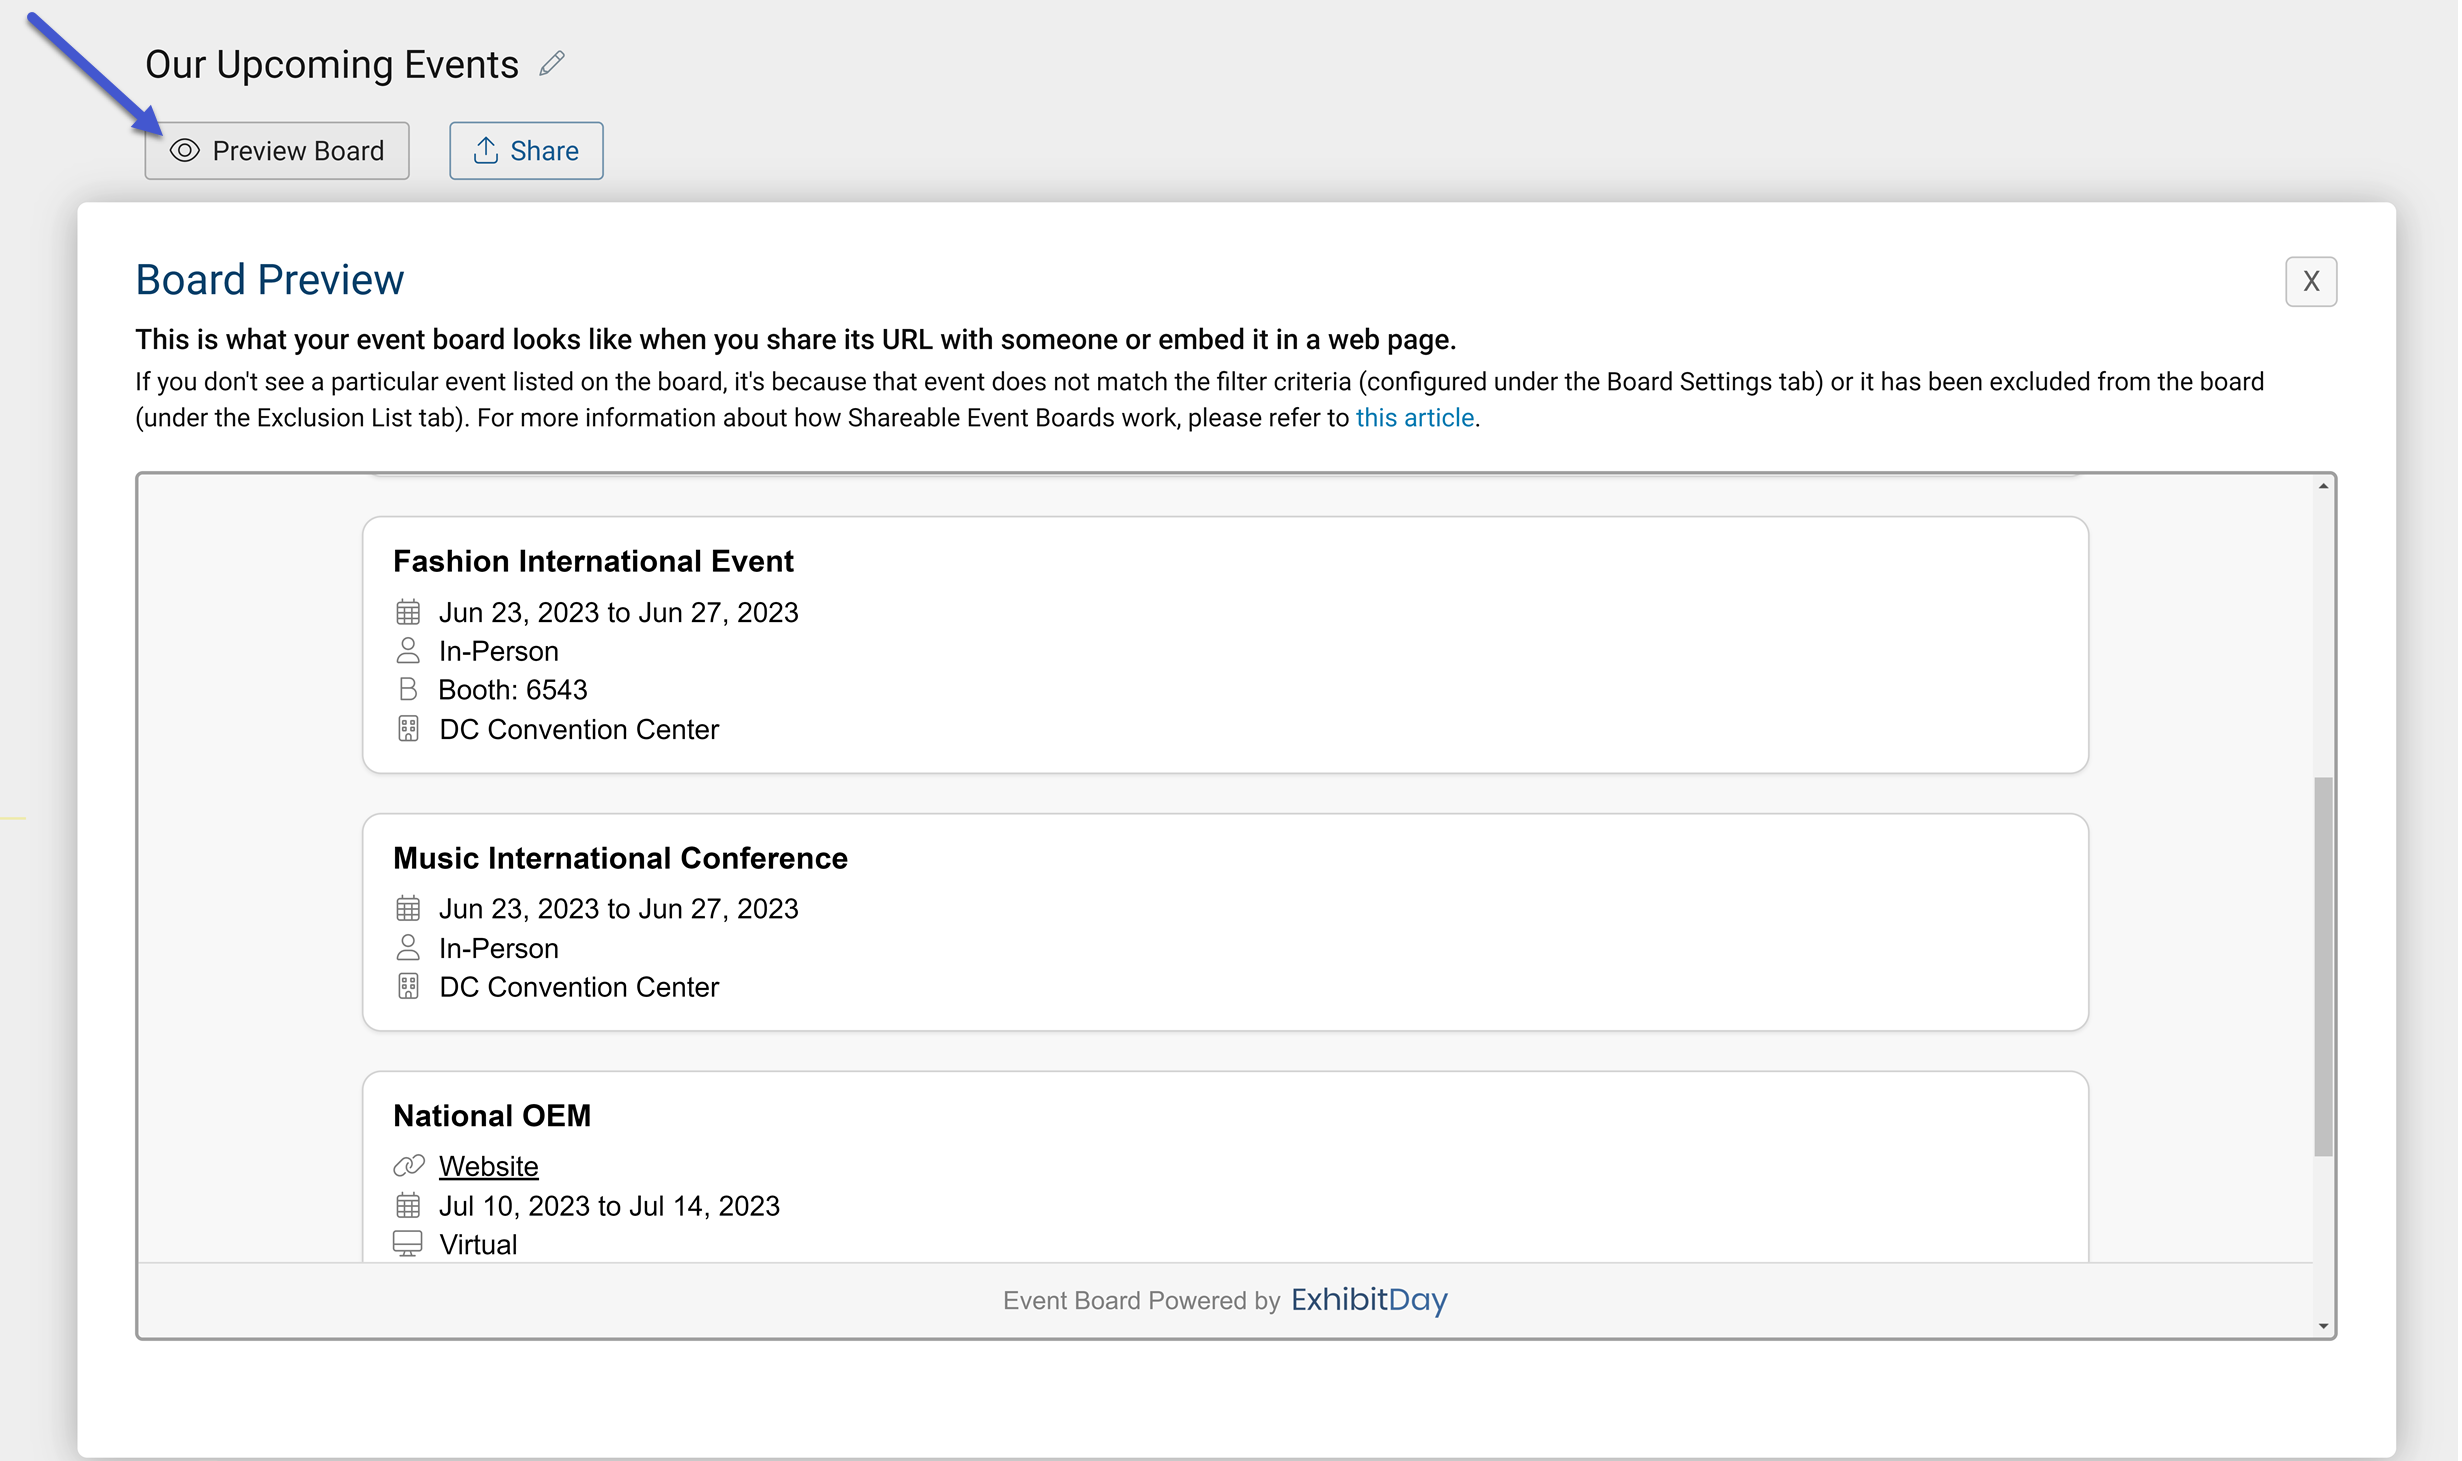
Note: If you don’t see a particular event listed on the board, it’s because that event does not match the filter criteria (configured under the Board Settings tab) or it has been excluded from the board (under the Exclusion List tab).
You can obtain the board’s shareable URL (unique web address) by clicking the “Share” button.
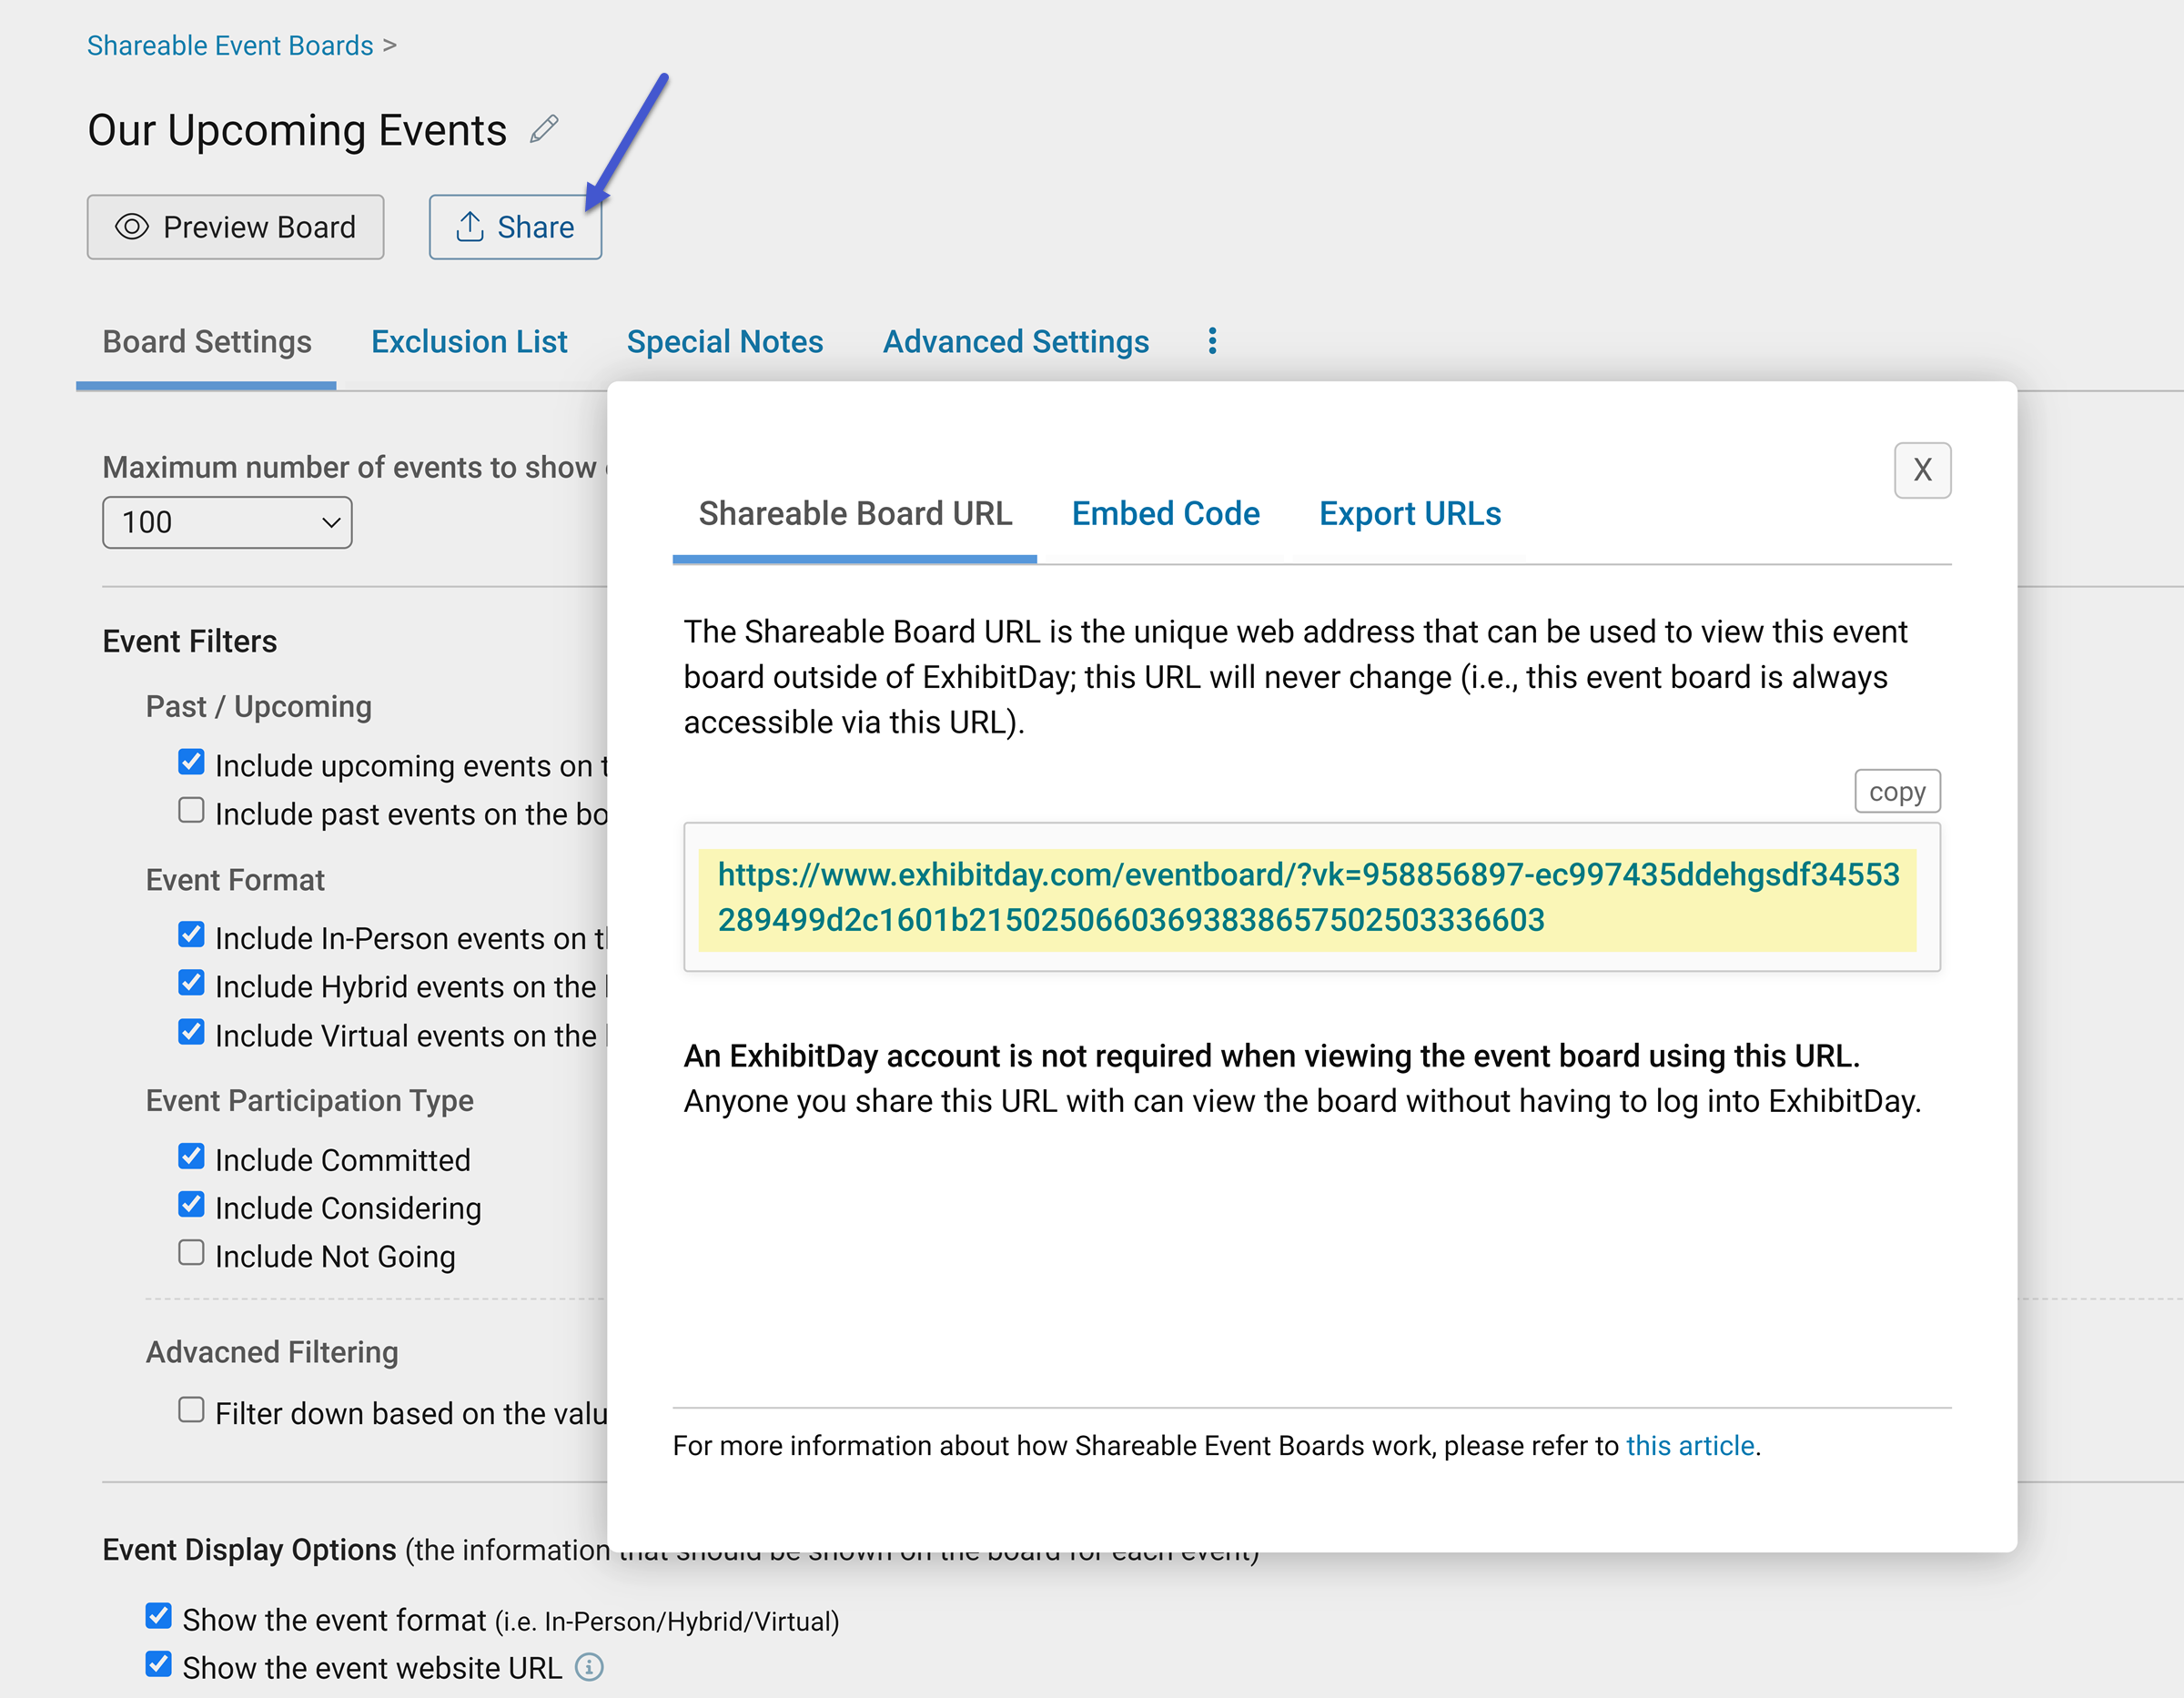
Note: The board’s shareable URL will never change (i.e., the event board is always accessible via this URL). Also, an ExhibitDay account is not required when viewing the event board using this URL. Anyone you share this URL with can view the board without having to log into ExhibitDay.
You can obtain the HTML markup for embedding the event board on a website from the “Embed Code” tab.
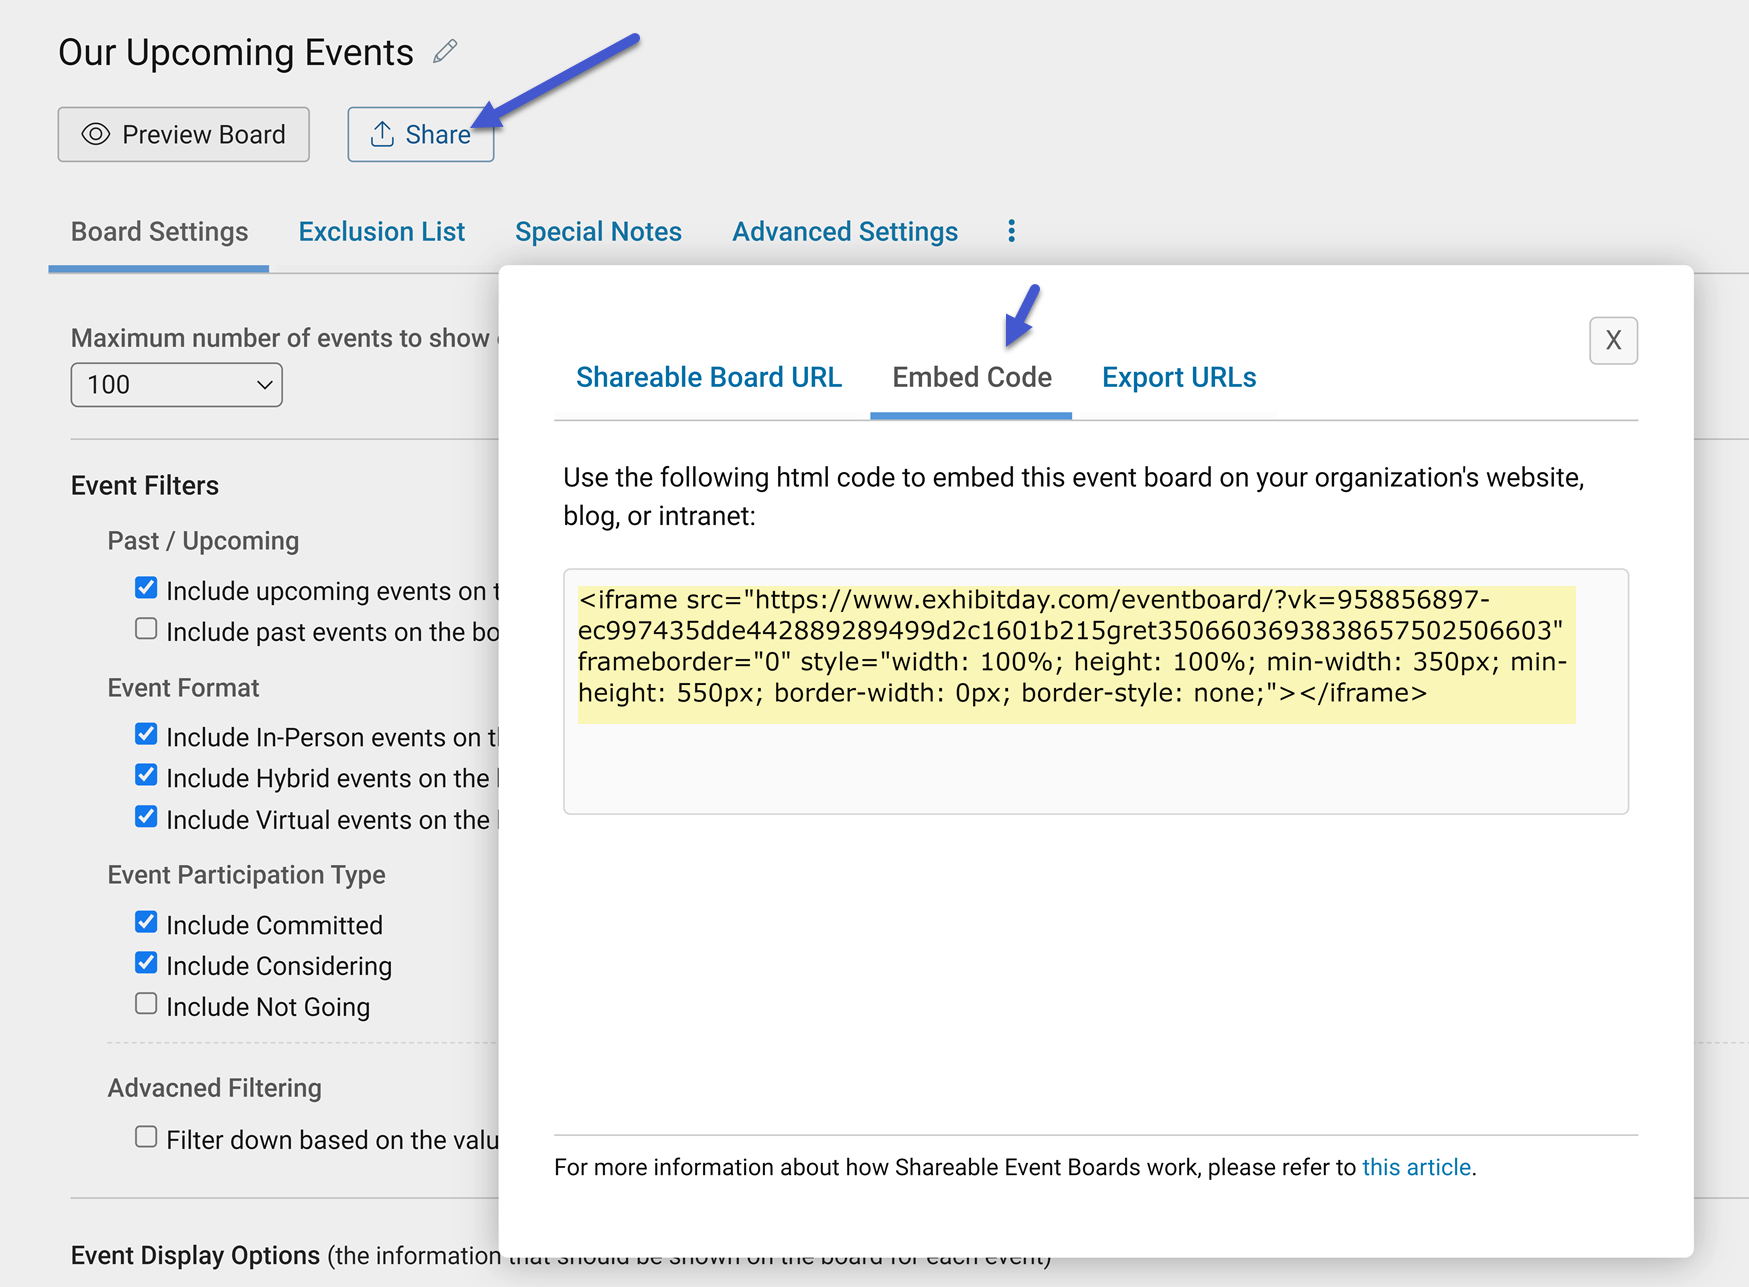
Note: if you are using the WordPress as your CMS, insert the embed code as a “Custom HTML” block.
The board can be exported in 3 formats: .csv (spreadsheet download), JSON, and XML. The unique URLs for exporting the board can be obtained from the “Export URLs” tab.
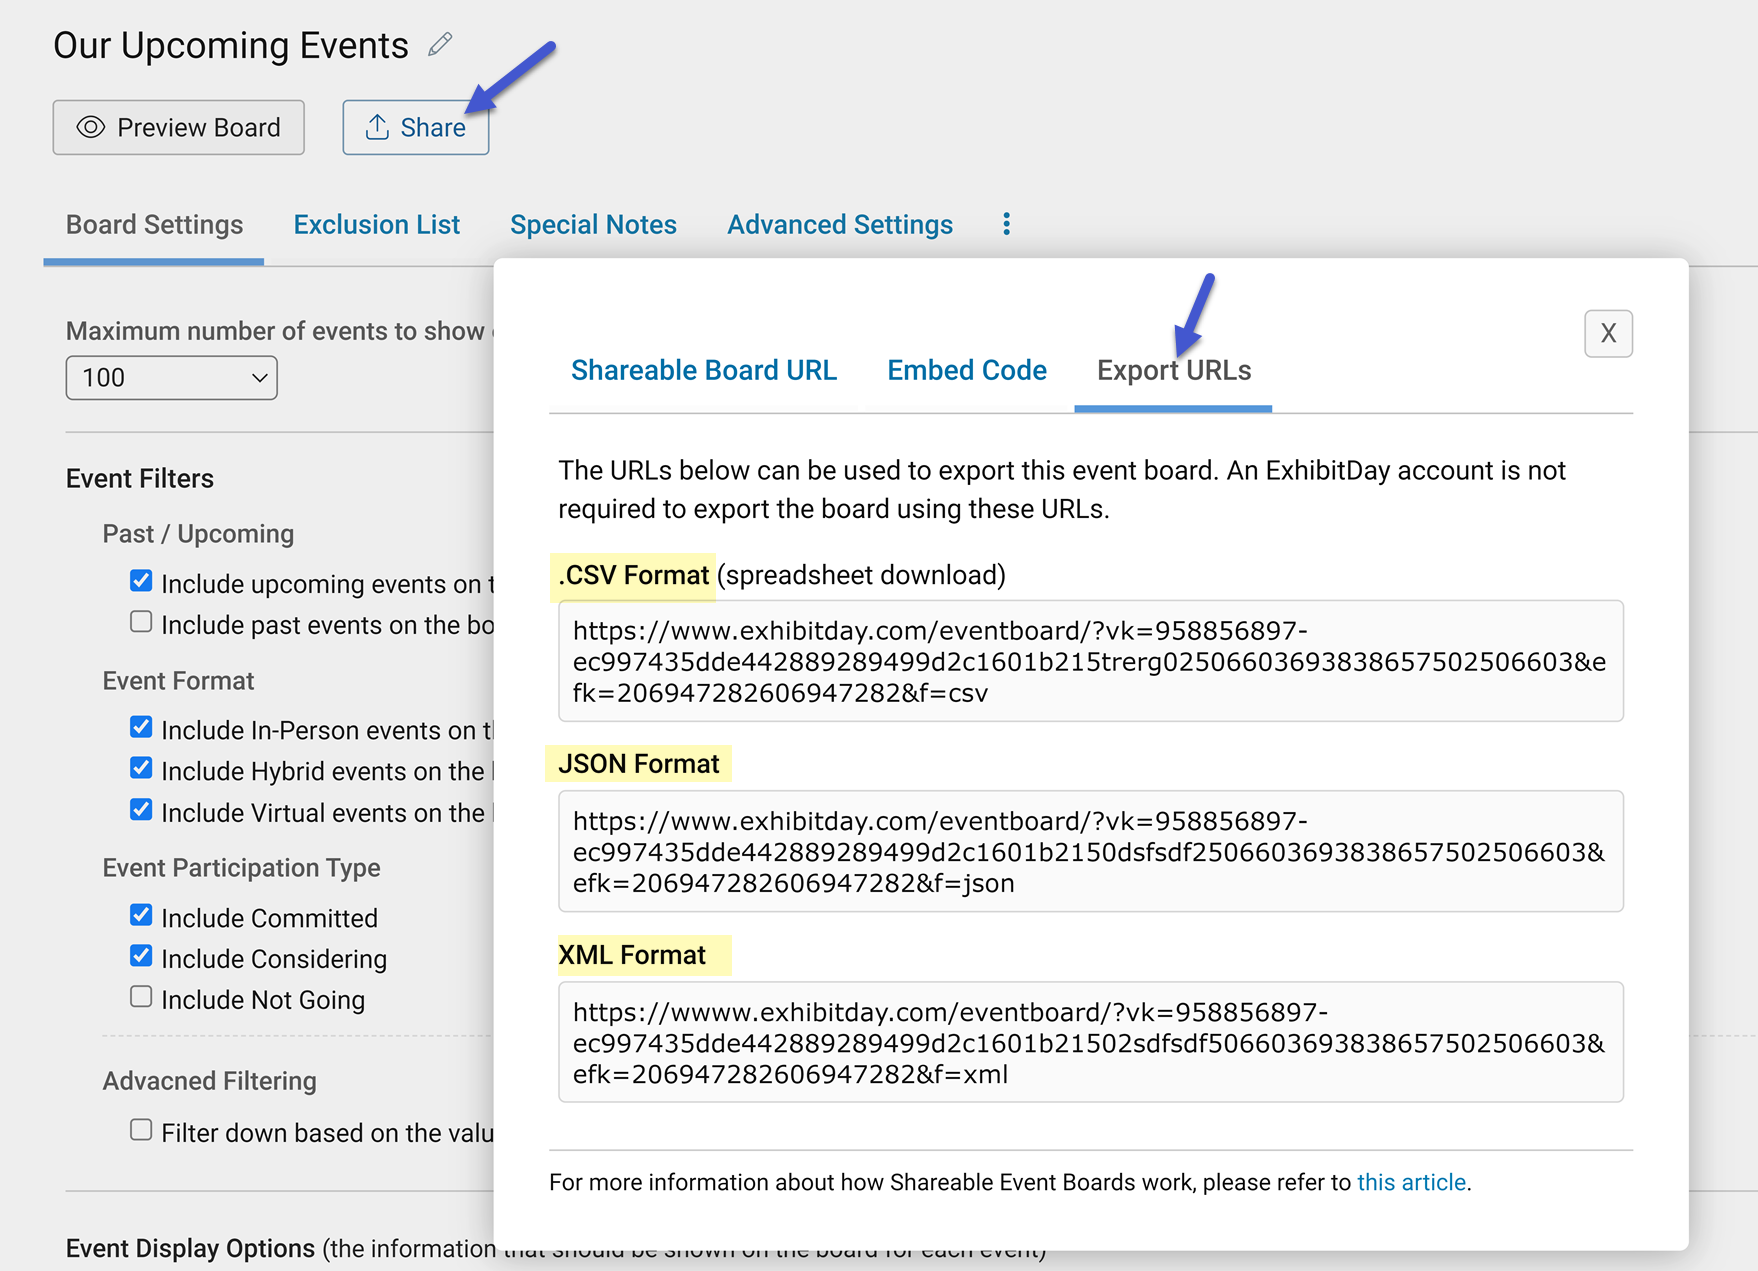
Note: An ExhibitDay account is not required for exporting the event board using the export URLs. Anyone you share the export URLs with can export the board without having to log into ExhibitDay.
If you would like to change the look and feel of an event board, use the “Custom CSS” field under the “Advanced Settings” tab to override the default styles.
Note: The Custom CSS setting is an advanced/technical setting that requires familiarity with Cascading Style Sheets (a design language used by programmers and web developers).
As an example, if you add the CSS styles below into the “Custom CSS” field, the board’s font size will be smaller, the background color will change to purple, the board name will be purple, and the background color of each event on the board will be light yellow.
#event-board { font-size: 12px; }
.event-item { background-color: lightyellow; }
#event-board-name { color: purple; }
body { background-color: pink; }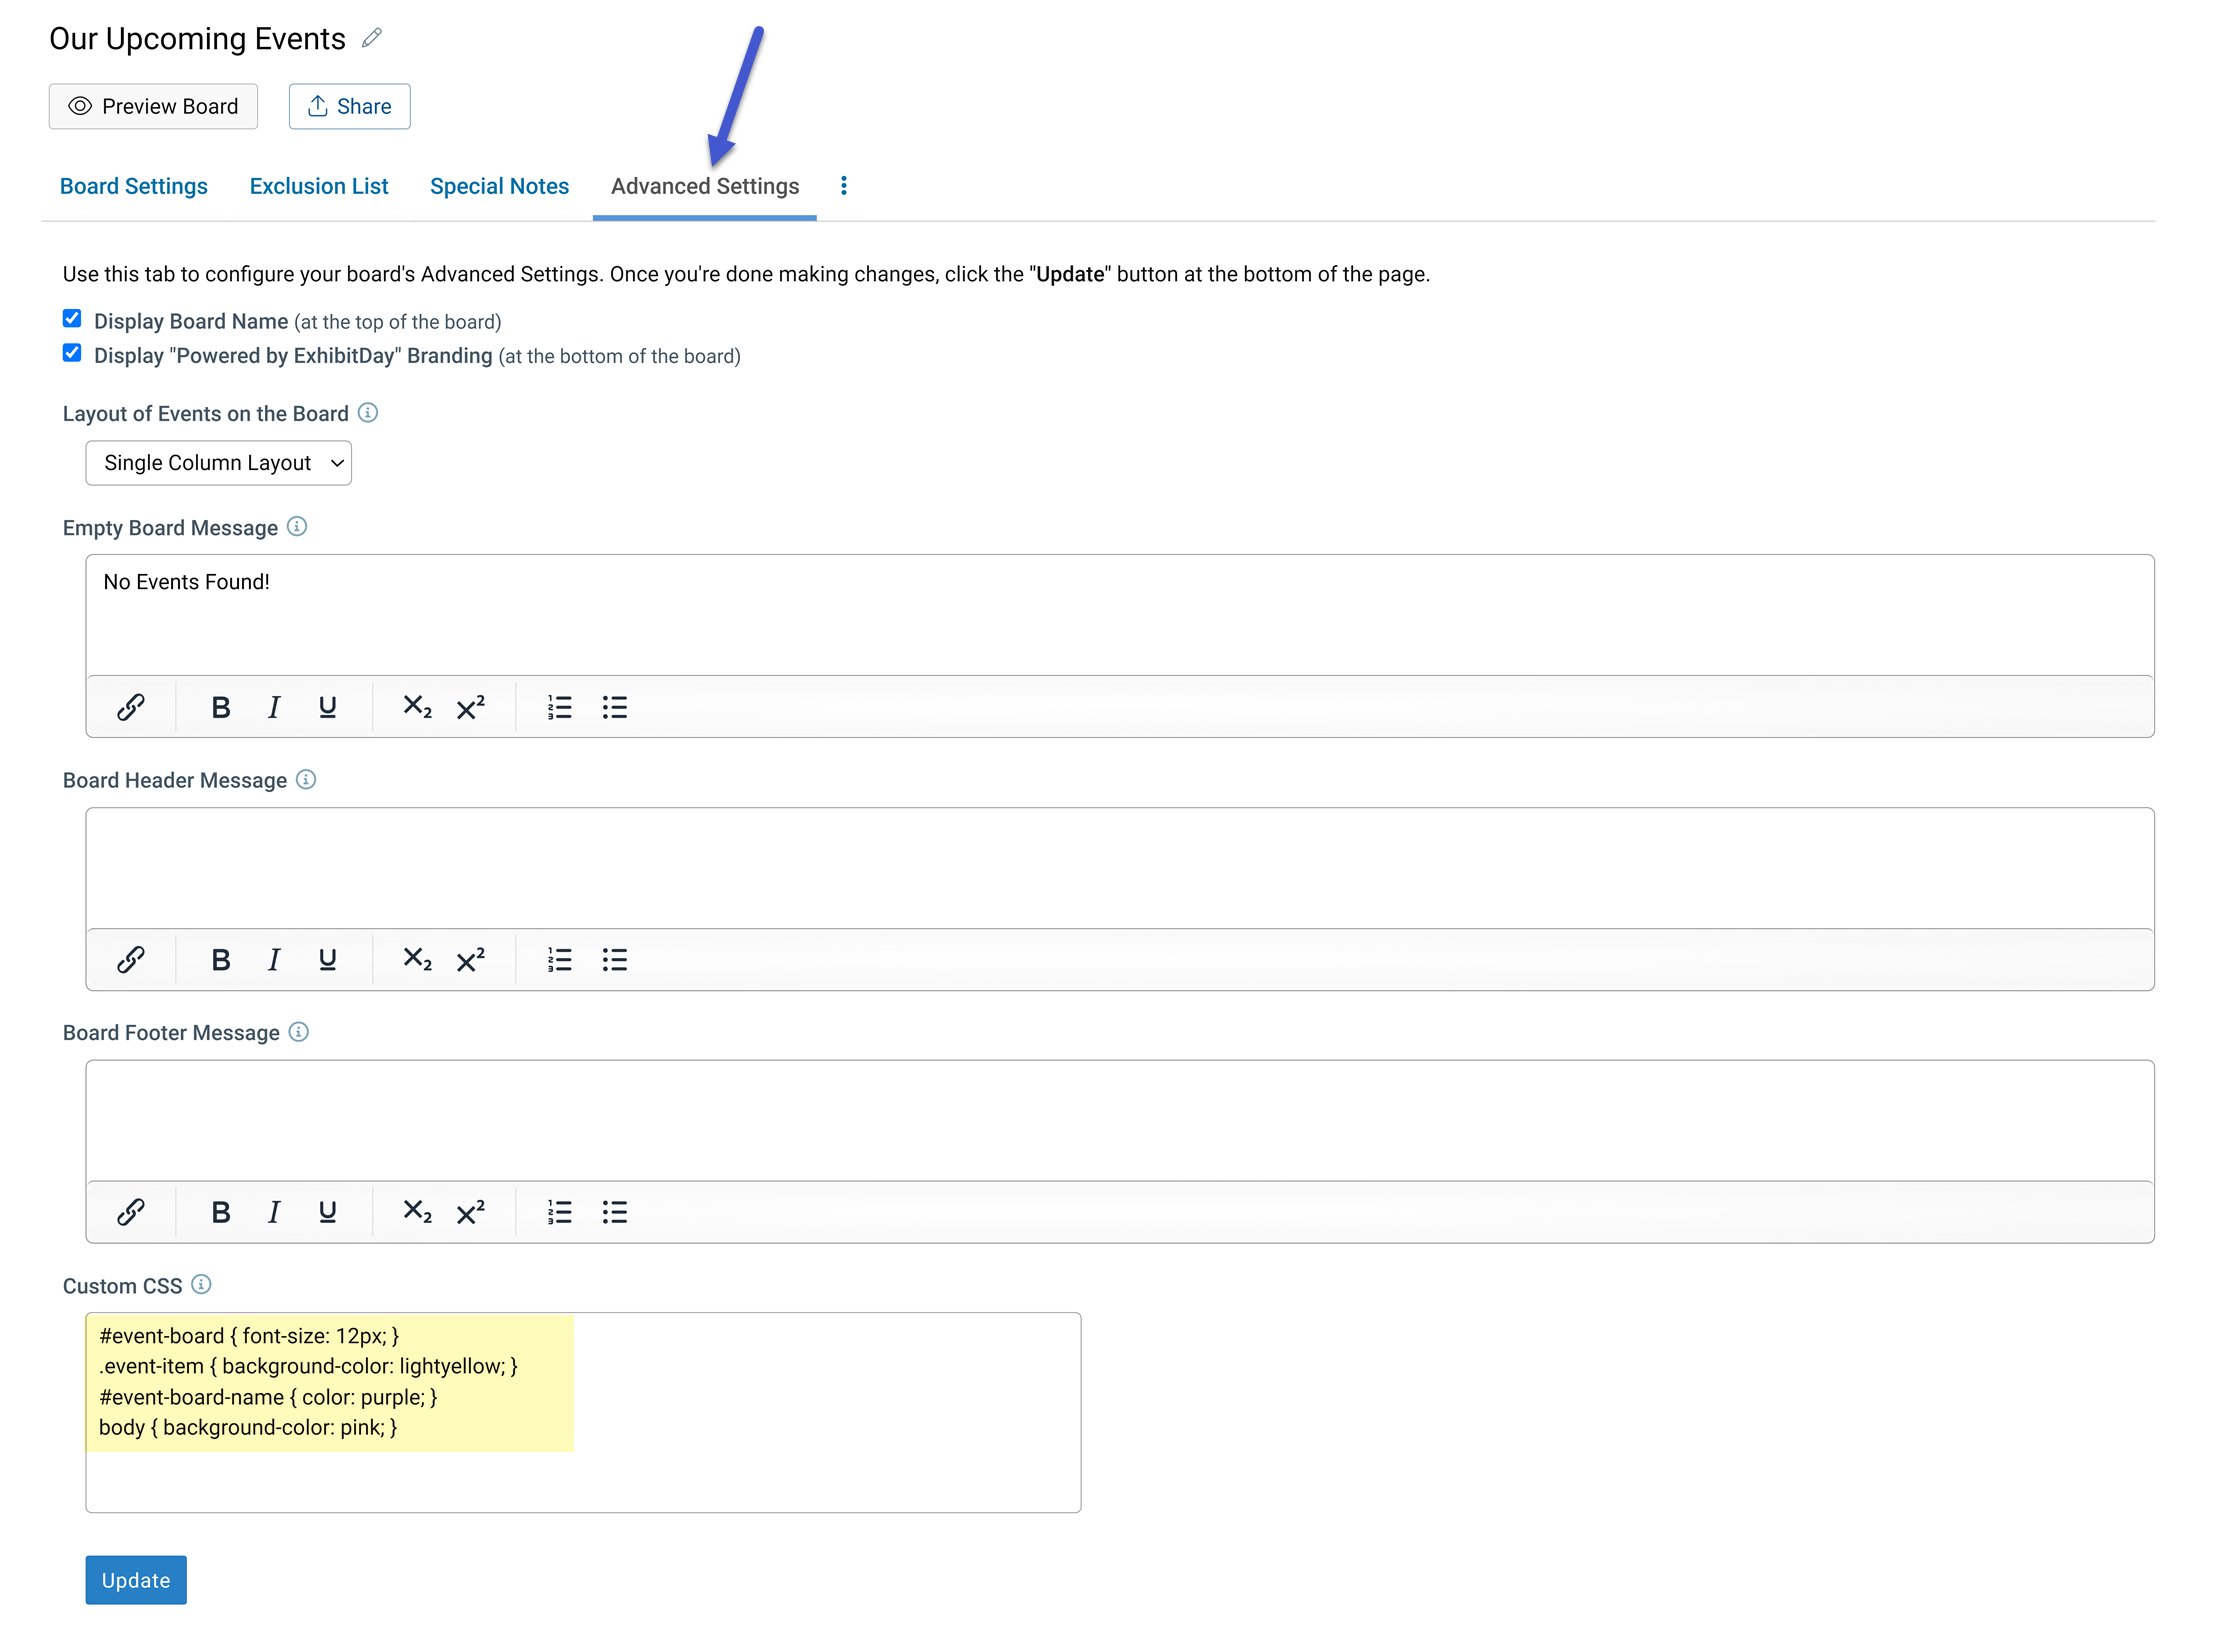
You can obtain a full list of default styles from following css file (which is referenced when viewing an event board): https://www.exhibitday.com/content/eventboard/eventboard.css
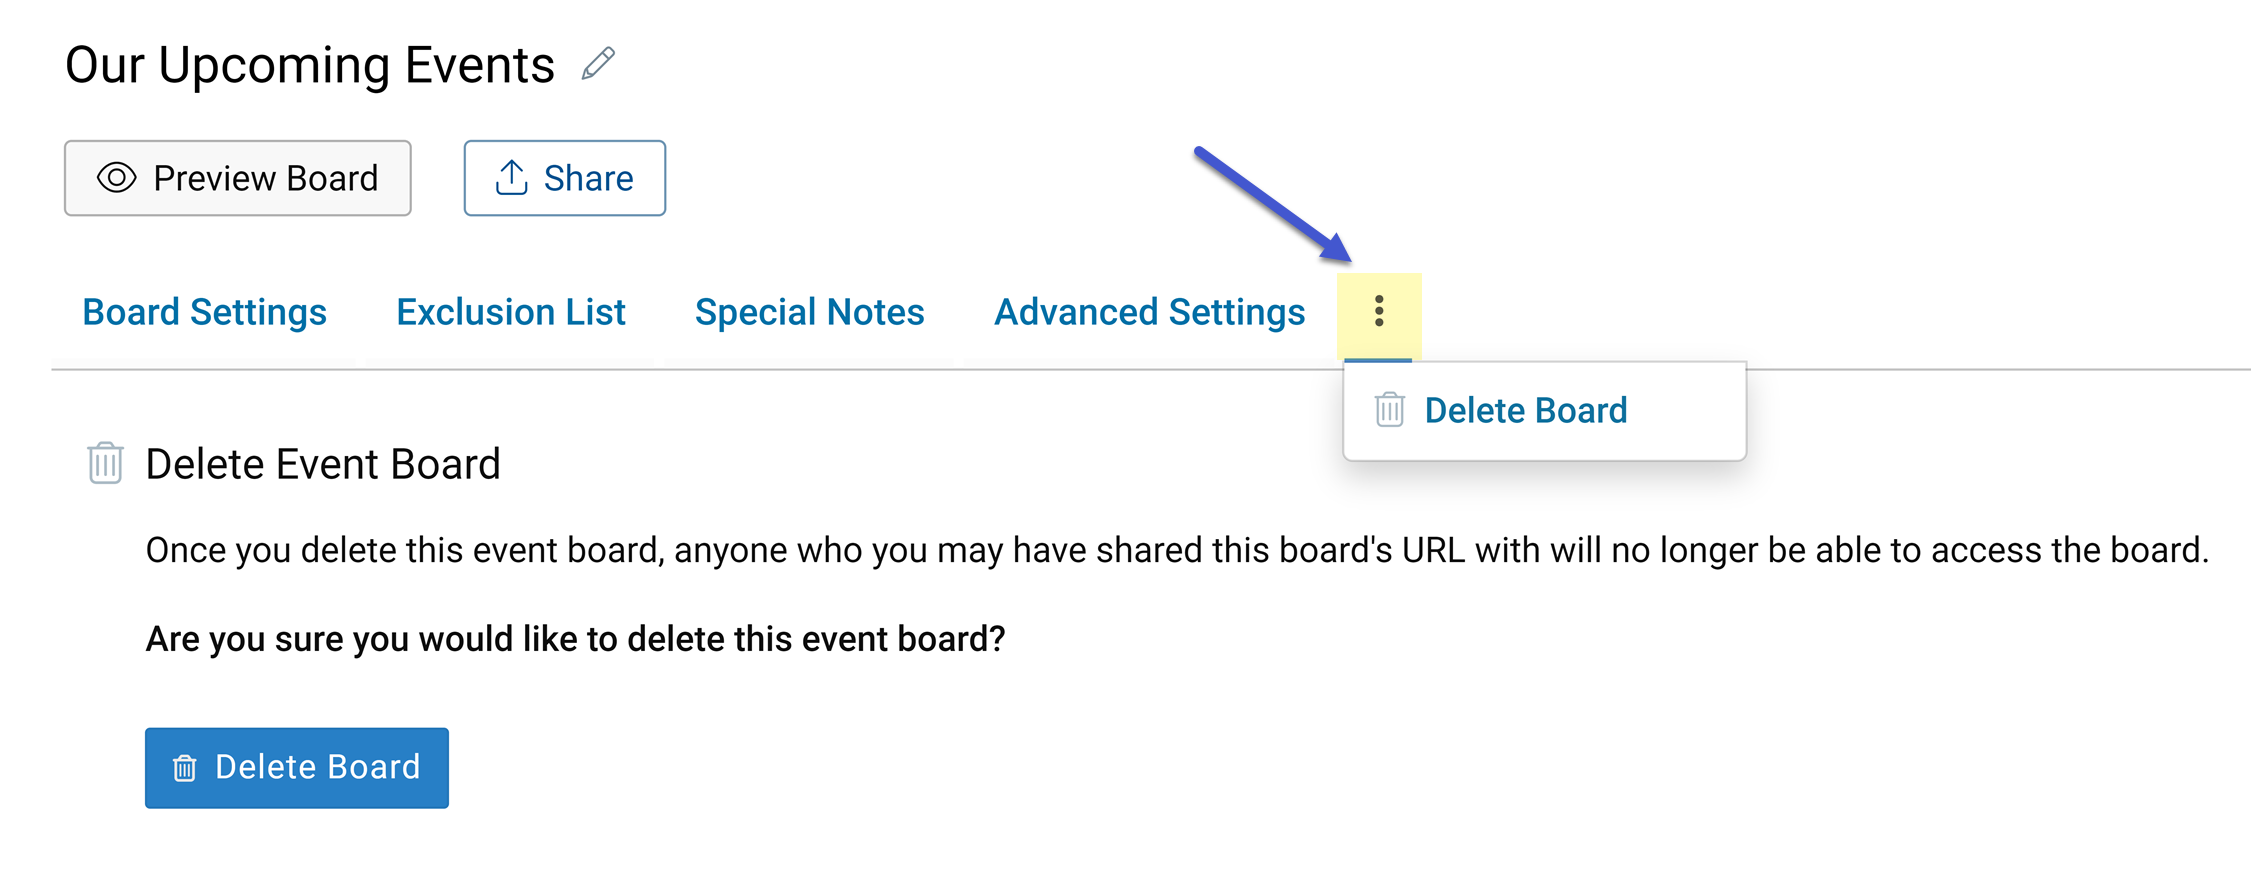
You can delete an event board by clicking the “Delete Board” option under the extended menu of the event board tab strip.
While the ExhibitDay Enterprise plan offers unrestricted access to all the features of Sharable Event Boards, the Lite, Professional, and Premium plans come with the following restrictions:
We are honored to be awarded the badge of 2023 “Best Ease of Use” in the Event Management Software category by Capterra, a subsidiary Gartner Digital Markets.
Gartner Digital Markets, the provider of Capterra, Software Advice, and GetApp, evaluates software solutions based on customer reviews in several key areas, including functionality, user experience, customer satisfaction, and overall performance. ExhibitDay has emerged as 2023’s top choice for “Ease of Use” in the Event Management software category.
This recognition is a testament to ExhibitDay’s user-friendly interface, intuitive features, and robust capabilities.
We are most thankful to our users. Many of the features and enhancements in ExhibitDay are built based on direct feedback from customers. As always, we welcome all your comments and feedback as we strive to create the best trade show planning platform known to humankind. 🙏🎉🚀
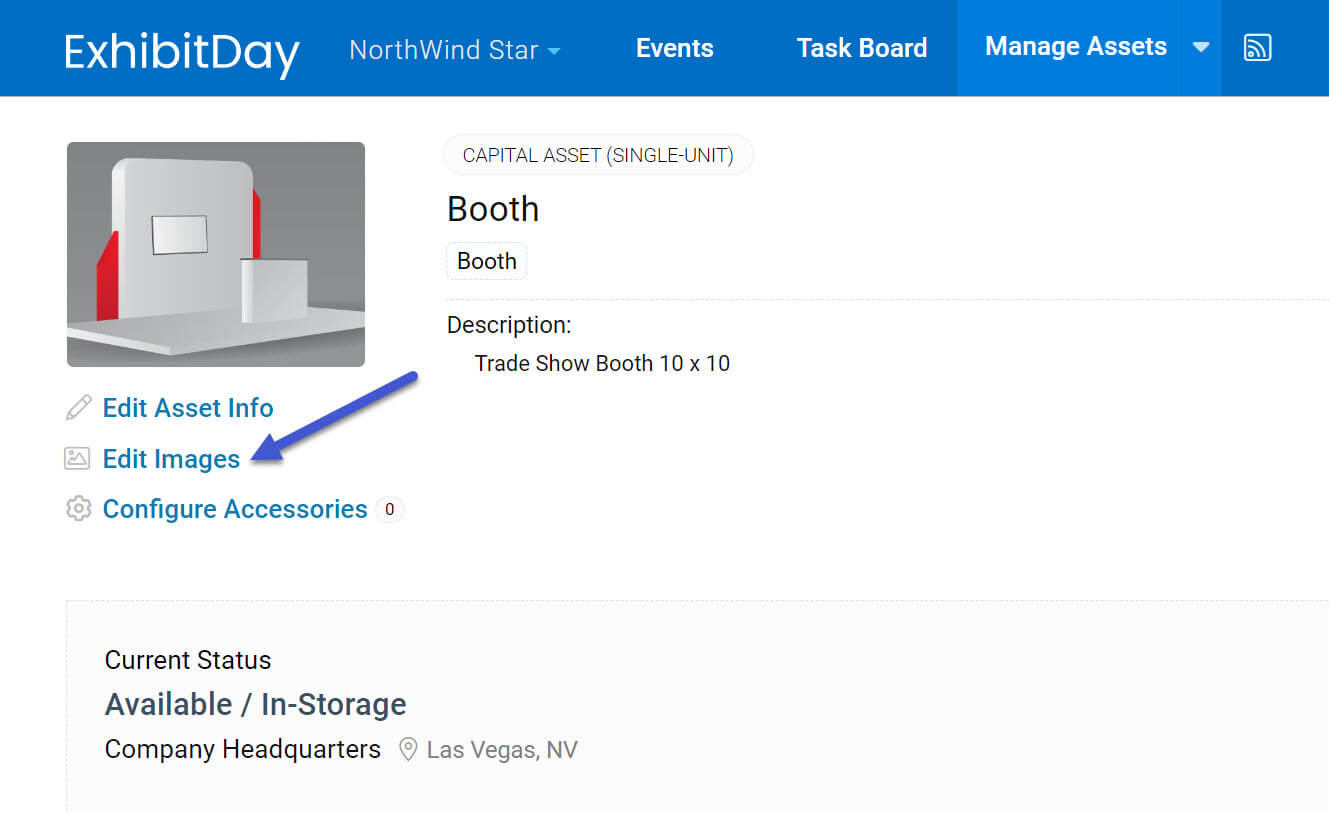
You can upload up to 5 images for each asset.
Use the “Edit Images” link on the asset page in order to manage images for a given asset.
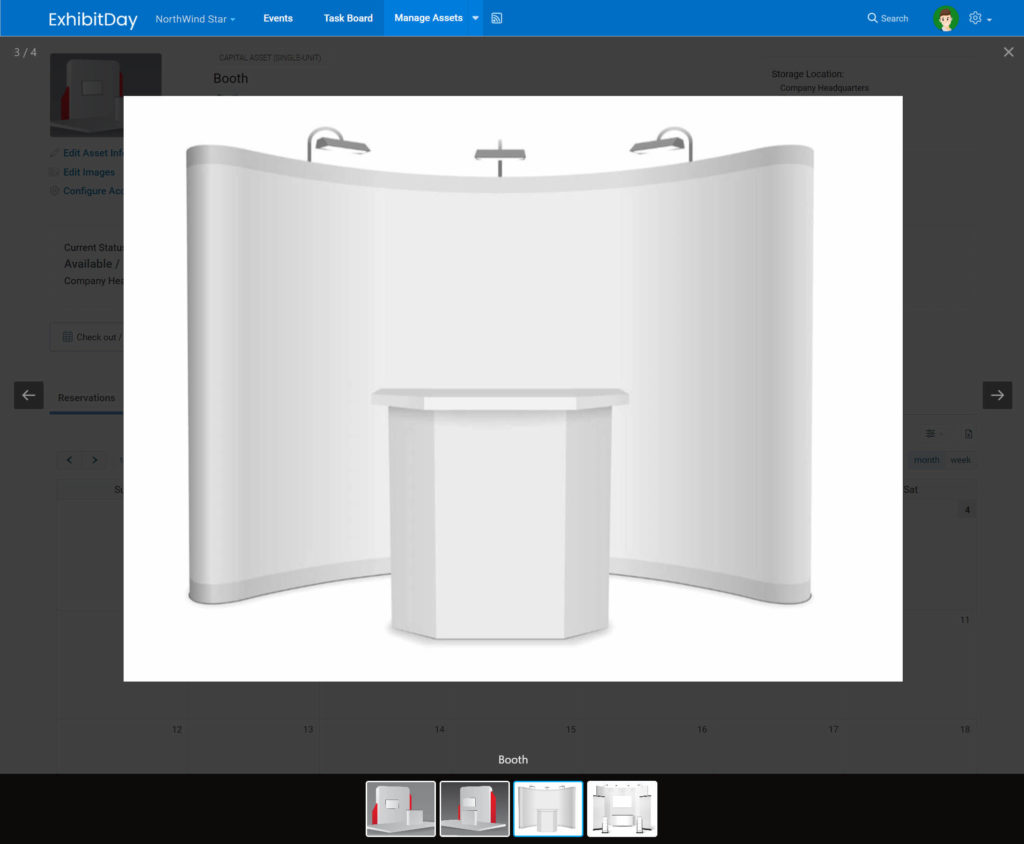
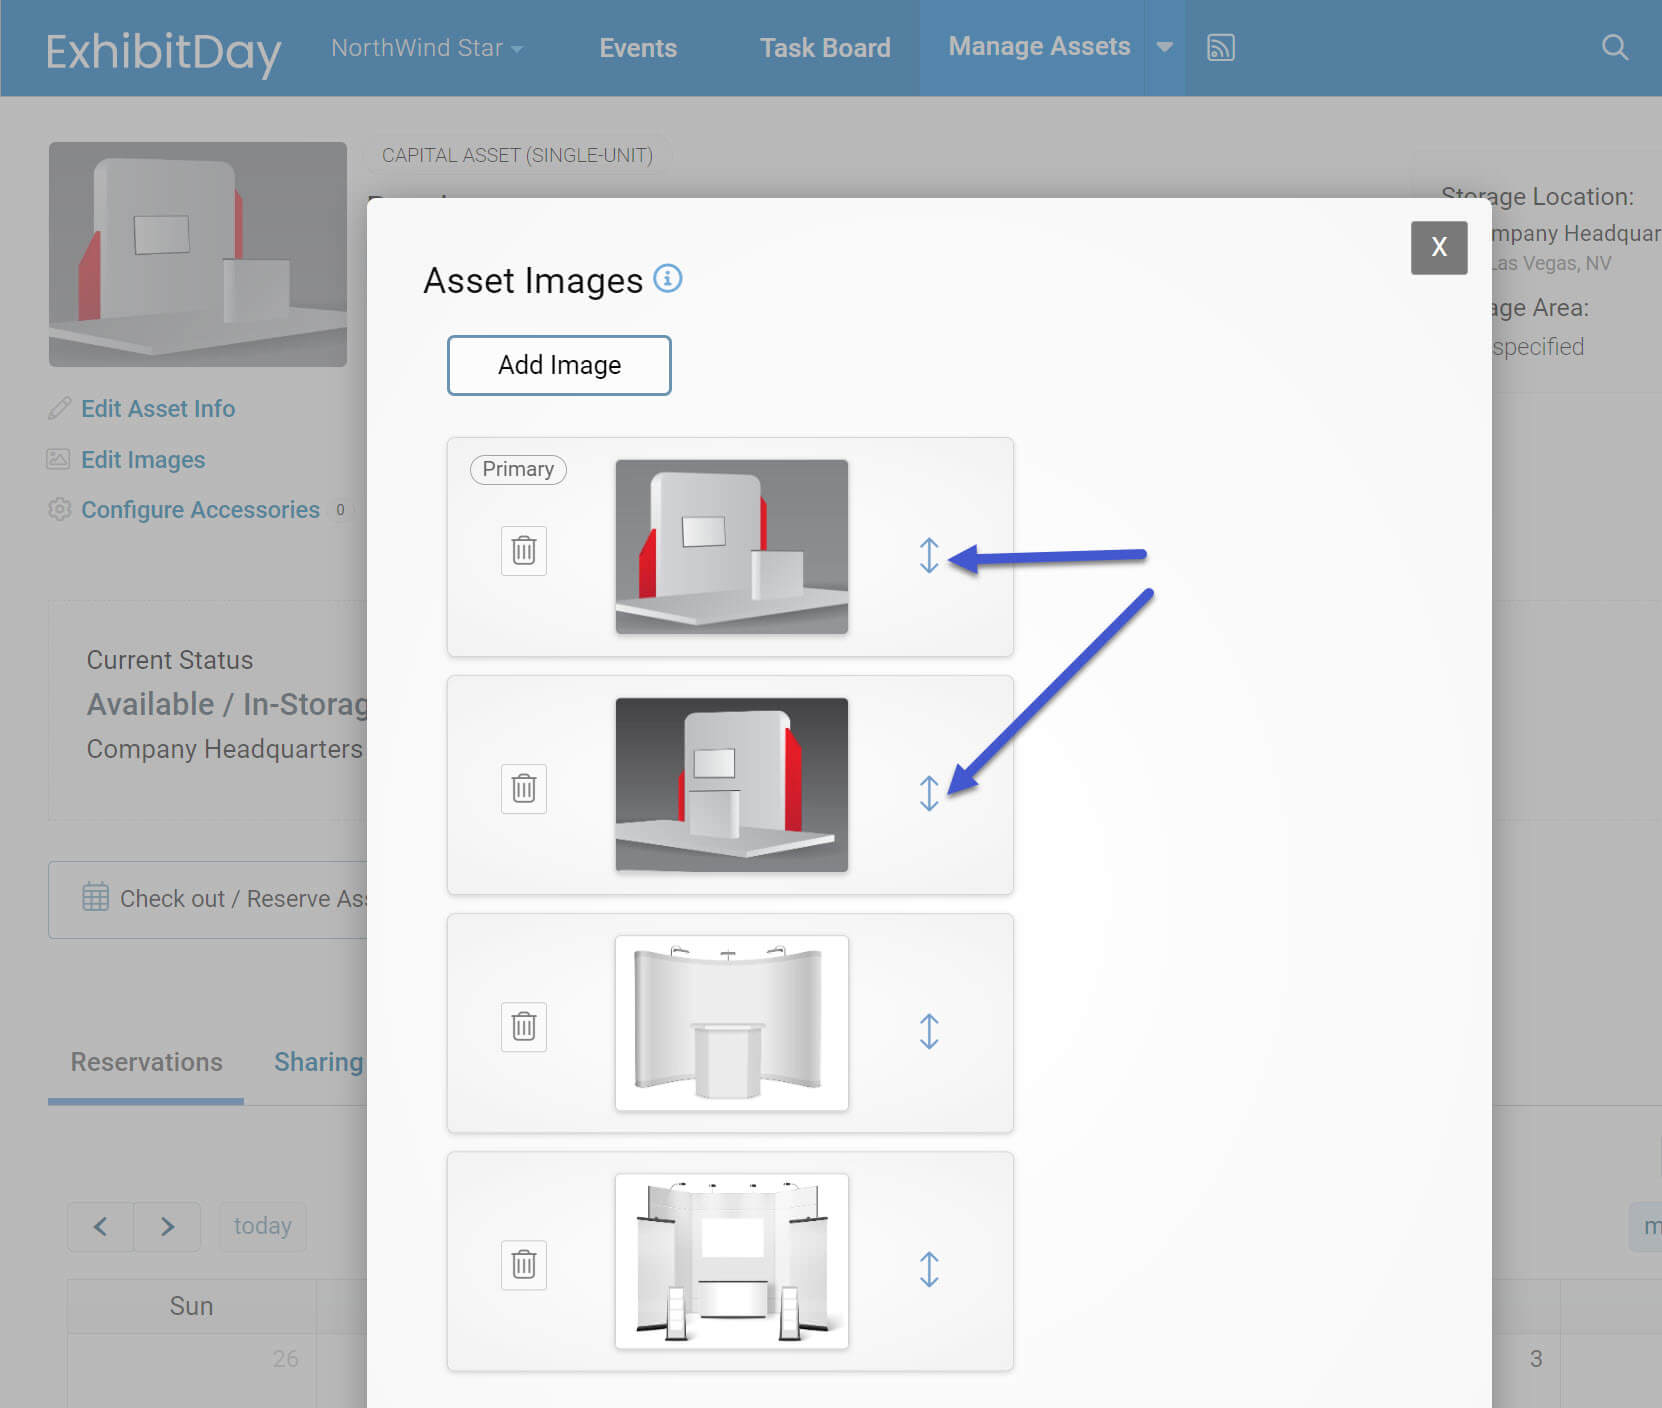
On the Asset Images popup dialog, click the “Add Image” button in order to add a new image for your asset. After you select the image file that you’d like to use, you’ll see a canvas that helps you crop the image in order to make it have the standard ExhibitDay asset image aspect ratio (125 / 94). You can move the crop area by clicking down and dragging it around. You can expand or shrink the crop area by clicking and dragging its corners. You can use the buttons at the top of the canvas to zoom, flip and rotate the image on the canvas.

If you upload more than one image, the order in which the uploaded images are listed defines the sequence of the images when viewing the image gallery for the asset; the first image will always be the primary image for the asset. You can change the ordering by click-and-dragging the image handles.
Once you have uploaded images for an asset, those images can be viewed wherever the asset appears throughout your ExhibitDay workspace (e.g., in your main list of assets, in the list of asset reservations under a given event, etc.). Clicking on the asset image will pop open an image gallery that displays all the images for the asset.