Images for Assets

You can upload up to 5 images for each asset.

Use the “Edit Images” link on the asset page in order to manage images for a given asset.

Edit Asset Images

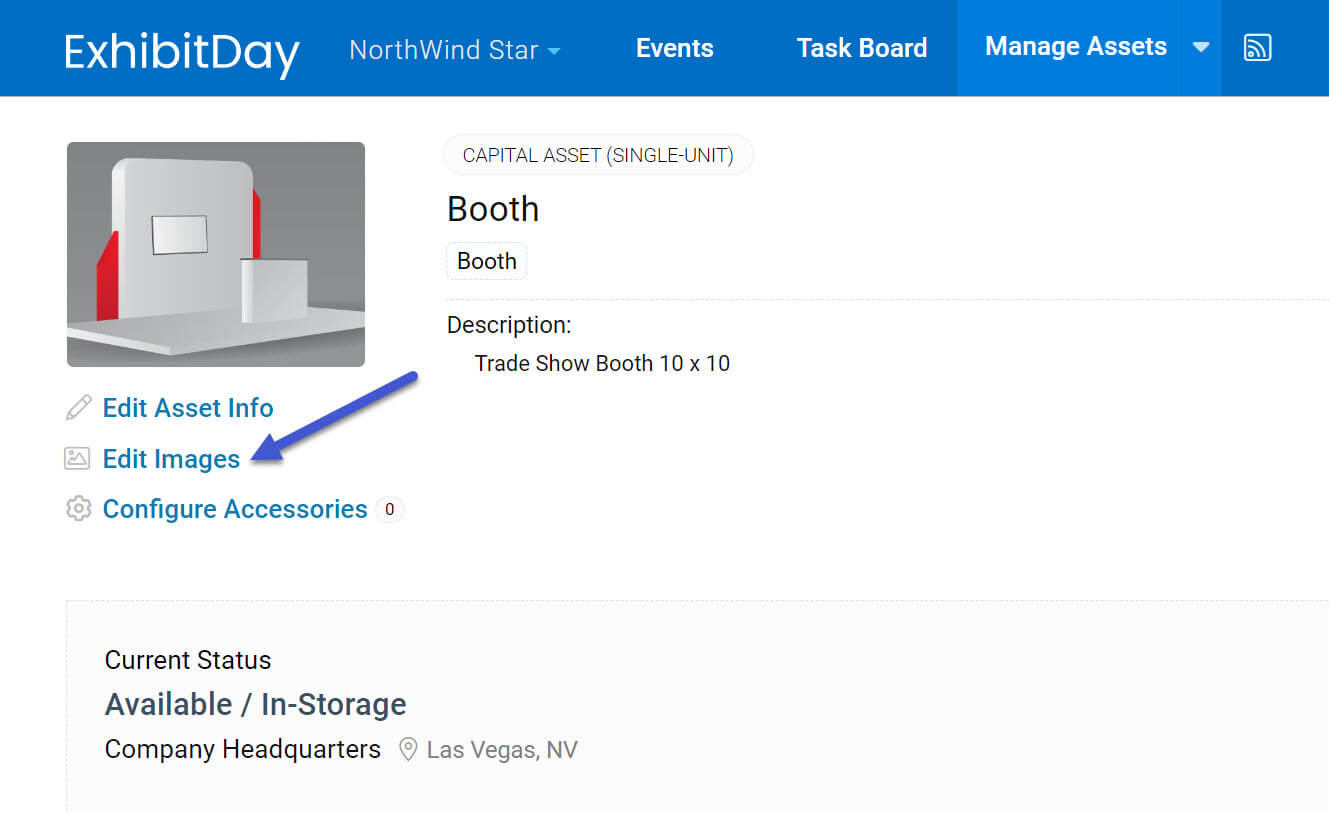
Uploading and Cropping Images

On the Asset Images popup dialog, click the “Add Image” button in order to add a new image for your asset. After you select the image file that you’d like to use, you’ll see a canvas that helps you crop the image in order to make it have the standard ExhibitDay asset image aspect ratio (125 / 94). You can move the crop area by clicking down and dragging it around. You can expand or shrink the crop area by clicking and dragging its corners. You can use the buttons at the top of the canvas to zoom, flip and rotate the image on the canvas.
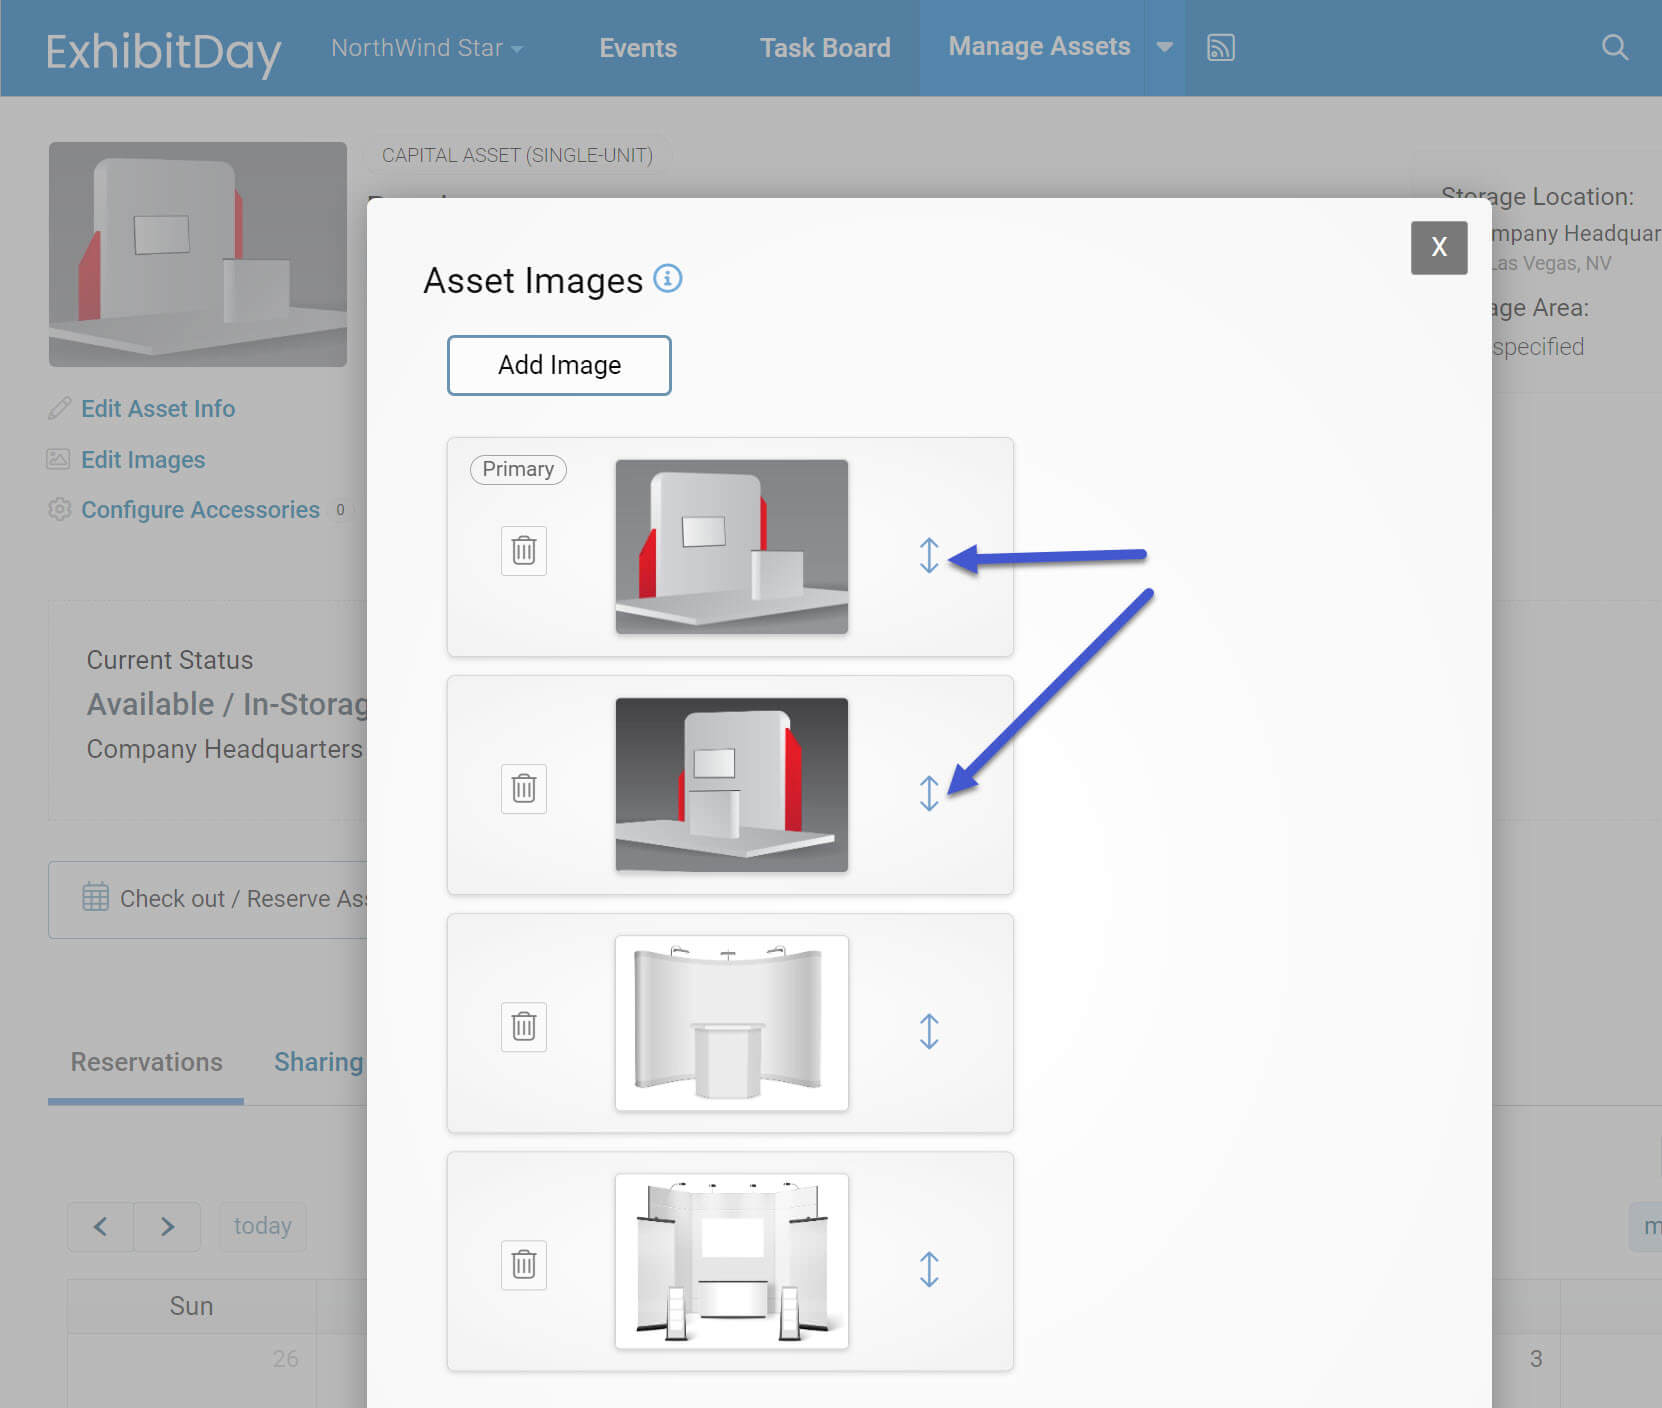
Crop Asset Image

Re-ordering Images

If you upload more than one image, the order in which the uploaded images are listed defines the sequence of the images when viewing the image gallery for the asset; the first image will always be the primary image for the asset. You can change the ordering by click-and-dragging the image handles.
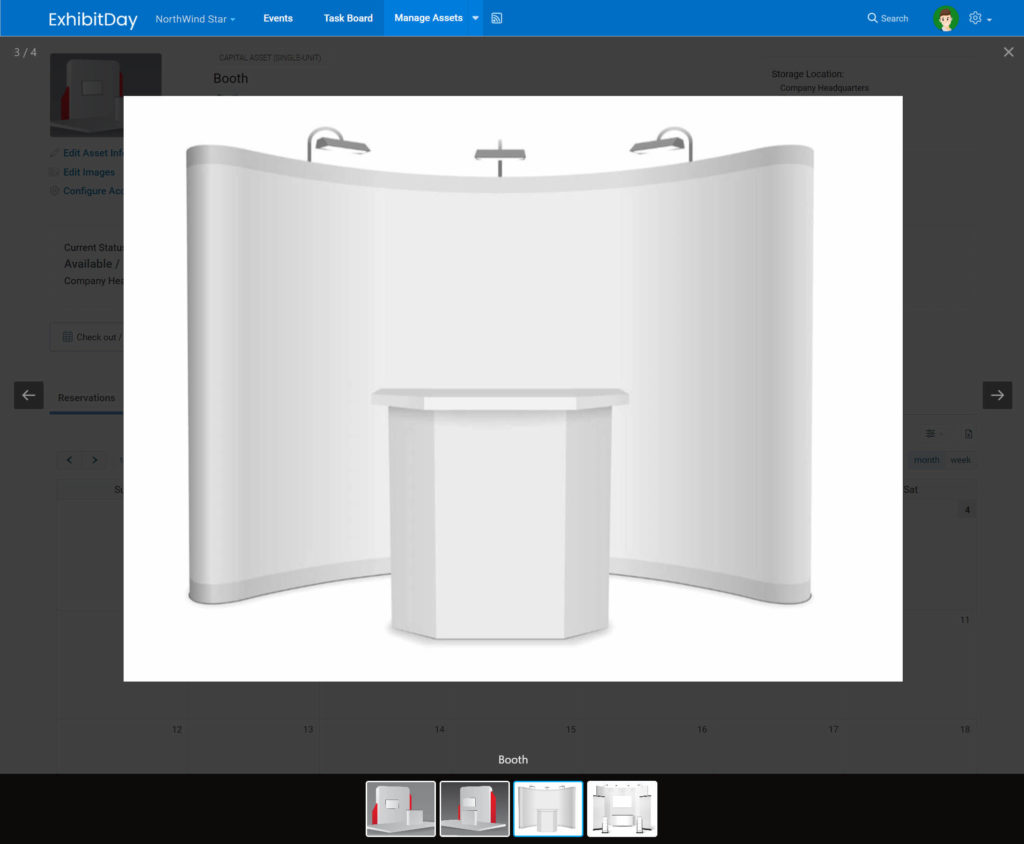
Reorder Asset Images

Asset Image Gallery

Once you have uploaded images for an asset, those images can be viewed wherever the asset appears throughout your ExhibitDay workspace (e.g., in your main list of assets, in the list of asset reservations under a given event, etc.). Clicking on the asset image will pop open an image gallery that displays all the images for the asset.

Asset Image Gallery

Asset Pull Notes

You can now specify Pull Notes for your Assets in ExhibitDay.

Pull Notes are instructions for pulling an Asset from storage. For example, Pull Notes can include specific instructions for packing the Asset, or, specify the mandatory parts that should be included.

Pull Notes can be specified when editing an Asset (in the [Manage Assets] area).

Inventory Pull Notes

When you generate an Asset Pull Sheet that includes a reservation for an Asset that has Pull Notes specified, the Pull Notes will be included on the Pull Sheet (under the line-item for the Asset).

Asset Pull Notes


Sign up for a free ExhibitDay account to plan your trade shows, manage your trade show assets, and collaborate on tasks with your event team.

Exporting Collateral Transactions and Capital Asset Reservations to Spreadsheet

We just released the ability to export your Collateral Transactions and Capital Asset Reservations to spreadsheet format in ExhibitDay.

Exporting Collateral Transactions (.csv format)

To export transactions for a collateral asset, click on the export button under the [Inventory Ledger] tab of the collateral asset. The .csv export file will include all the inventory adjustments and reservations for the collateral.

Export Trade Show Collateral Asset Ledger Transactions

Exporting Capital Asset Reservations (.csv format)

To export all the reservations for a given capital asset, click on the export button under the [Reservations] tab of the capital asset. The .csv export file will include all the reservations for the capital asset.

Export Trade Show Capital Asset Reservations to Spreadsheet

Note: the ability to export data is offered to ExhibitDay workspaces that subscribe to the Premium plan.

Sign up for a free ExhibitDay account to plan your trade shows, manage your trade show assets, and collaborate on tasks with your event team.

Trade Show Asset Management

We’re excited to announce the [Beta] release of ExhibitDay’s Asset Management Module.

You can now track and manage your Capital Assets (like your booth and displays) as well as Collateral (like swag and marketing material) in ExhibitDay.

Reserving Assets for Your Trade Shows

You can reserve assets for your trade shows under each Event’s [Assets] tab.

Asset Management Access Control

Like all other ExhibitDay modules, access to Managing Assets and Making Reservations for Events can be controlled in the team workspace > user management area.

Sign up for a free ExhibitDay account to plan your trade shows and collaborate on tasks with your event team.