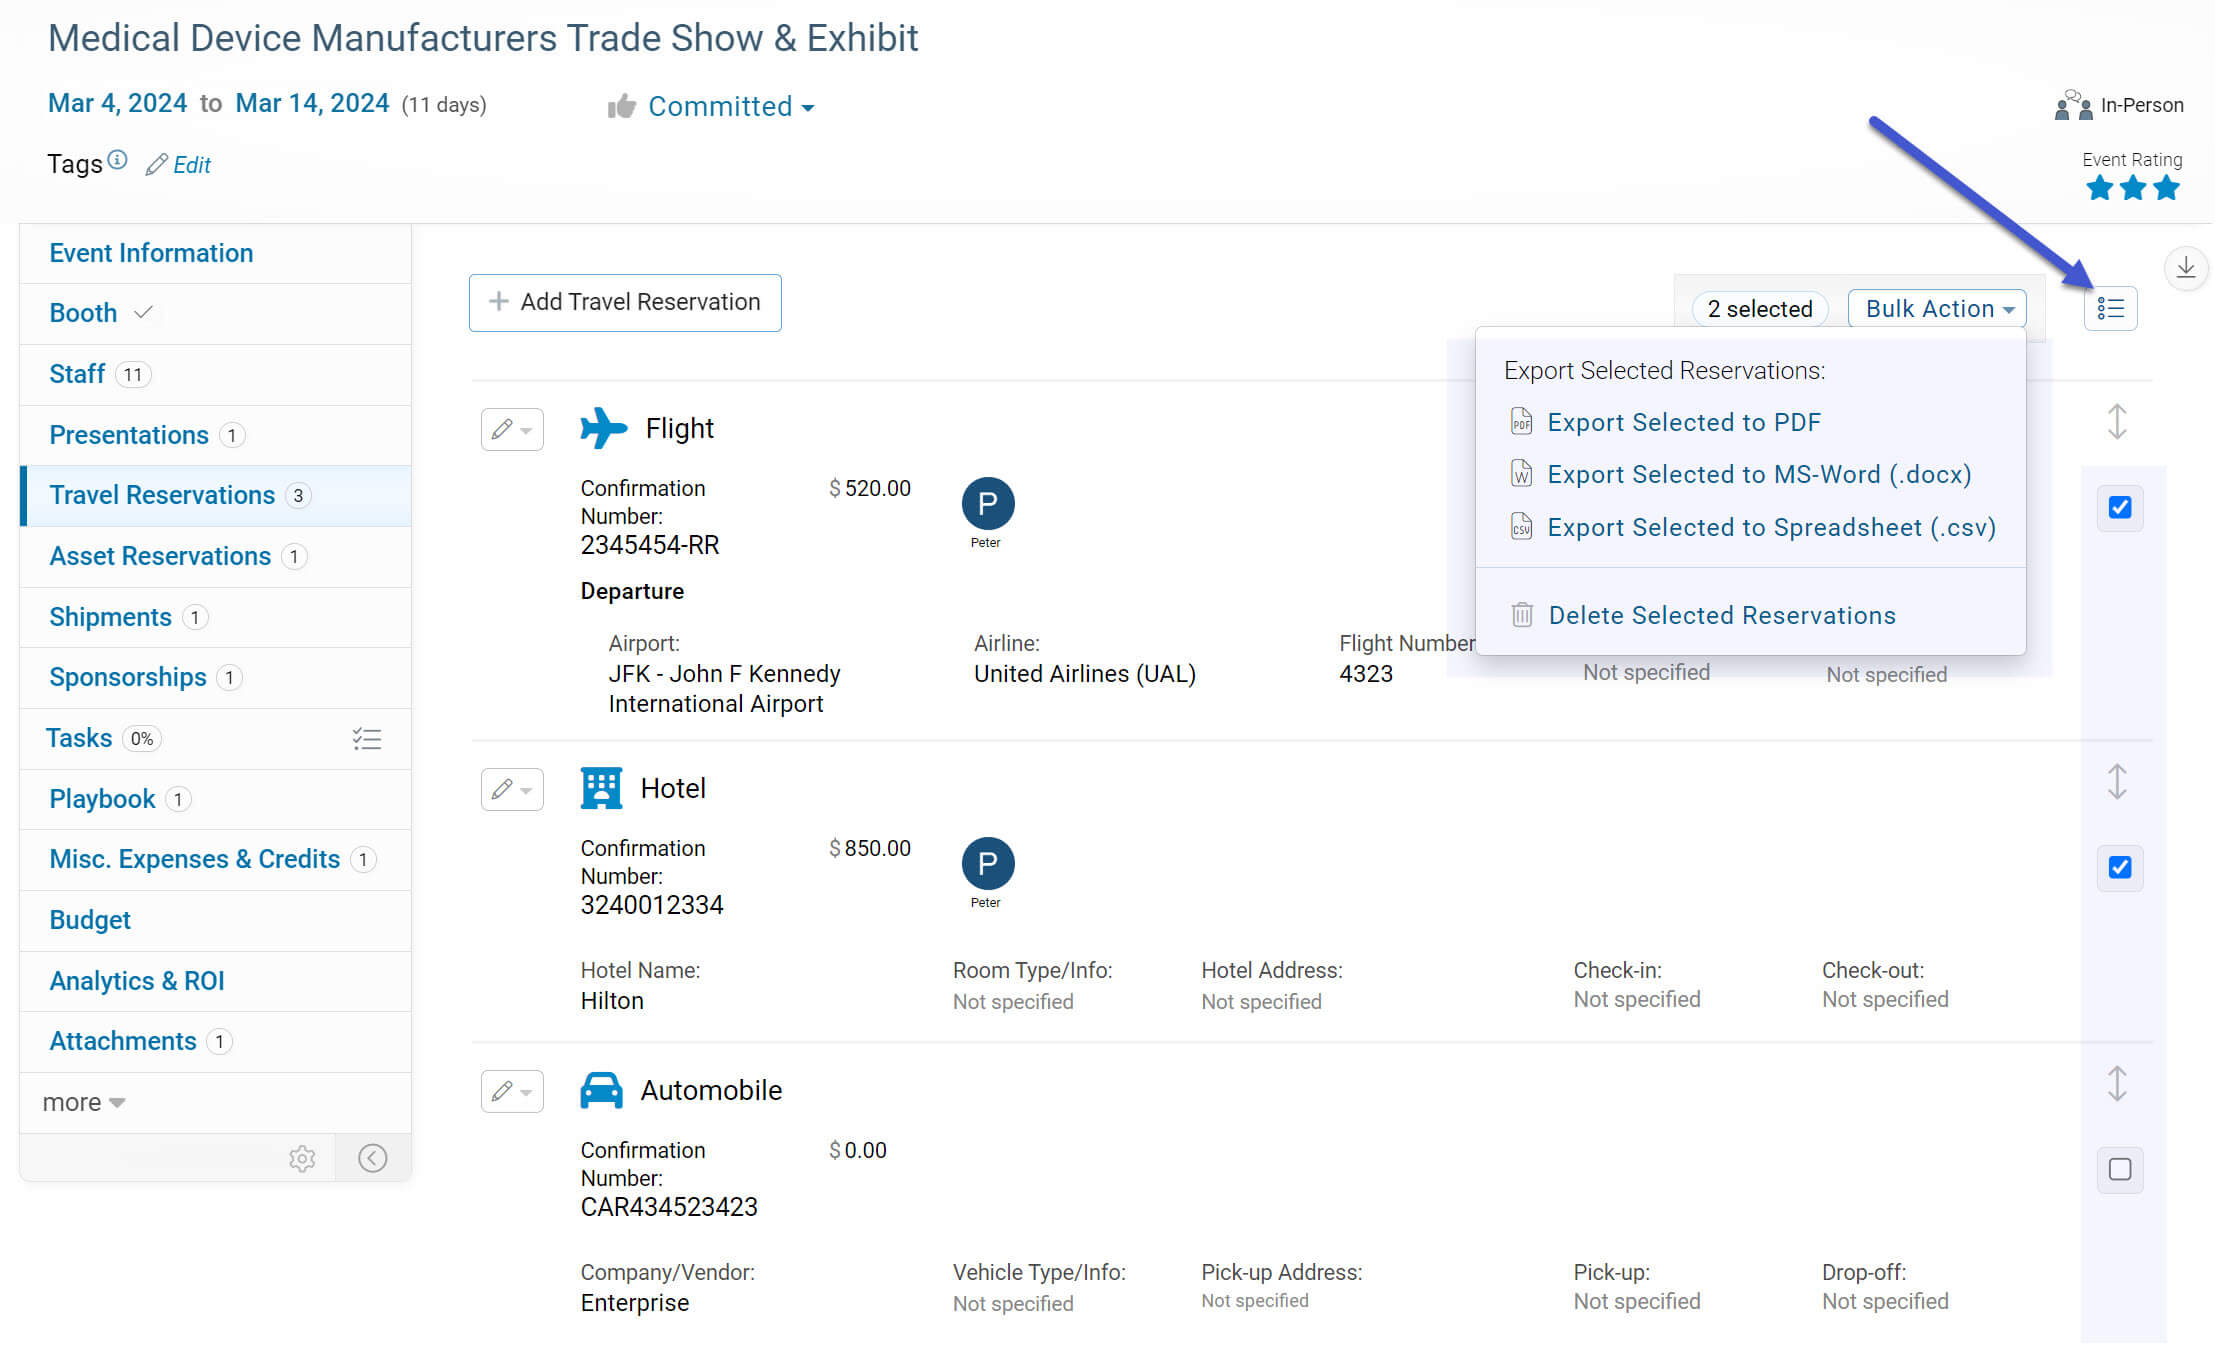
You can selectively choose multiple travel reservations to export or delete.
In order to enable multi-select, click on the multi-select button located at the top-right of the event Travel Reservations tab; when the checkboxes appear (to the right of each travel reservation), choose the reservation(s) that you’d like to export or delete. Then, click on the “Bulk Action” dropdown button and choose the action you’d like to apply to your selection.
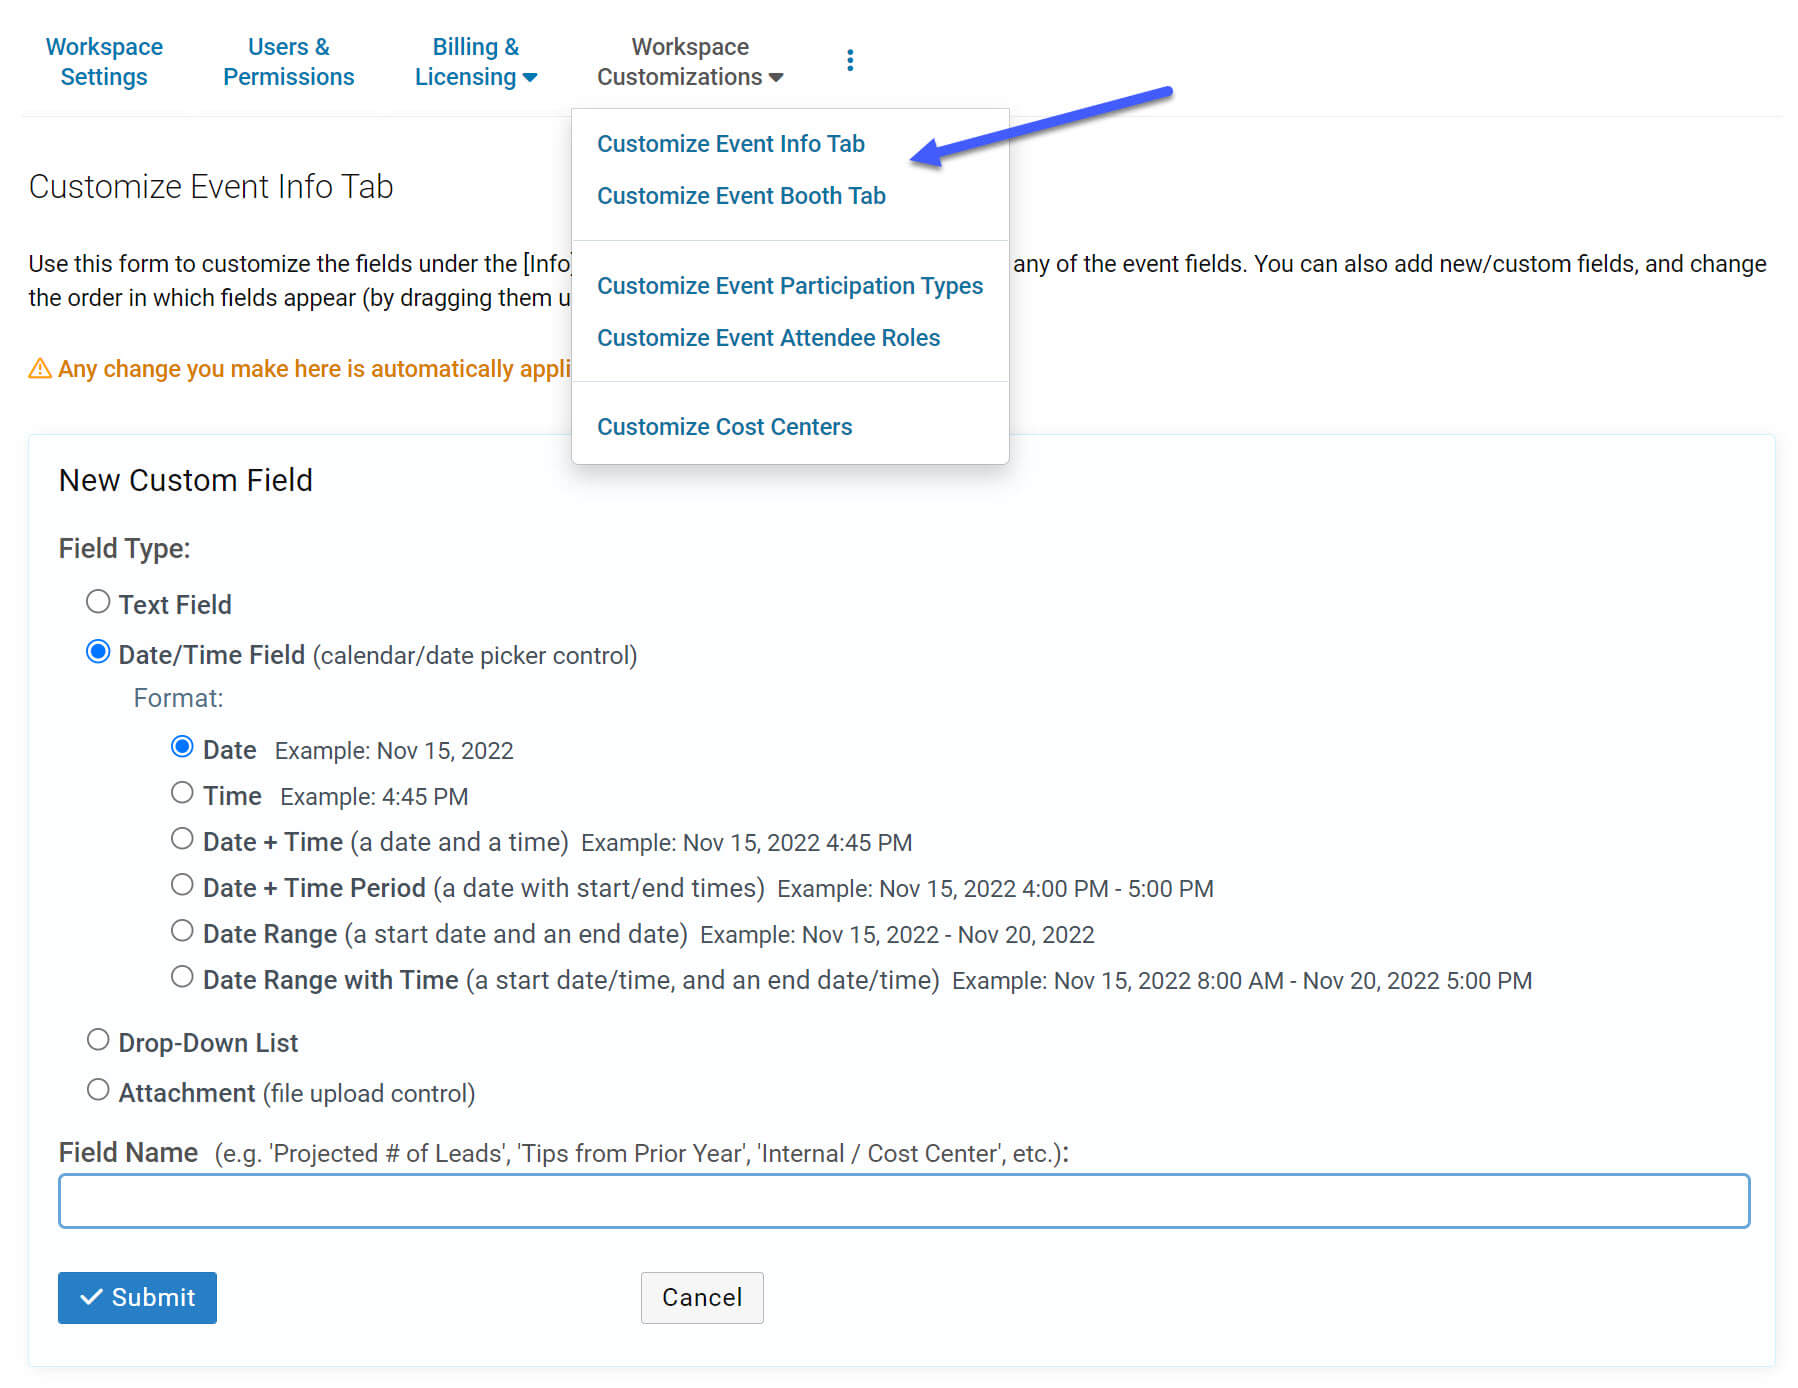
You can now add custom Date/Time fields to the “Info” and “Booth” tabs of your Events in ExhibitDay.
Custom Date/Time Field Types
There are 6 different Date/Time field types that you can add to your events.
1. Date
The Date field adds a Calendar control to your events. There is also an optional Notes field that can be used to add notes about the selected date.
2. Time
The Time field adds a time-selector control to your events. The custom Time field also comes with an optional Time Zone field and an optional Notes field.
3. Date + Time
The “Date + Time” custom field lets you specify a date and a time (i.e. a timestamp). This field provides a calendar control for selecting a date and a time-selector control for specifying a time. This custom field also comes with an optional Time Zone field and an optional Notes field.
4. Date + Time Period
The “Date + Time Period” custom field lets you specify a date and start/end times. This field provides a calendar control for selecting a date and time-selector controls for specifying a start time and an end time. This custom field also comes with an optional Time Zone field and an optional Notes field.
5. Date Range
The “Date Range” custom field lets you specify a start date and an end date using calendar controls. This custom field also comes with an optional Notes field.
5. Date Range with Time
The “Date Range with Time” custom field lets you specify a start date/time and an end date/time using calendar and time-selector controls. This custom field also comes with an optional Time Zone field and an optional Notes field.
You can add tasks to your events by copying tasks from other events.
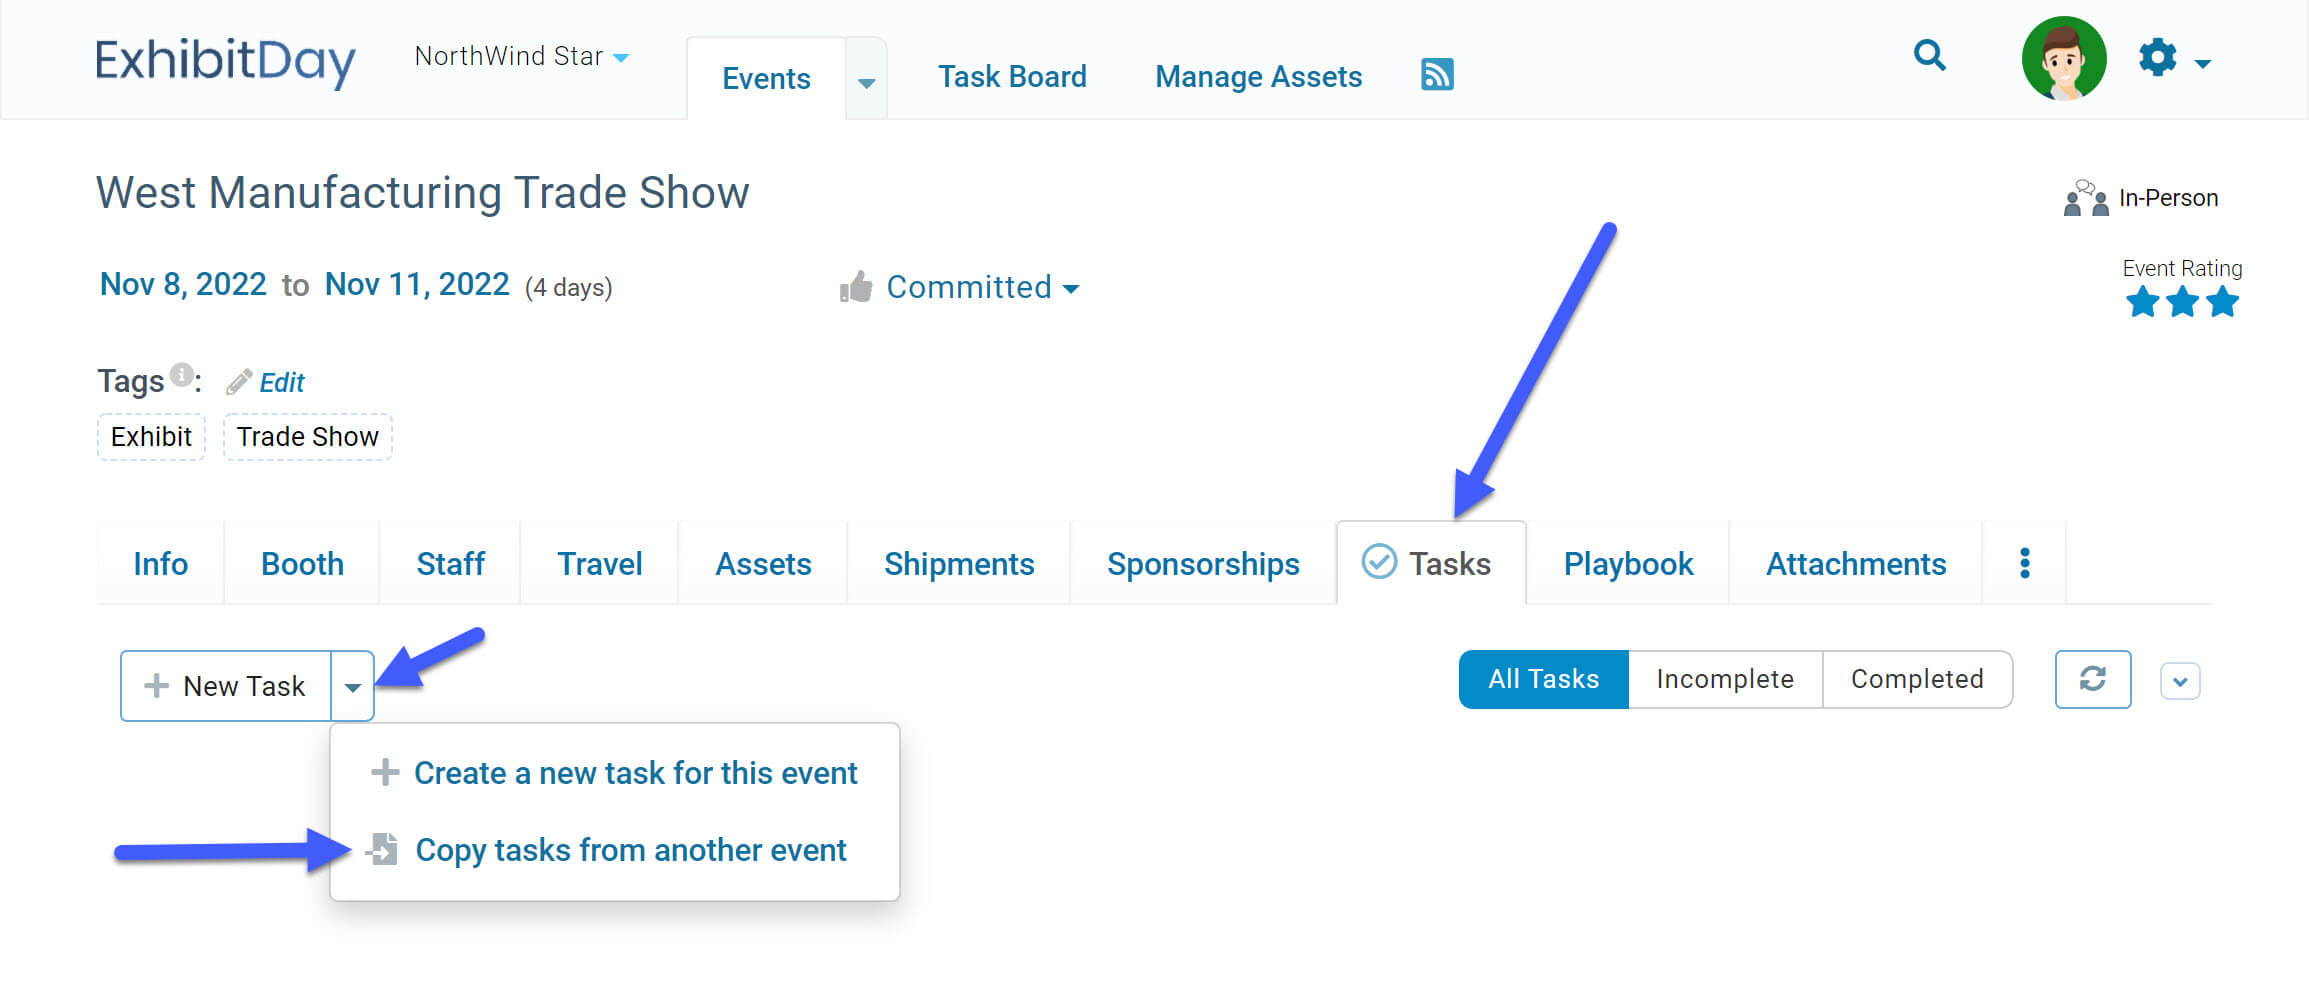
In order to copy tasks from another event, go to the [Tasks] tab of the event that you’d like to copy tasks into. Then, open the dropdown menu of the [New Task] button and select “Copy tasks from another event”.
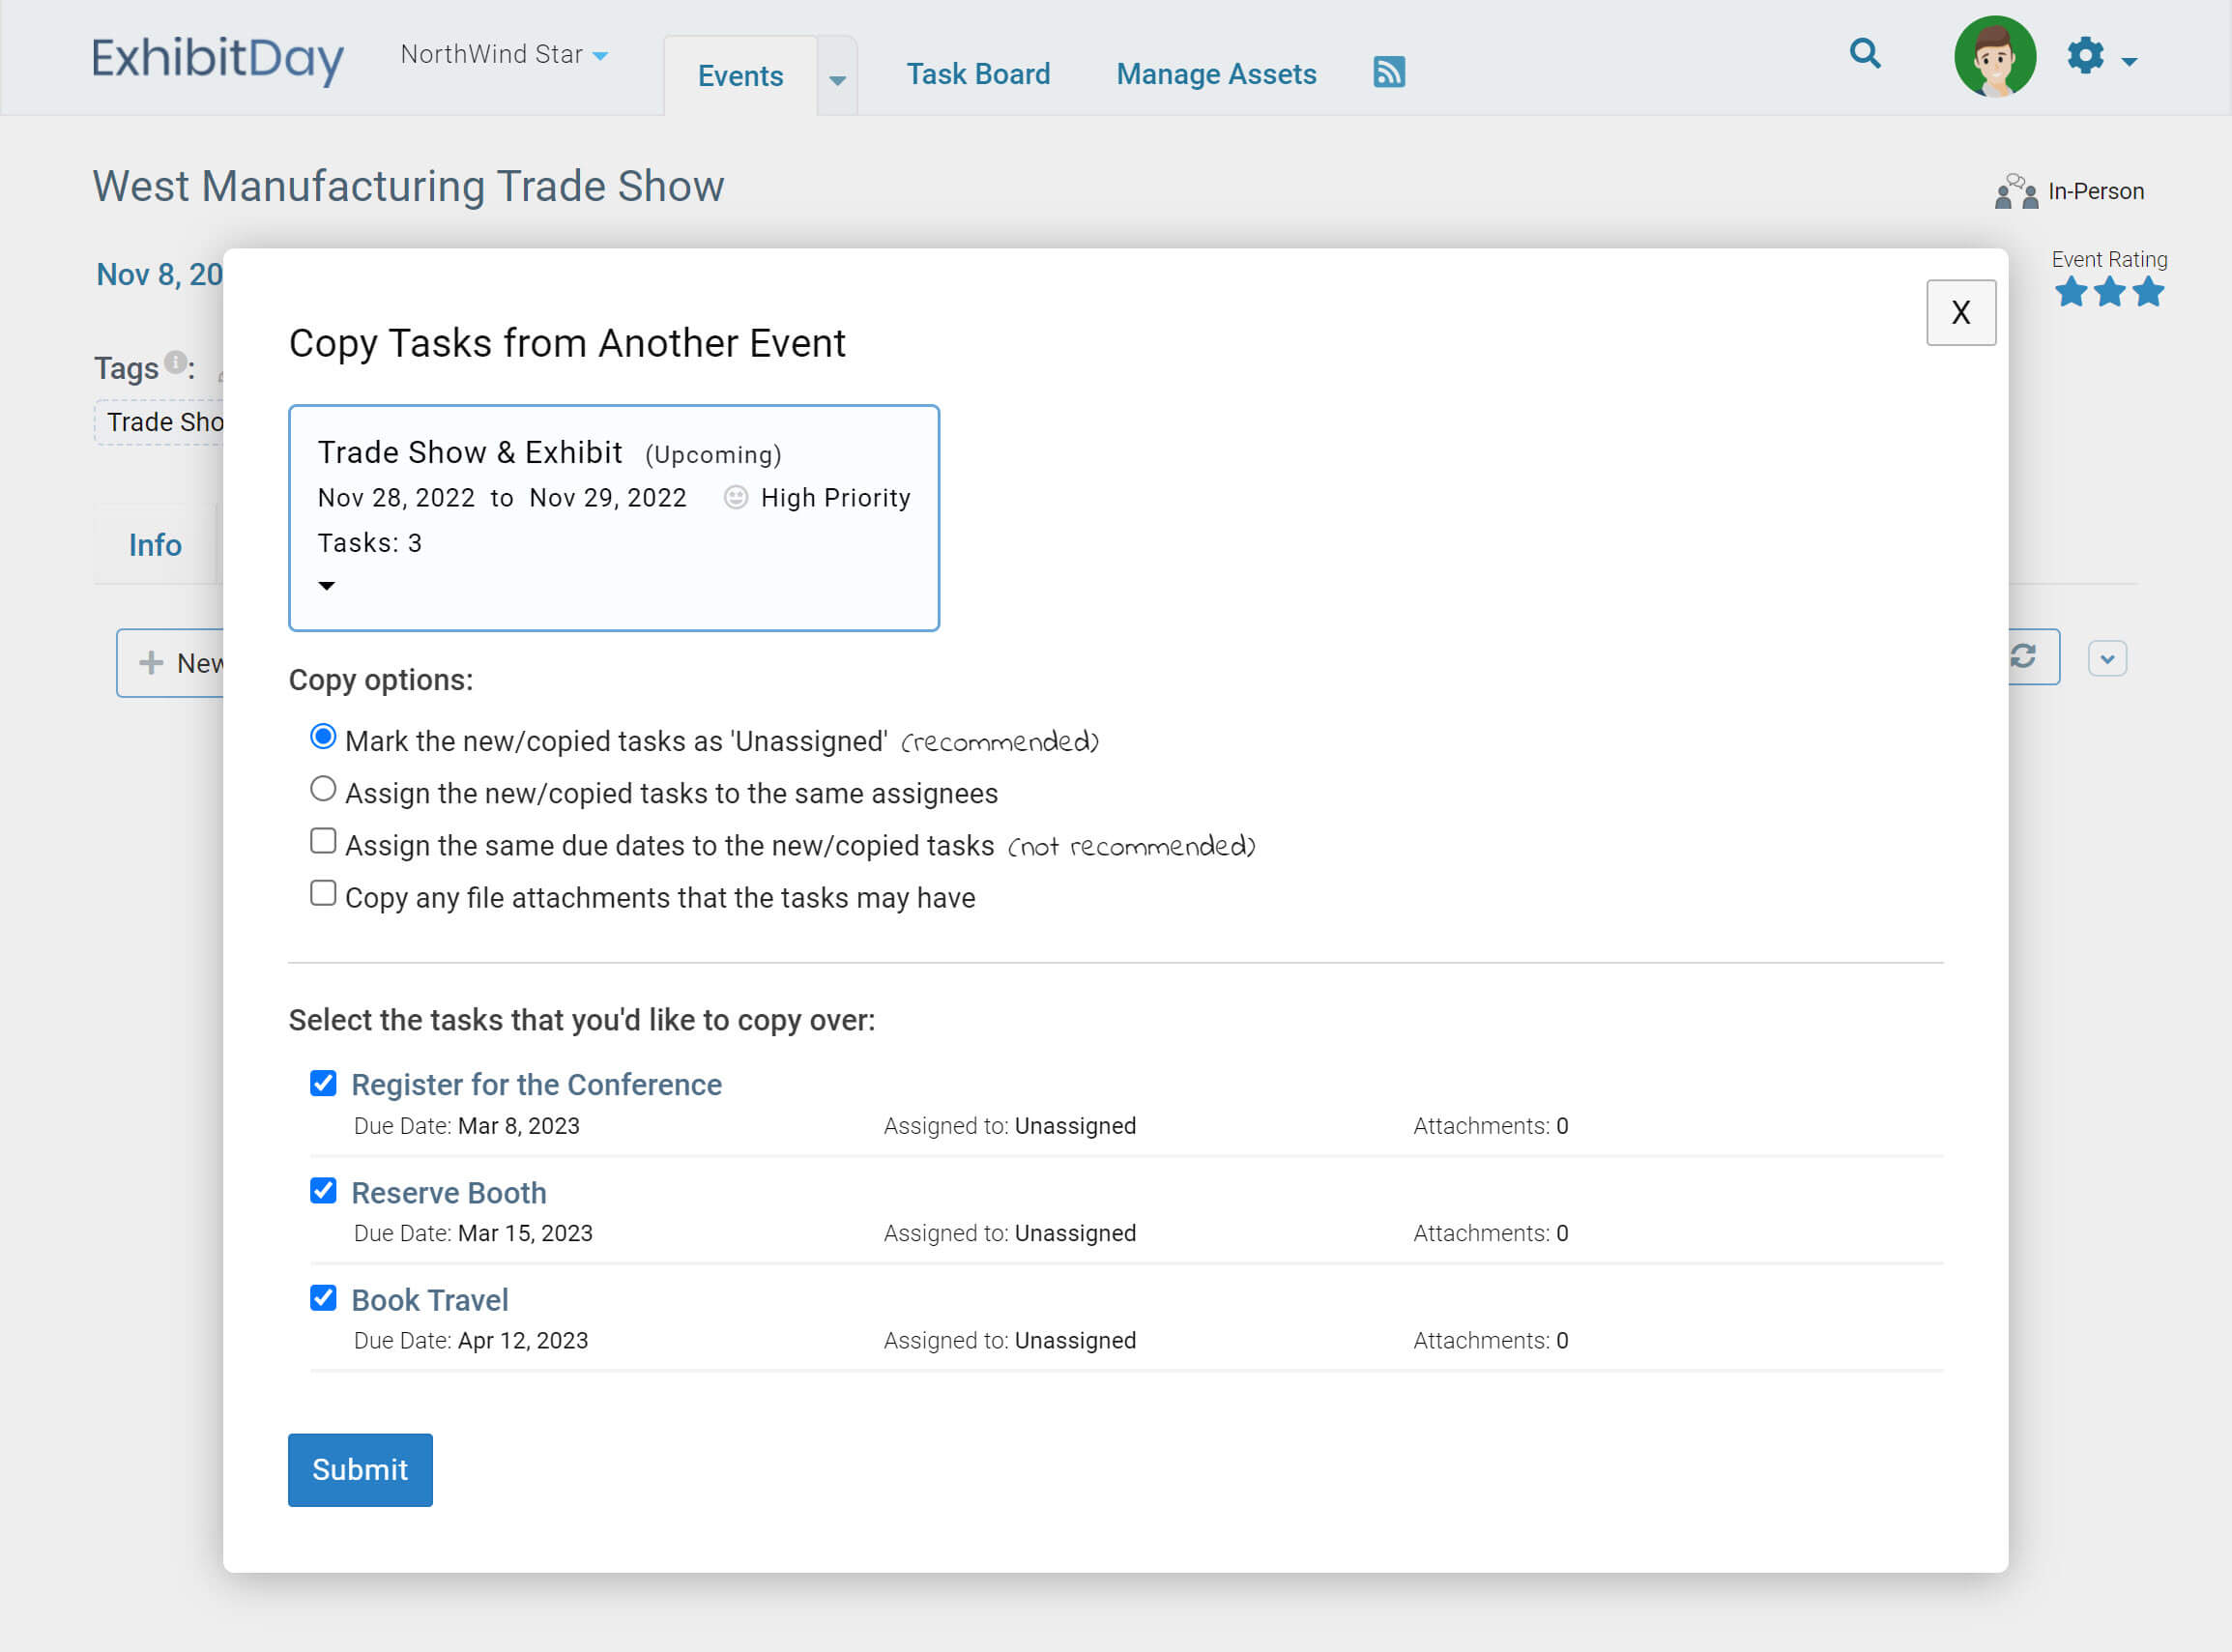
Use the Copy Tasks pop-up dialog to select the event you’d like to copy tasks from, and choose the copy options you’d like to use. Then, click the [Submit] button at the bottom of the pop-up dialog to compelete the copy/import process.
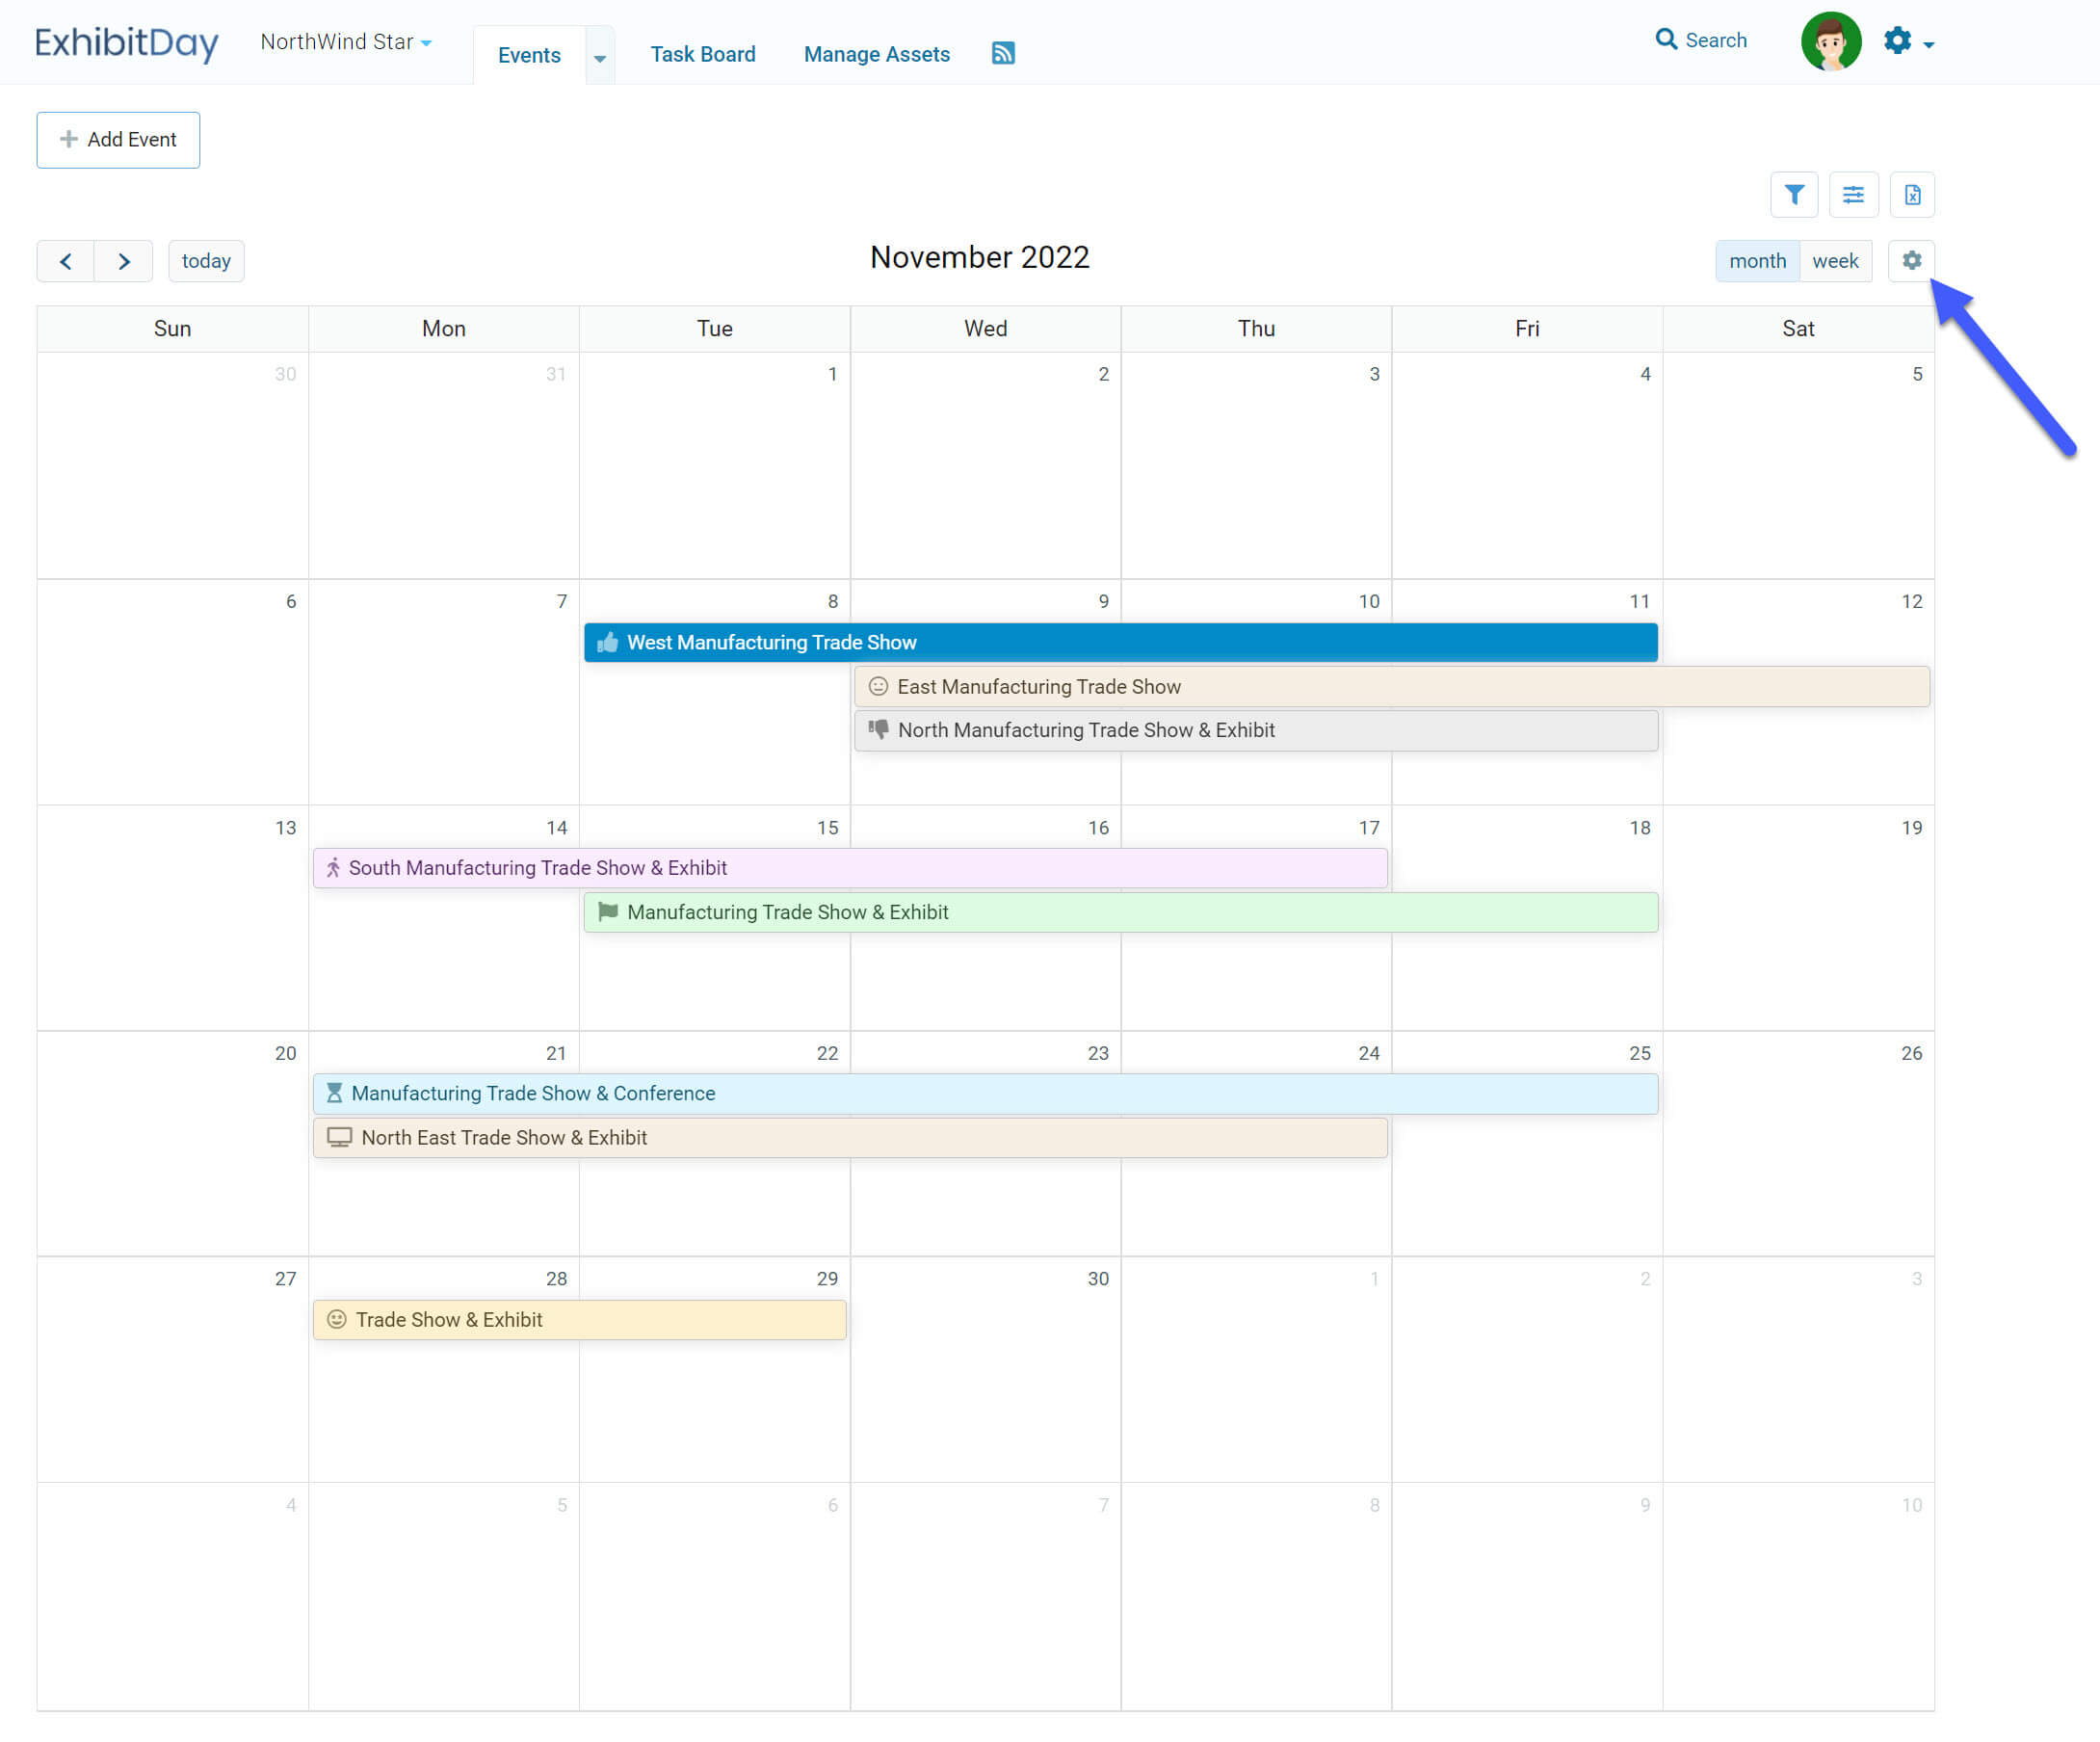
You can personalize the colors of the calendar entries for your Events in ExhibitDay. Different color codes can be selected based on Event Participation type.
How to Change the Colors of Calendar Entries
To personalize the colors for your calendar entries, first switch to the Calendar View under the main Events tab. Then, click the Calendar Preferences icon (located at the top-right corner of the Events Calendar).
Note: any personalizations that you make to your Calendar View are only applied to your account; the Calendar View preferences for other users in your ExhibitDay Workspace will not get affected.
Personalization of the Event Calendar View is available to ExhibitDay Workspaces under the Premium and Enterprise plans.
Did you know?
Did you know that you can add up to 5 additional Event Participation Types for your Events in ExhibitDay? For more information about customizing your Event Participation Types, please see this post.
You can now specify a ‘Description’ for each Date/Time entry listed under the Exhibit Hall and Booth Setup/Dismantle sections of the Event Info tab. To specify a description for a Date/Time entry, click the ‘Add description’ link listed directly underneath the Date/Time row. The description field can be used to track notes (e.g. ‘Vendor Reception’, ‘Coffee Break / Dedicated Viewing’, etc.).