Images for Assets

You can upload up to 5 images for each asset.

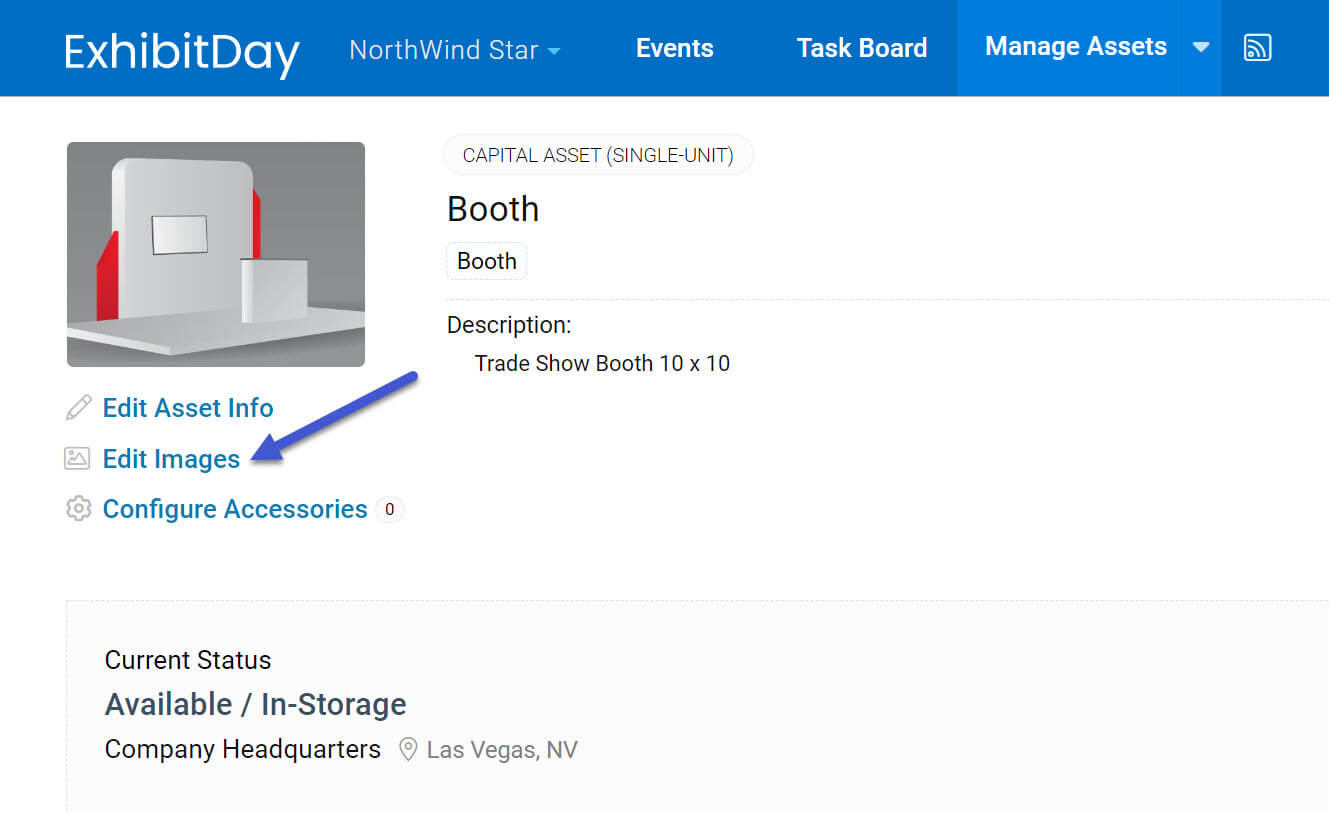
Use the “Edit Images” link on the asset page in order to manage images for a given asset.

Edit Asset Images

Uploading and Cropping Images

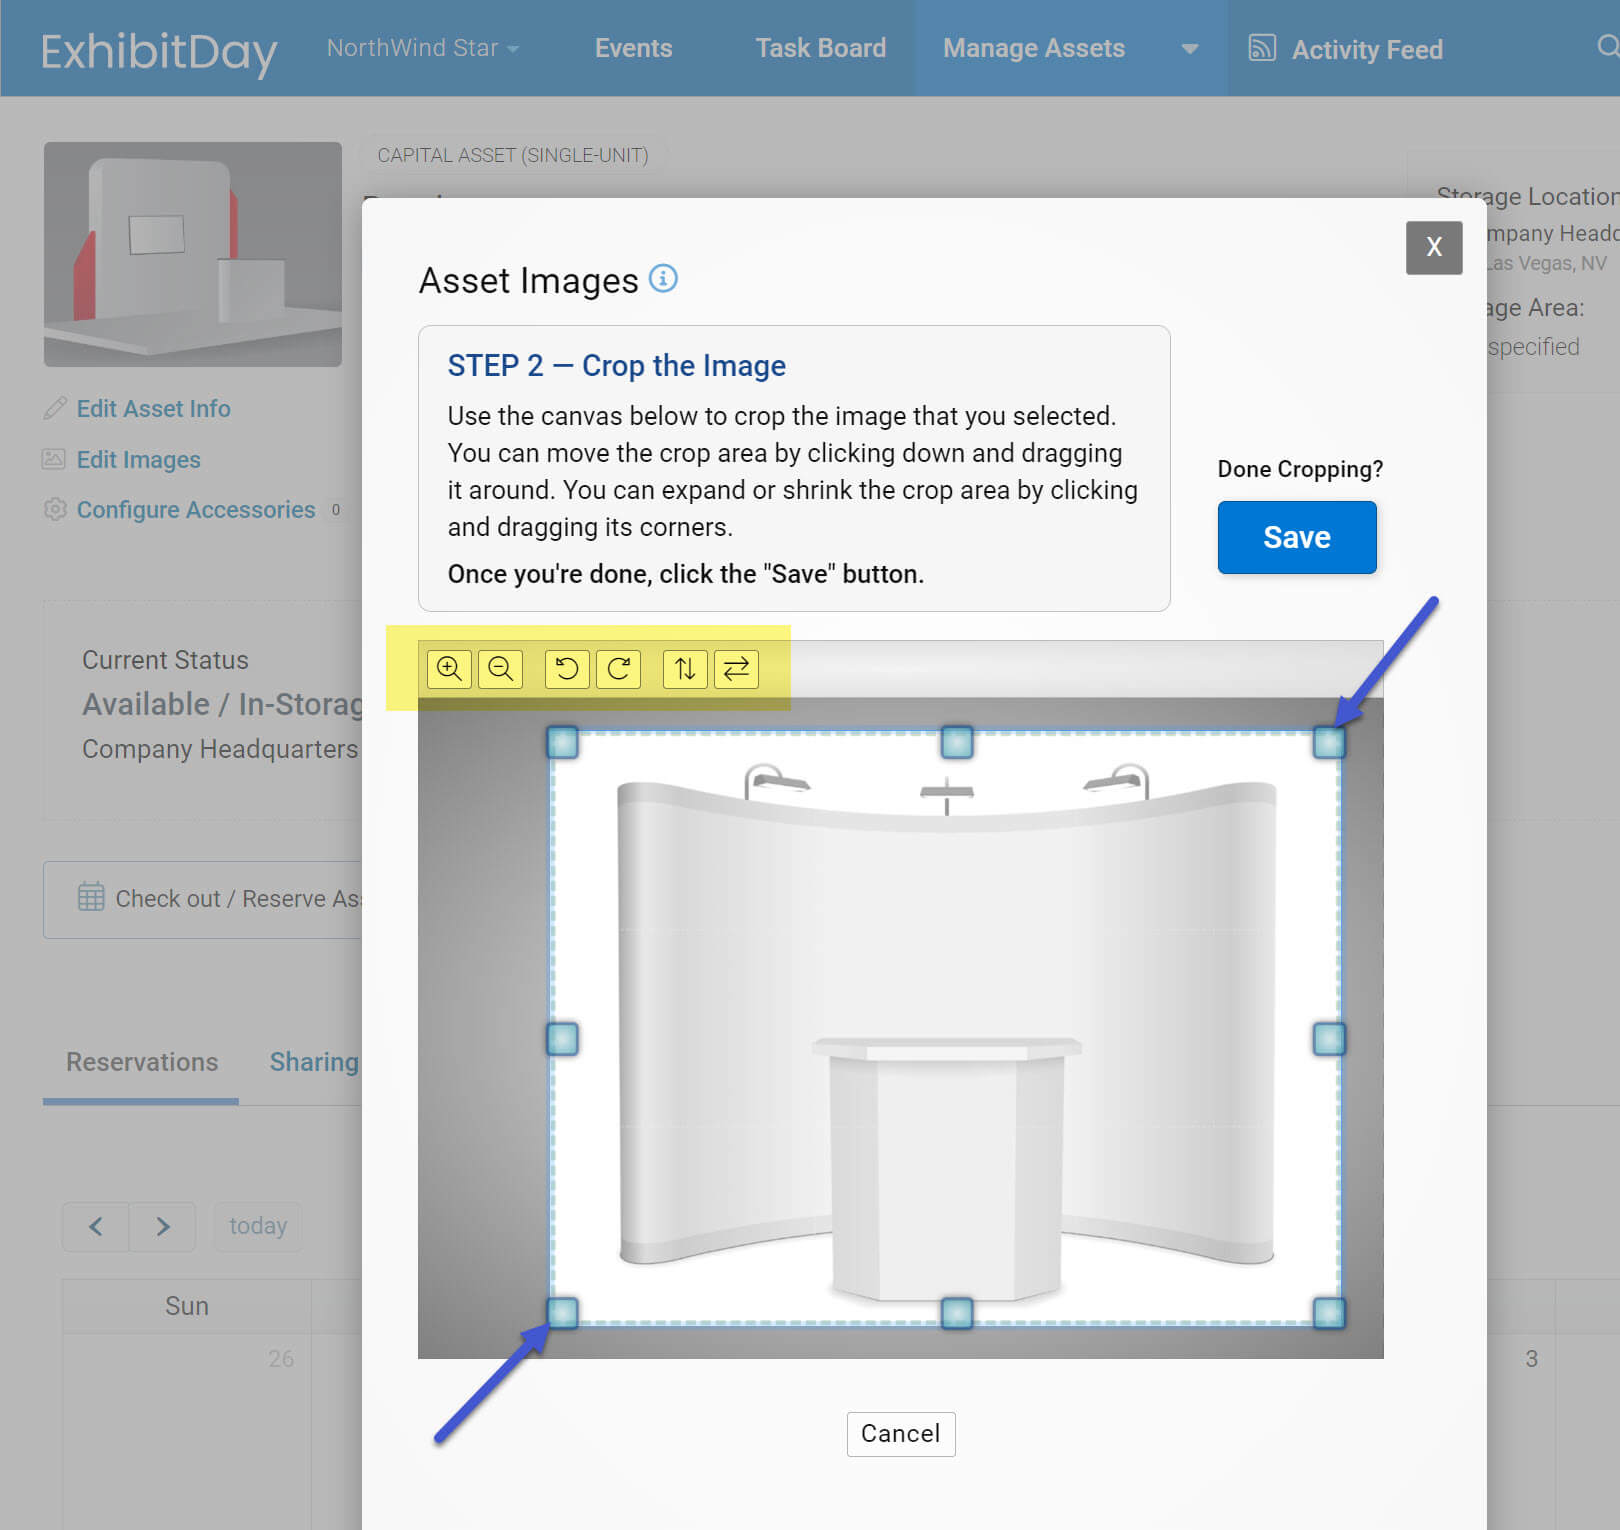
On the Asset Images popup dialog, click the “Add Image” button in order to add a new image for your asset. After you select the image file that you’d like to use, you’ll see a canvas that helps you crop the image in order to make it have the standard ExhibitDay asset image aspect ratio (125 / 94). You can move the crop area by clicking down and dragging it around. You can expand or shrink the crop area by clicking and dragging its corners. You can use the buttons at the top of the canvas to zoom, flip and rotate the image on the canvas.

Crop Asset Image

Re-ordering Images

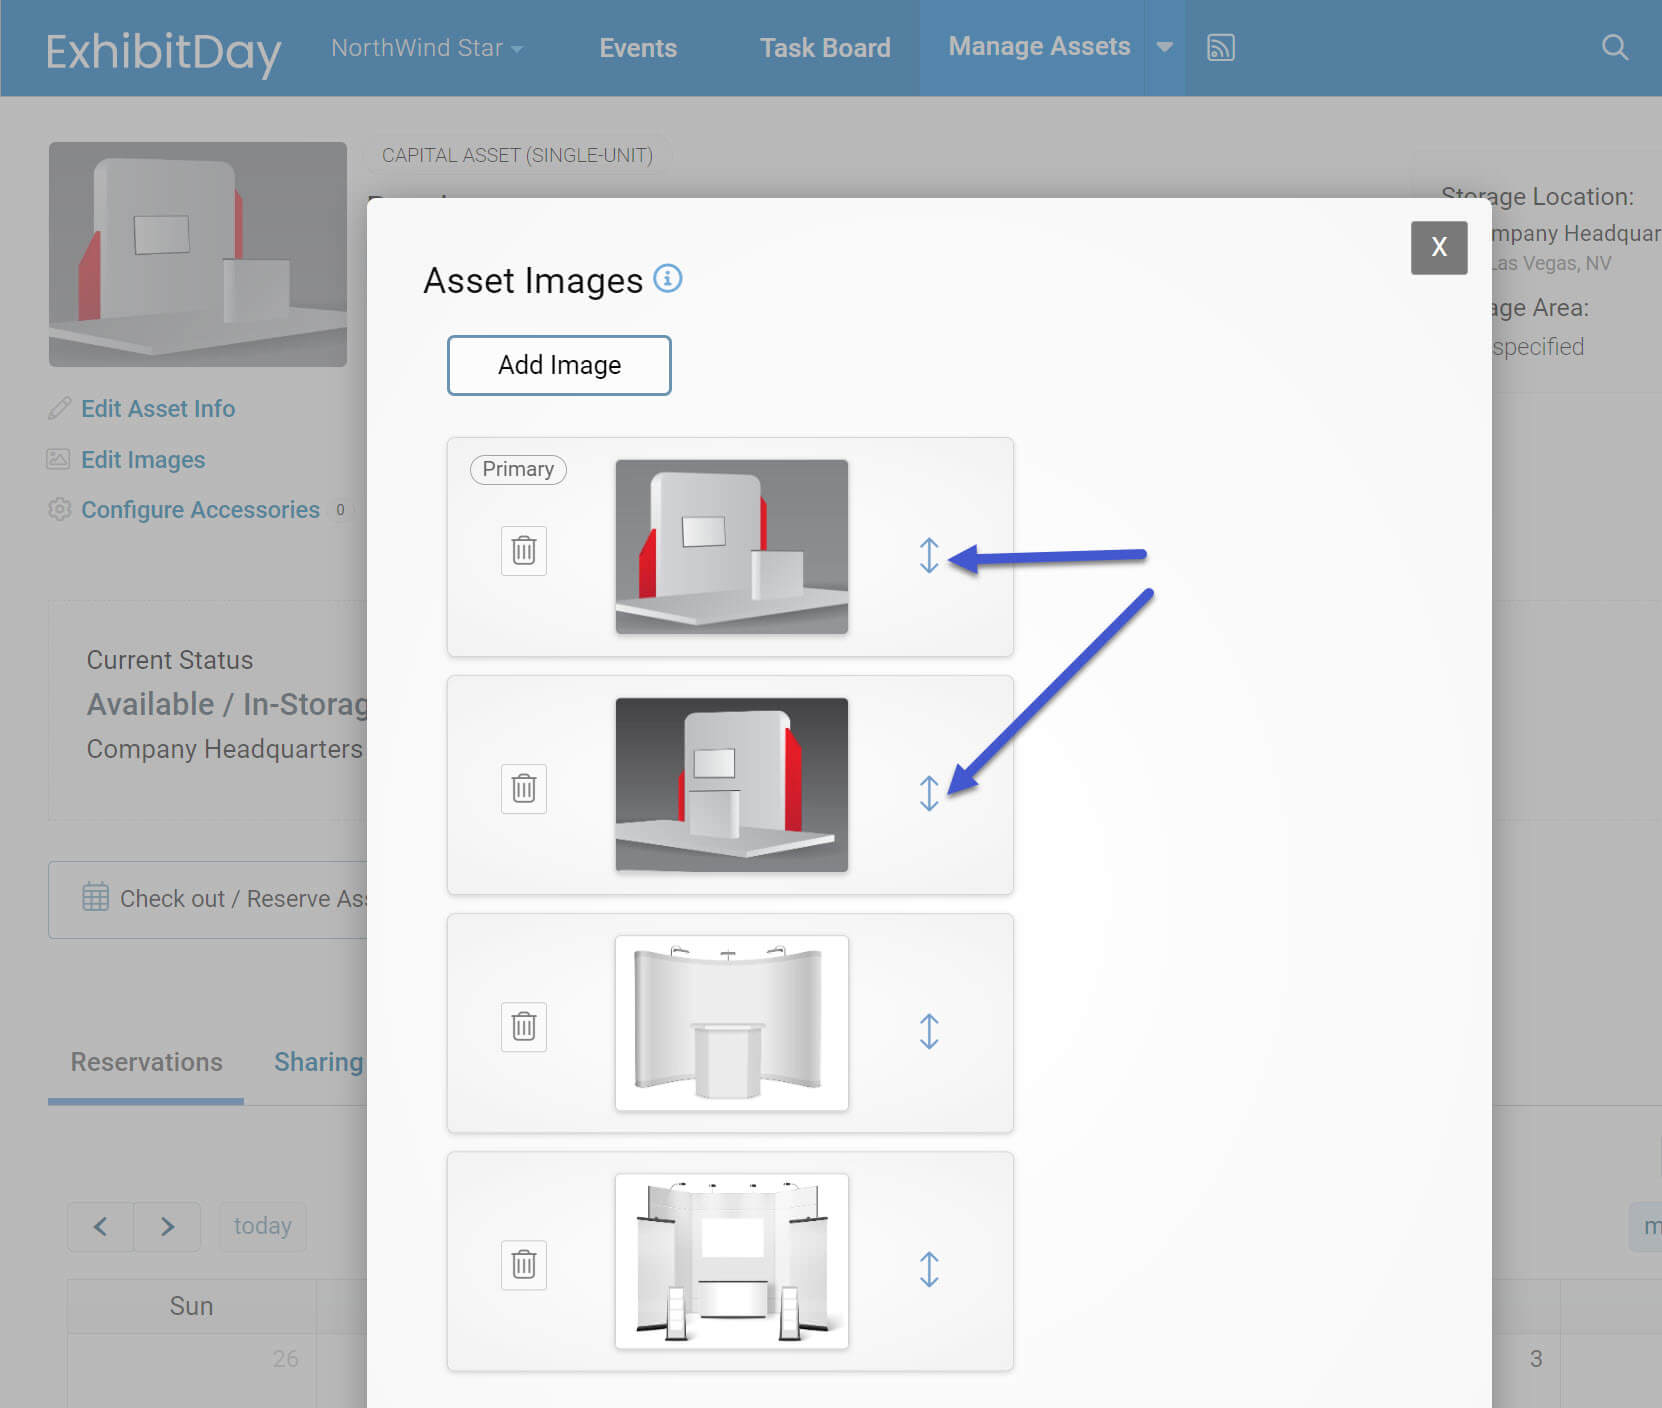
If you upload more than one image, the order in which the uploaded images are listed defines the sequence of the images when viewing the image gallery for the asset; the first image will always be the primary image for the asset. You can change the ordering by click-and-dragging the image handles.

Reorder Asset Images

Asset Image Gallery

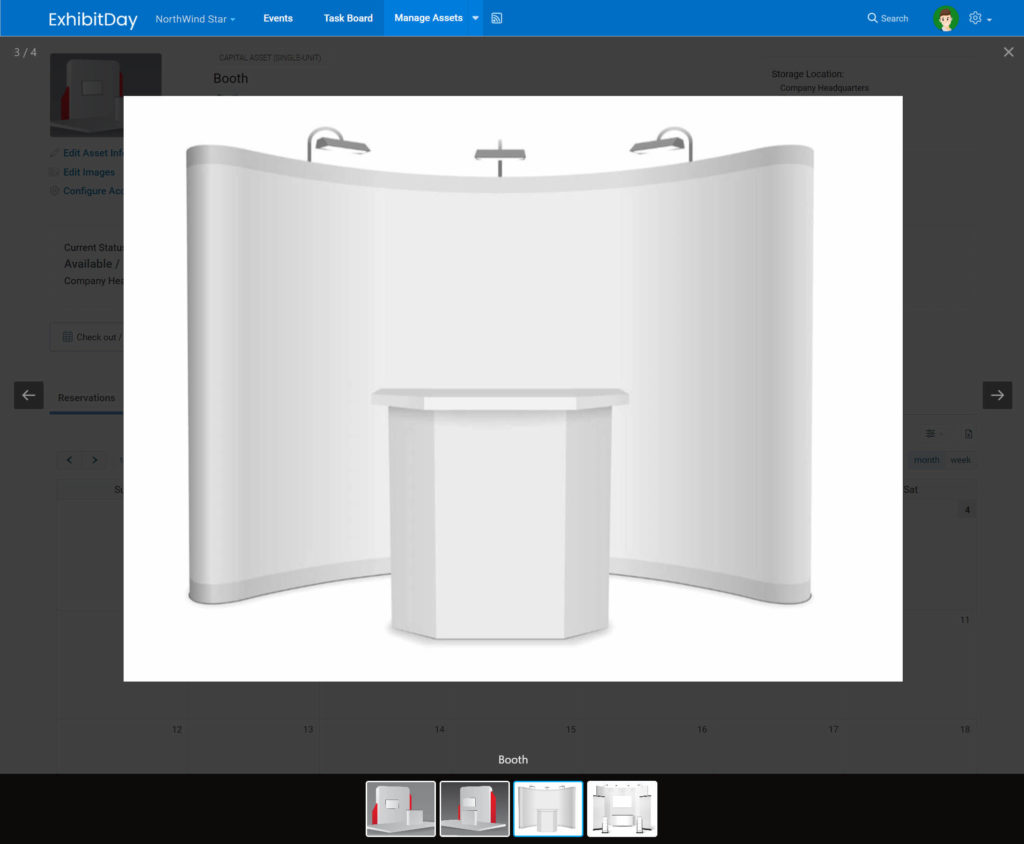
Once you have uploaded images for an asset, those images can be viewed wherever the asset appears throughout your ExhibitDay workspace (e.g., in your main list of assets, in the list of asset reservations under a given event, etc.). Clicking on the asset image will pop open an image gallery that displays all the images for the asset.

Asset Image Gallery

Sharing Assets Between Your Workspaces (for multi-workspace configurations)

If you have a multi-workspace configuration (offered under the ExhibitDay Enterprise plan), you can share Assets between your ExhibitDay workspaces.

What is a Shared Asset?

A shared asset is any asset that has been shared with another workspace. When an asset is shared with another workspace, it can get reserved for events in that workspace (via the Event “Asset Reservations” tab of the workspace it is shared with).

How do I share an Asset with another workspace?

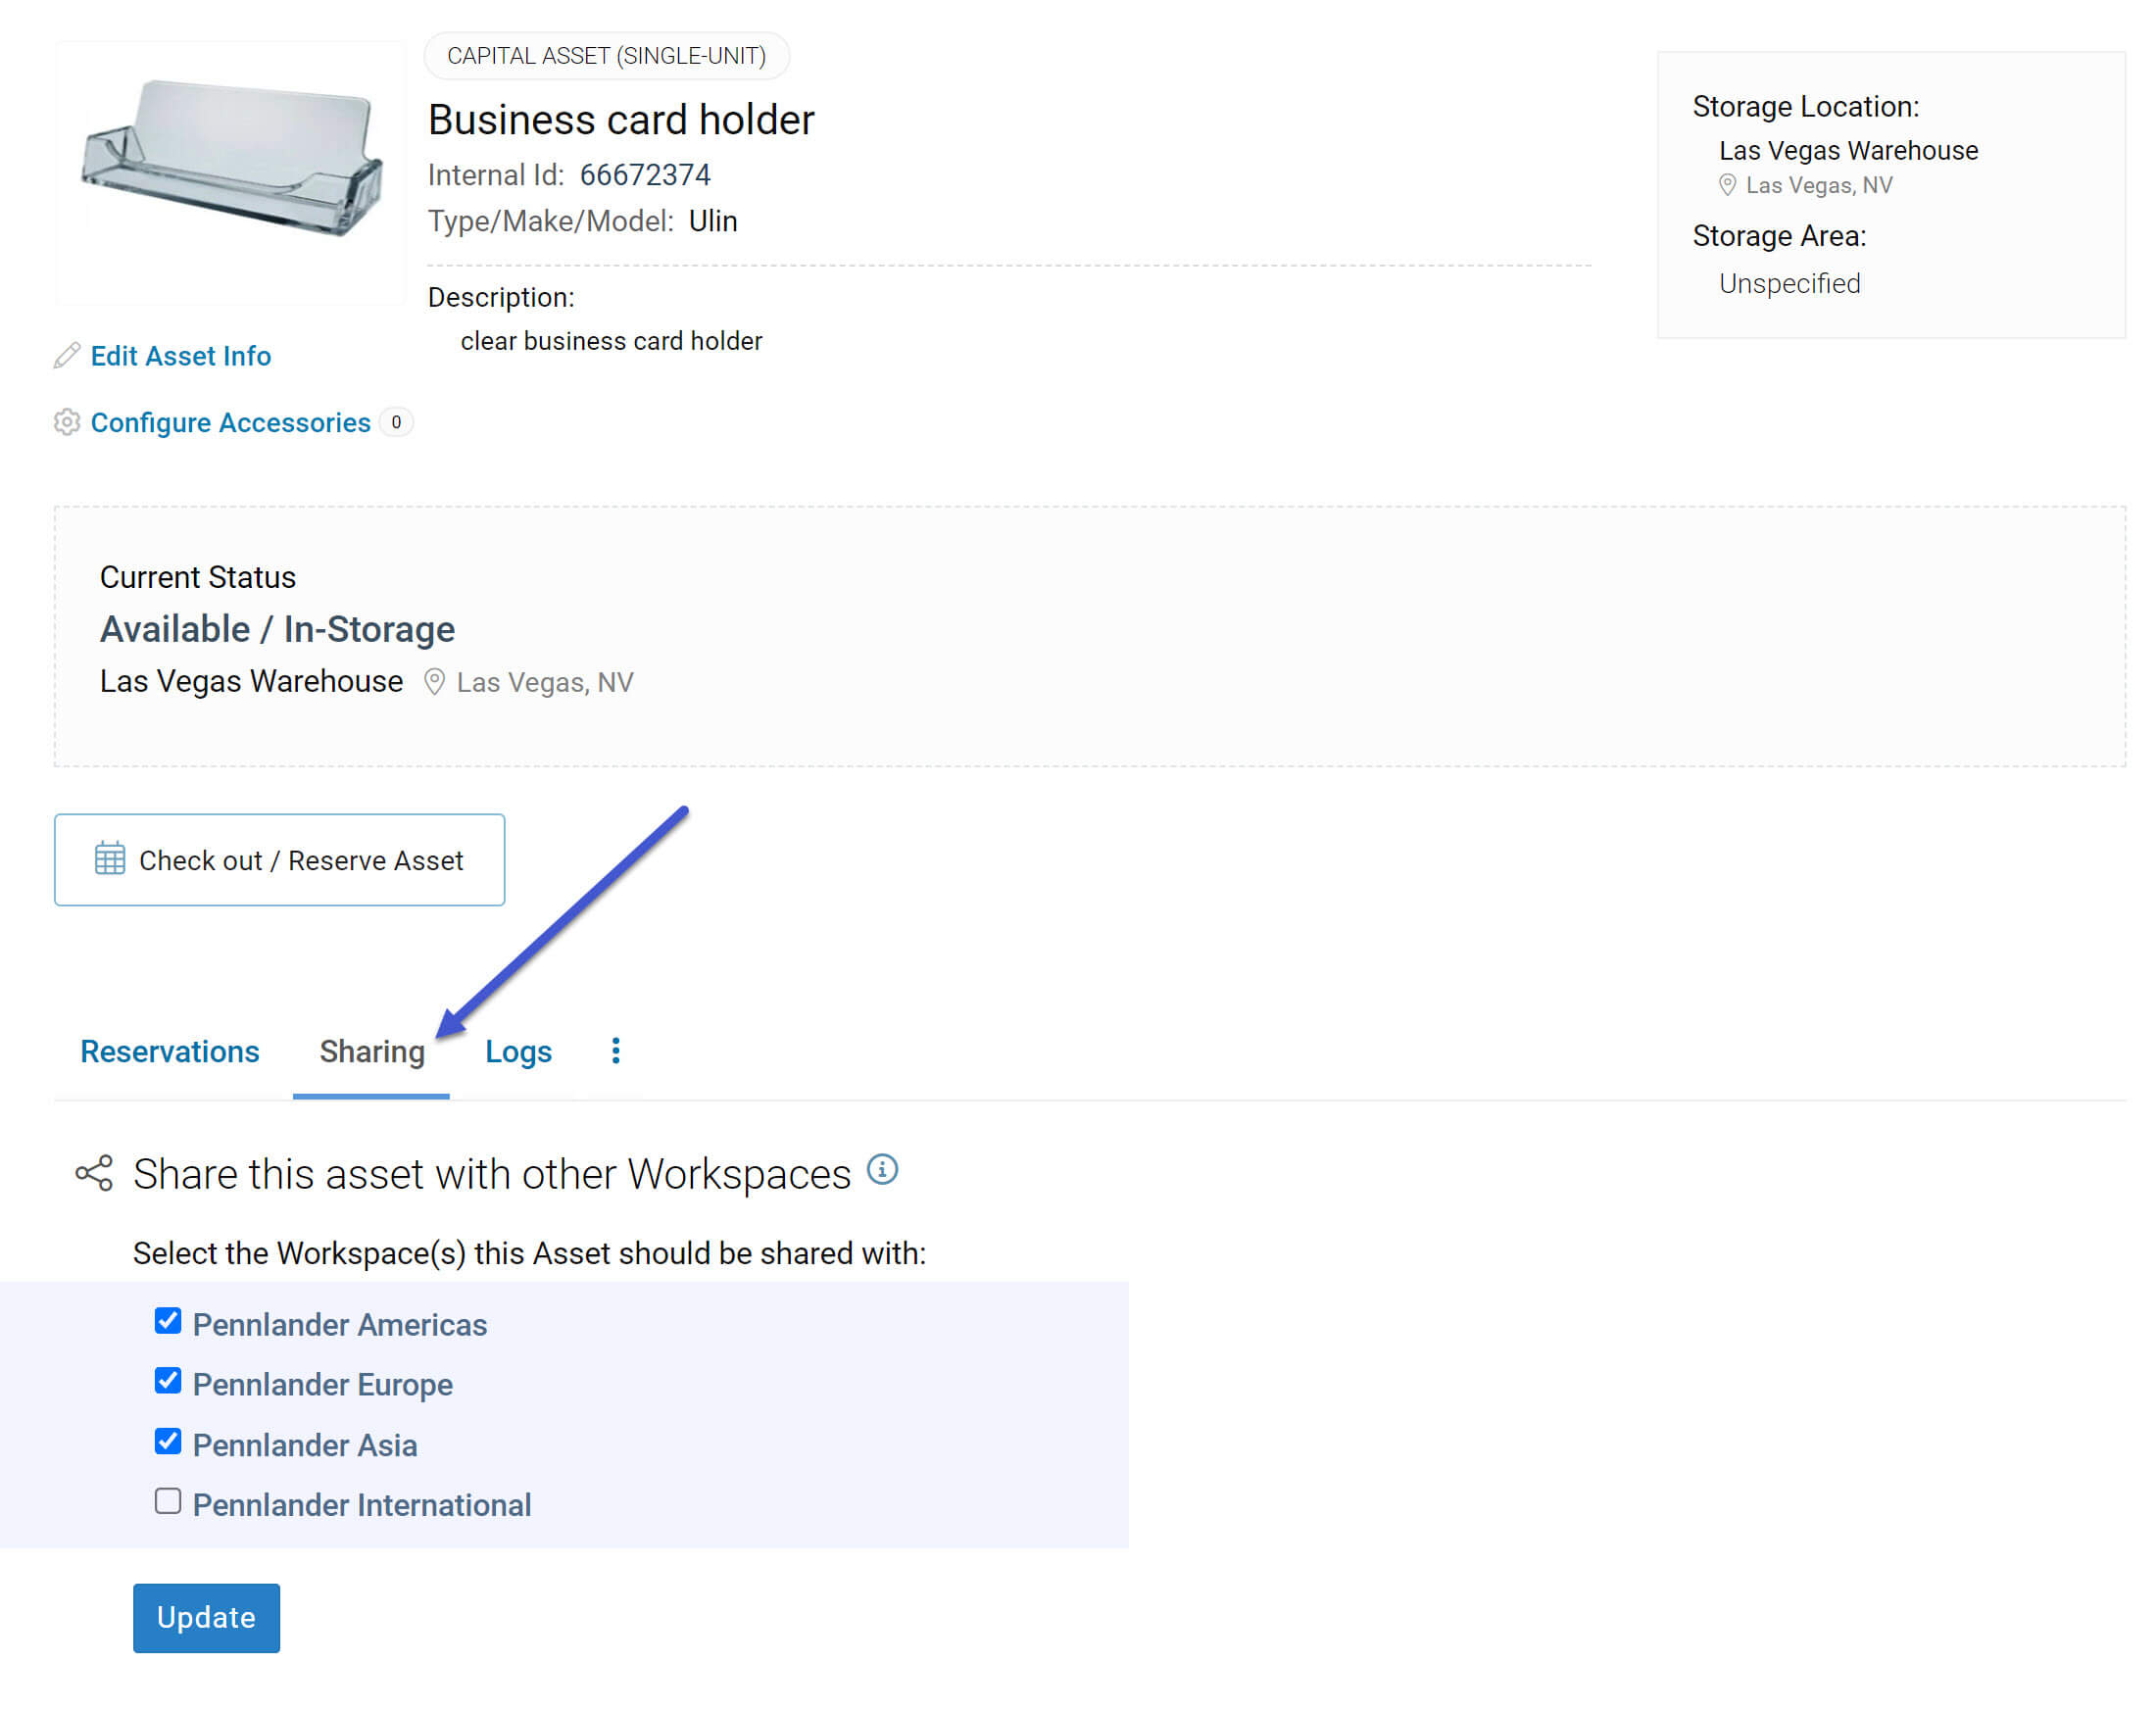
If you are on the ExhibitDay Enterprise plan and have multiple workspaces, when you view an asset (in the “Manage Assets” area), you’ll see a “Sharing” tab. Under the “Sharing” tab you can specify which of your other workspace(s) the asset should be shared with.

Sharing an Asset

Where do Shared Assets Appear?

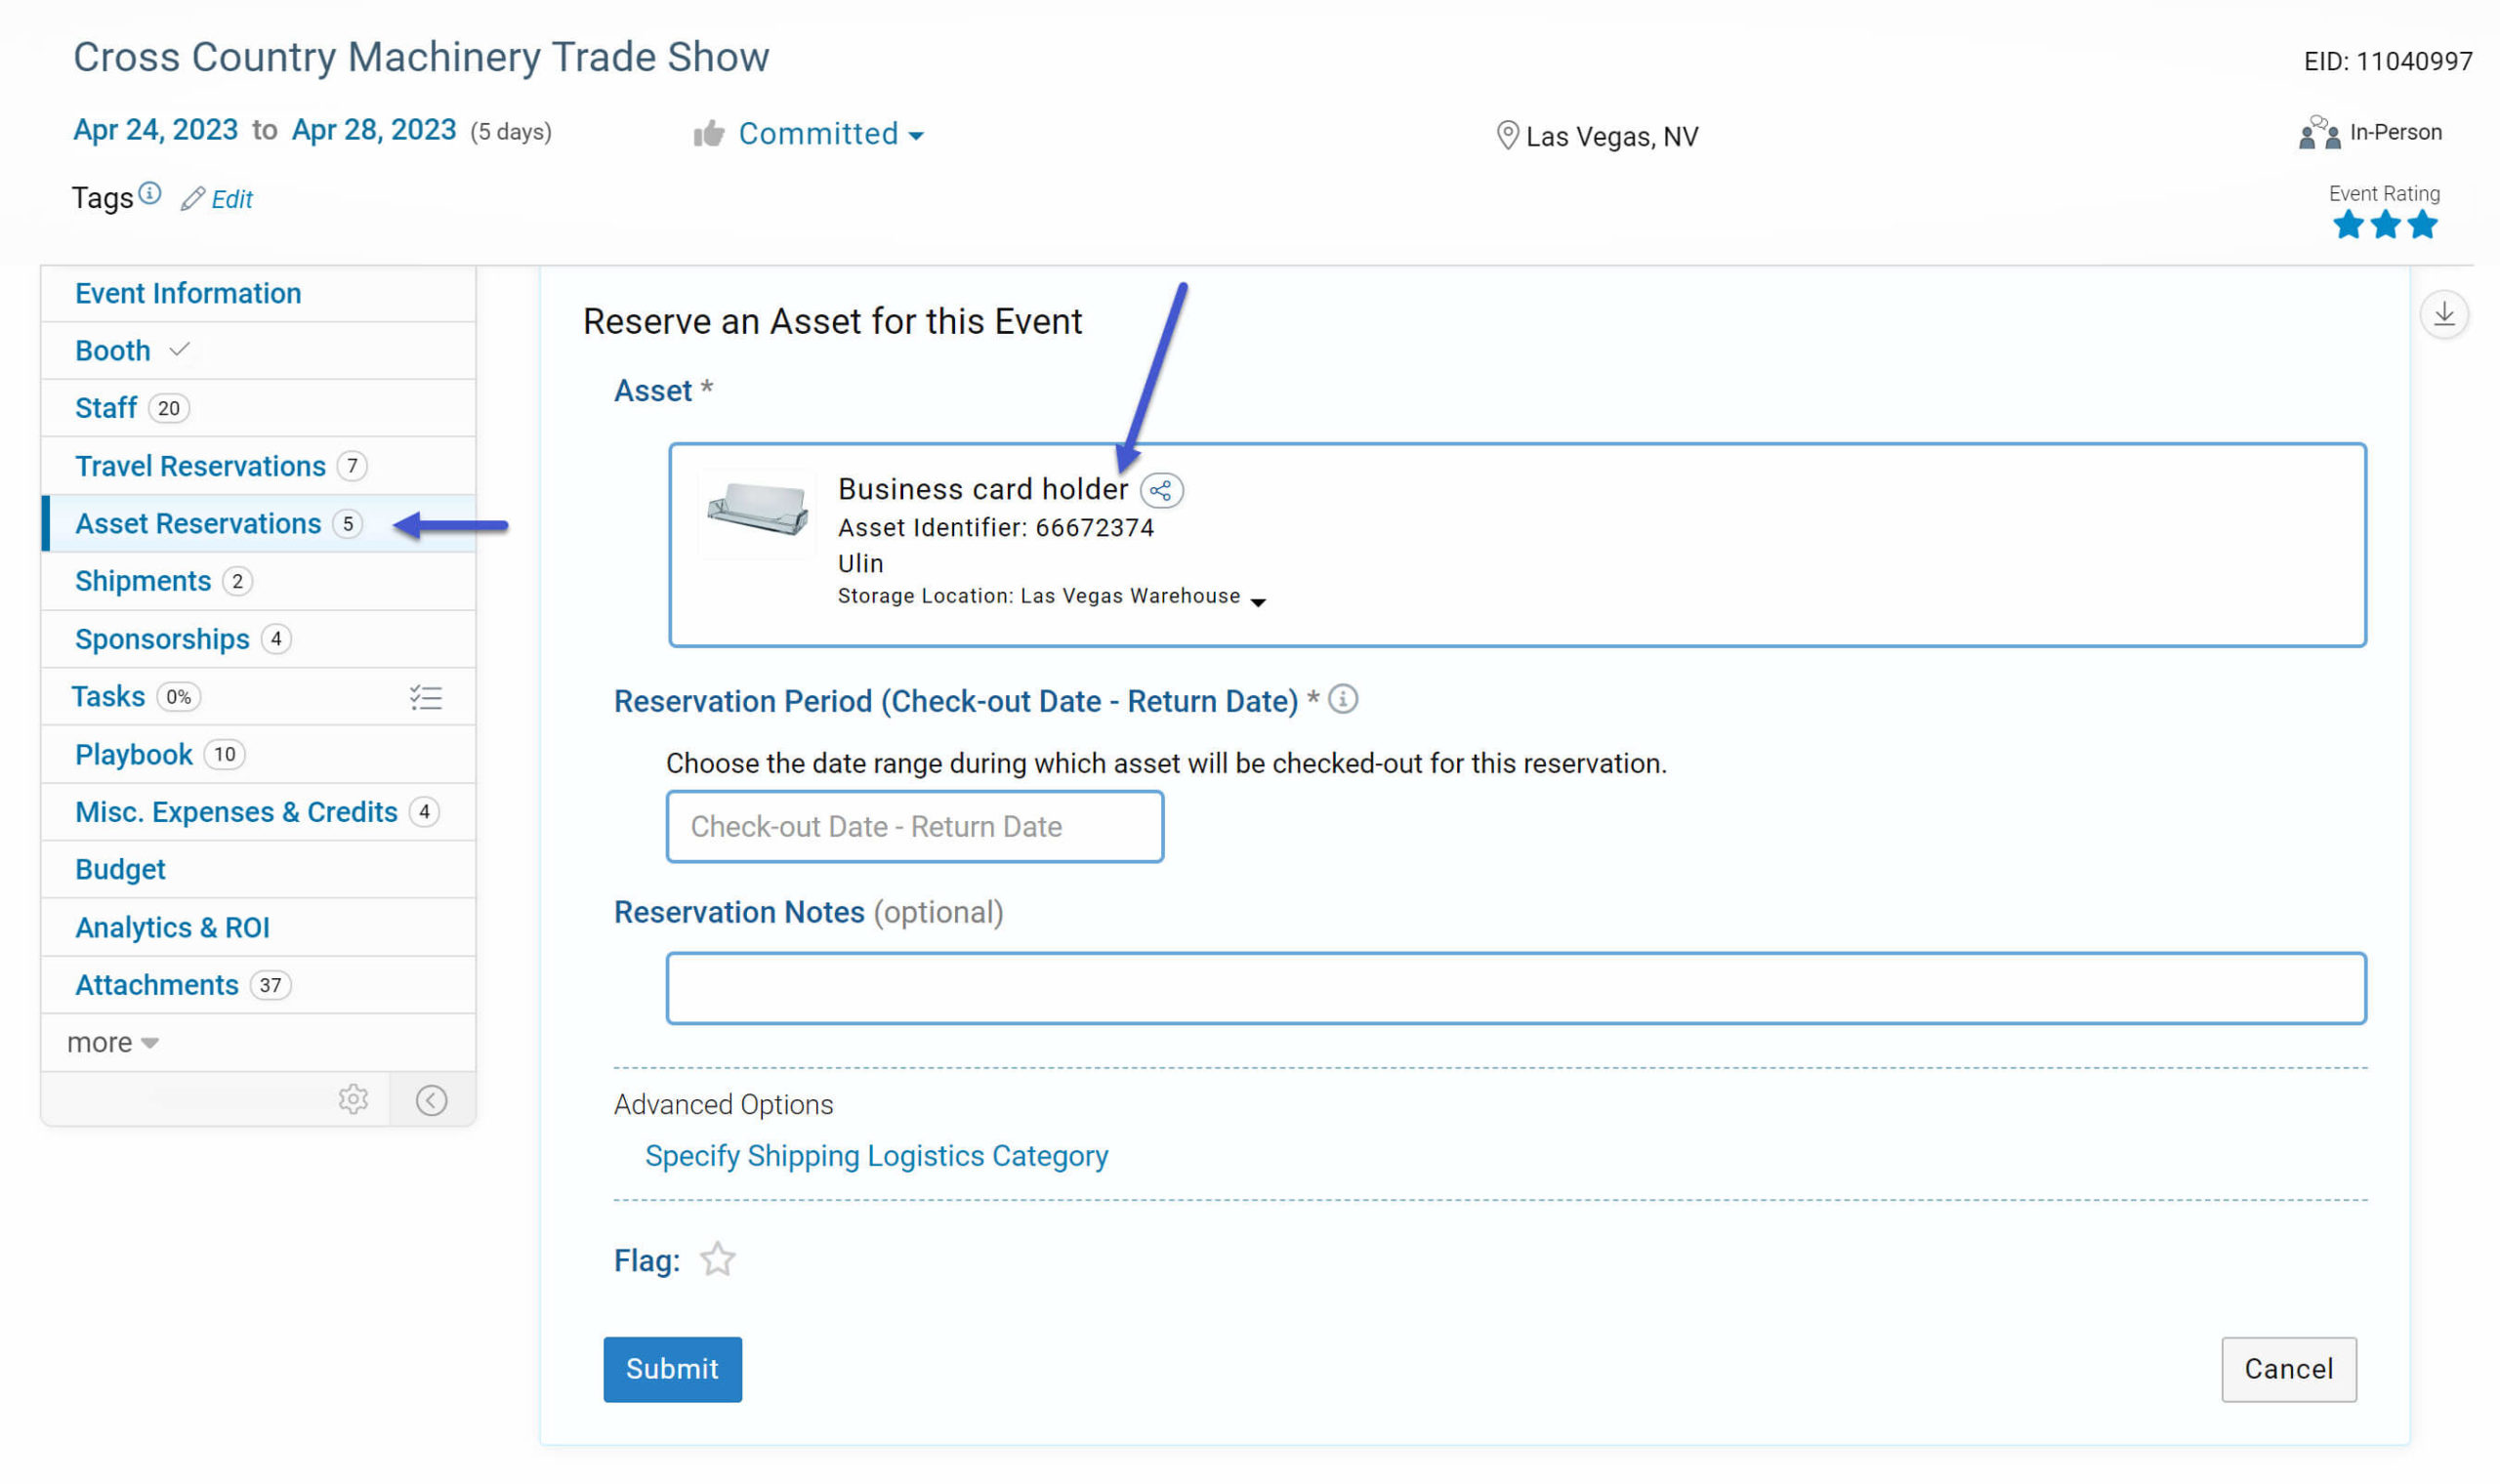
Shared assets will be made available under the Event “Asset Reservations” tab of the workspaces they are shared with. Shared assets will not appear in the “Manage Assets” area of the workspace they are shared with. For example, if you share an asset from workspace A with another workspace, B, then any event in workspace B can reserve the shared asset; however, the asset will not appear under the “Manage Assets” area of workspace B. Any change to the asset itself (like changes to the asset name, model number, image, etc.) must be made in the asset’s origin workspace (workspace A).

A share icon Shared Asset is displayed in front of the names of shared assets.

Reserving a Shared Asset

Can Users of the Workspace the Asset is Shared With See the Cost of the Asset?

The Cost of an asset can be set when adding/editing the asset (in the Manage Assets area). When you share an asset with another workspace, you have the option to specify whether or not the users of that workspace can see the cost of the shared asset.
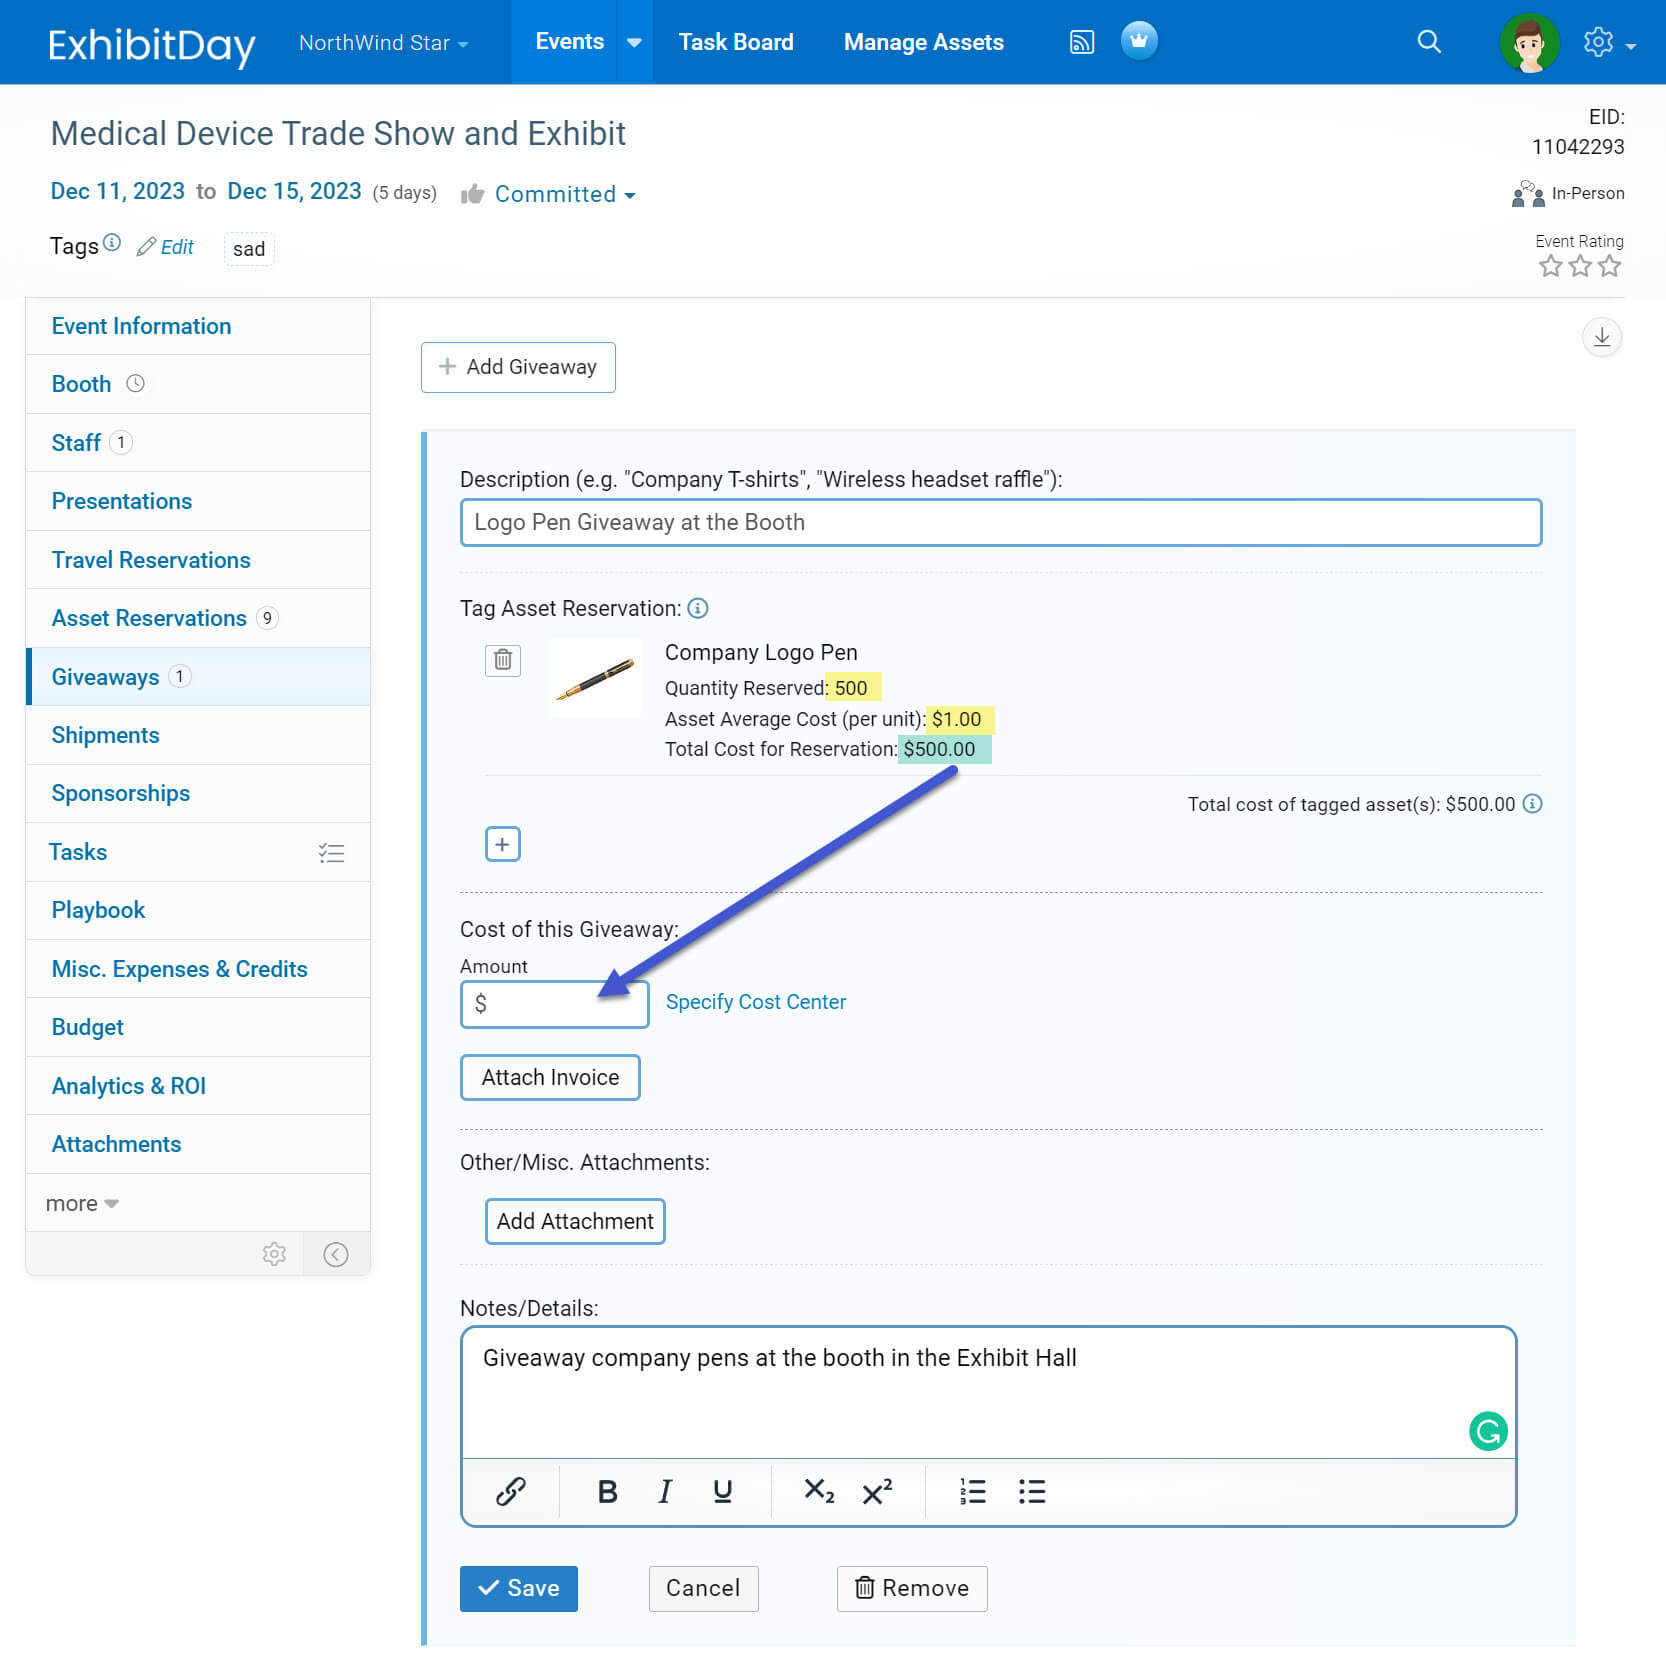
Note: The cost of an asset is shown as a reference when tagging an asset in a giveaway for an event (in order to help calculate the cost of the giveaway); for more information about tagging assets in giveaways of an event, please refer to this article.

What Happens When a Shared Asset is Unshared?

Unsharing (i.e., disabling sharing of) an asset that has already been shared with another workspace prevents new reservations of the asset from the workspace it was shared with — any existing reservations that may have already been made while the asset was shared will not get canceled.

Tagging Asset Reservations in Shipments

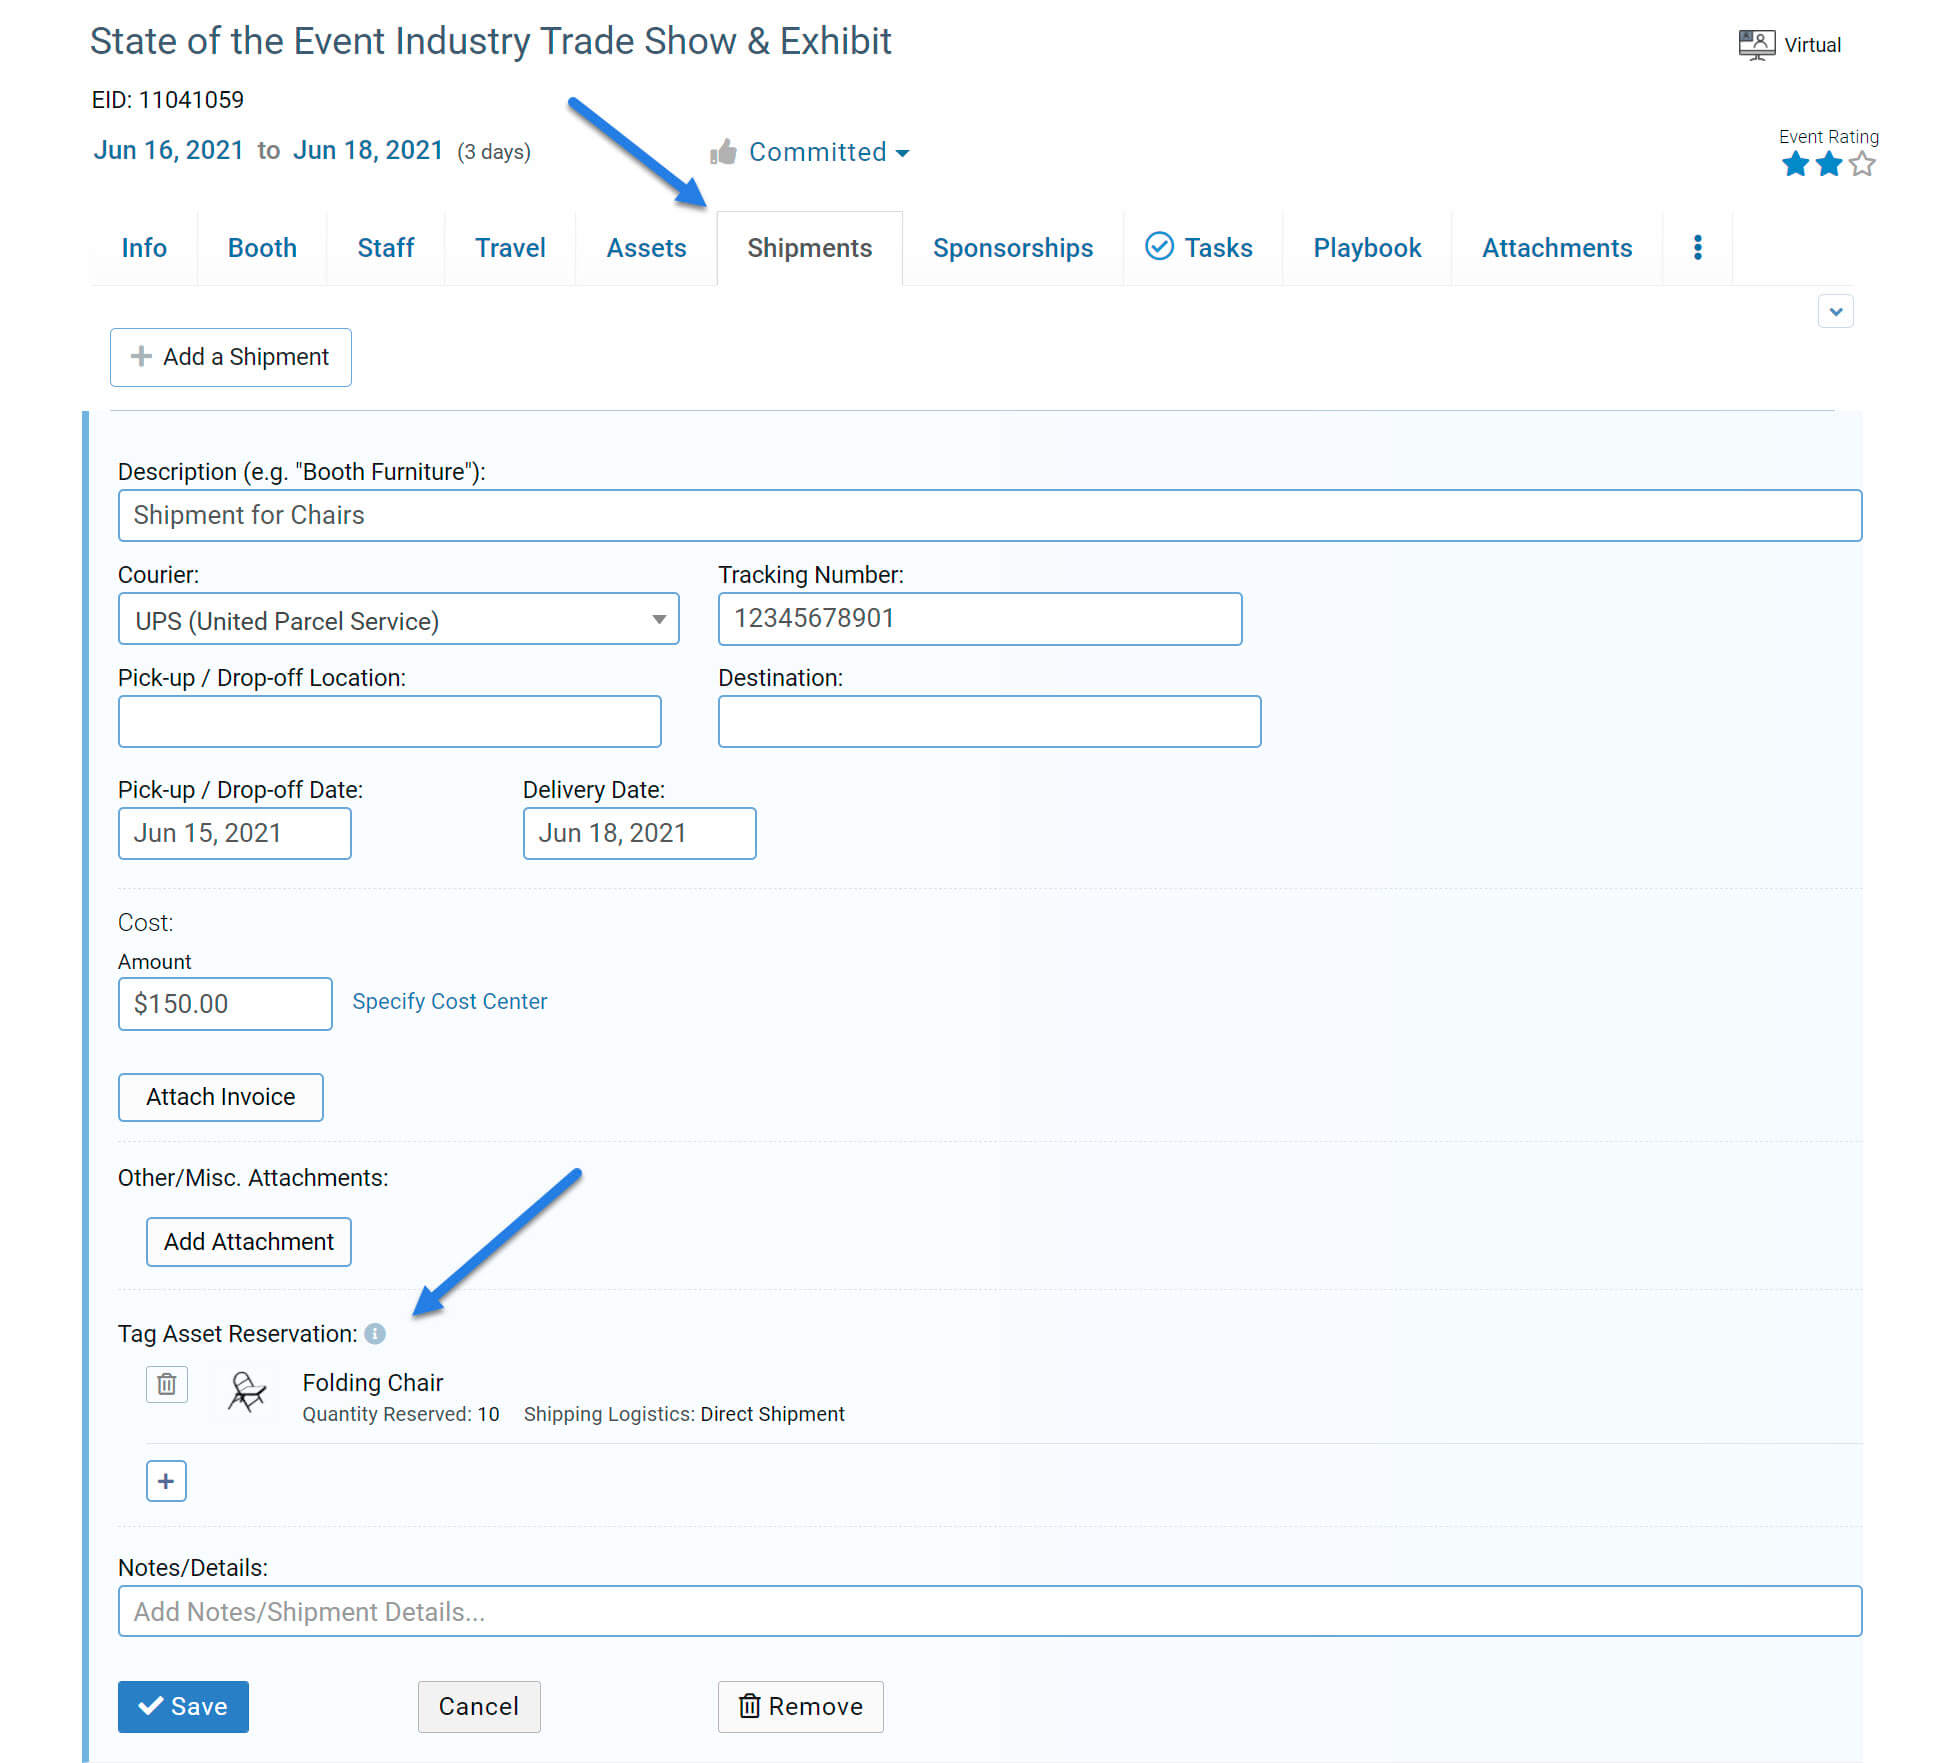
Asset reservations can now be tagged in Shipments for your Events in ExhibitDay.

Tagging a Reservation

Once you have made reservations for Assets (under the Event [Assets] tab), you can tag those reservations in any of your Shipments (under the Event [Shipments] tab).

Tagging Asset Reservations for Trade Shows and Exhibits in Shipments

Sign up for a free ExhibitDay account to plan your trade shows, manage your trade show assets.

Specifying the Check-in (Return to Storage) for Collateral and Multi-Quantity Asset Reservations

You can now specify a Check-in/Return Date for Collateral and Multi-Quantity Asset reservations in ExhibitDay.

When reserving a Collateral/Multi-Quantity Asset for an event, use the “Return to Storage / Check-in” section of the reservation form to specify if/when the items will return back to storage.

Check-in Return of Trade Show Asset to Storage

When to choose the ‘Unspecified / TBD’ option:

In certain cases, the items that get checked out either do not return back to storage at all, or, only some portion of the quantity checked-out gets returned back to storage. For example, if 500 Logo Pens are checked out for an event, some or none of the Logo Pens may return back to storage after the event. In such scenarios, choose the ‘Unspecified / TBD’ option. If/when any portion of item(s) end up getting sent back to storage, you can make a manual inventory adjustment entry for this asset at the storage location the items are returned to.

Also, in certain scenarios, some portion of the items checked-out may even go to a different location after the event (e.g. 15 chairs are checked out for an event, 5 of them return to the original storage location and 10 get shipped directly to a different event and get returned at a later date); in such cases, it is also recommended that the ‘Unspecified / TBD’ option be selected so that manual inventory adjustments are made upon actual arrival of the items at each location.

When to choose the ‘Everything comes right back after the event’ option:

Choose this option only if you know that all quantities of this asset checked-out for this reservation will return back to the same storage location after the event. The system will automatically make the inventory adjustment entry (increase) for the check-in on the specified return date. For example, if 15 chairs are reserved for an event, and after the event, all 15 chairs will return to the same storage location they were checked-out from, then you can select this option and specify the return date — this way, the system will automatically mark an inventory increase on the return date, and you won’t have to ‘check-in’ (by adding an inventory adjustment entry for the return).

Sign up for a free ExhibitDay account to plan your trade shows, manage your trade show assets, and collaborate on tasks with your event team.

Optional Accessories for Capital Assets

You can now add Optional Accessories to your Capital Assets in ExhibitDay.

Optional Accessories

Optional Accessories are supplemental add-on items that can be optionally requested when reserving a Capital Asset. The person making the reservation can specify the quantity for each Optional Accessory (depending on the specific nature of the reservation).

Example:
If the Asset is a Laptop Computer, the Optional Accessories could be a Carry-on Case, a Mouse, a Keyboard, or a Power Adapter; when a user reserves the Laptop, they may specify (1) Keyboard, and (2) Power Adapters to be included.

Adding Optional Accessories to Capital Assets

Optional Accessories for a Capital Asset can be configured from the Asset Edit page (in the Manage Assets area).

Configuring Optional Accessories for a Capital Asset

The Maximum Quantity (that can be requested)

The Maximum Quantity (that can be requested) is the maximum number of units of an Optional Accessory that can be specified (by the person making the reservation) when reserving the underlying Asset.

Example:
If the Asset is a Laptop Computer and the Optional Accessory is a Power Adapter, and you want users to be able to request a maximum of only 2 Power Adapters when reserving the Laptop, then set the value of its Maximum Quantity to 2.

The Default Quantity

The Default Quantity is the quantity (of the Optional Accessory) that is selected by default when making a new reservation for the underlying Asset.

Example:
If the Asset is a Laptop Computer and the Optional Accessory is a Power Adapter with a Default Quantity of (1), whenever a new reservation for the Laptop Computer is made, by default the system will select (1) as the quantity for the Power Adapter. The user making the reservation may choose to change that quantity (depending on the specific nature of that reservation).

Note: If you don’t want to set a Default Quantity (i.e. you want the person reserving the underlying Asset to decide how many units of this Accessory they want to include in the reservation), then enter 0 for the Default Quantity.

The Availability Status

The Availability Status of an Optional Accessory determines whether or not the Accessory is available when making new reservations for the underlying Asset.

If the Availability Status is set to ‘Active/Available’, then the Optional Accessory is included in the list of selectable Accessories.

If the Availability Status is changed to ‘Temporarily Unavailable’, then the Optional Accessory will not be included in the list of selectable Accessories (for any new reservations of the underlying Asset).

Requesting Optional Accessories when Making a Reservation

If a Capital Asset has Optional Accessories configured, the Asset Reservation screen will allow the user to select the quantity for each Optional Accessory they would like to add-on to the reservation.

Selecting Accessories when Reserving and Asset

Optional Accessories in the Inventory Pull Sheet

If a reservation for a Capital Asset has Optional Accessories specified, the Requested Accessories will be listed on the Pull Sheet.

Asset Pull Sheet with Optional Accessories

Important Notes

  1. An Optional Accessory cannot be reserved by itself; it is something that can be optionally added-on only when reserving the underlying Asset.
  2. Optional Accessories are not tracked like Assets; the system does not keep track of the status, the storage location, or inventory levels (available quantities) of Optional Accessories. It is assumed that there is typically sufficient inventory available in storage to fulfill the requested number of Optional Accessories for a given reservation. If tracking the status and inventory levels of an item are required, that item should be entered as its own stand-alone Asset.
  3. ‘Required parts’ of an Asset should not be entered as Optional Accessories. For example, if the Asset is a Booth, and its parts always consist of Frames/Panels/Rolling Case/Lights (which collectively make up the Asset), do not enter these parts as Optional Accessories; the required parts can be specified in the ‘Pull Notes’ textbox (when Editing the Asset Information).

Sign up for a free ExhibitDay account to plan your trade shows, manage your trade show assets, and collaborate on tasks with your event team.