You can now specify a Check-in/Return Date for Collateral and Multi-Quantity Asset reservations in ExhibitDay.
When reserving a Collateral/Multi-Quantity Asset for an event, use the “Return to Storage / Check-in” section of the reservation form to specify if/when the items will return back to storage.
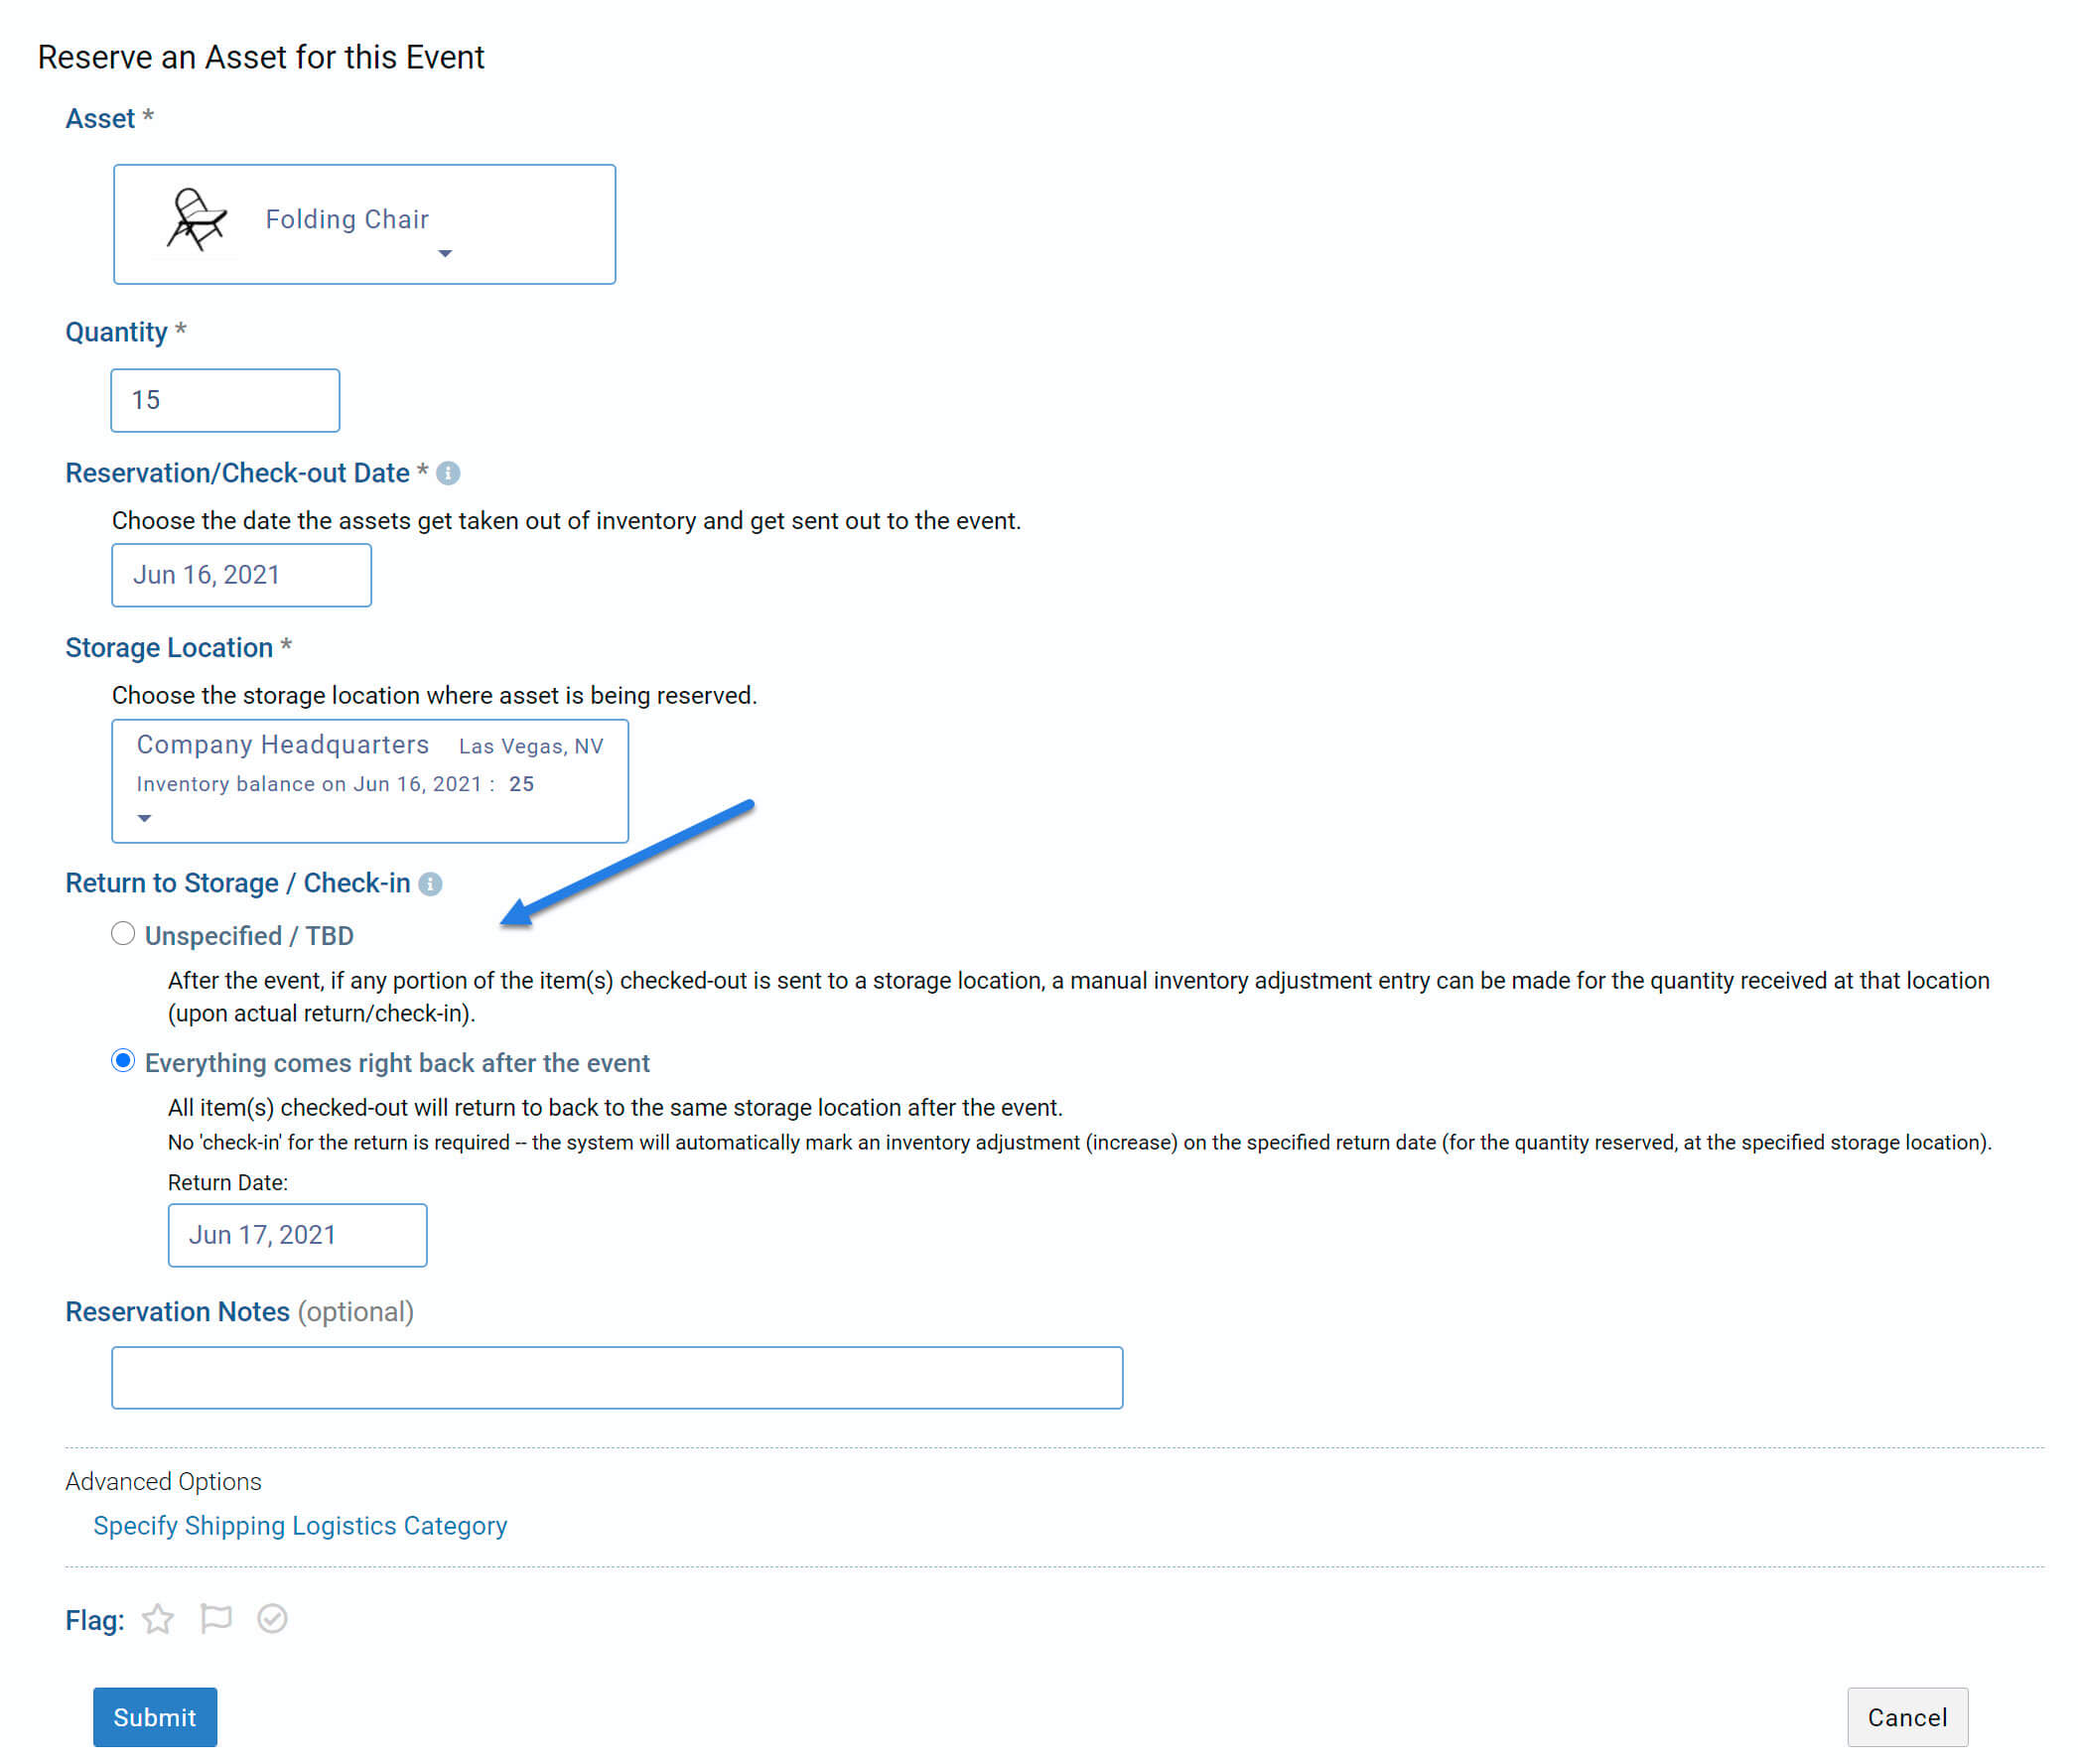
When to choose the ‘Unspecified / TBD’ option:
In certain cases, the items that get checked out either do not return back to storage at all, or, only some portion of the quantity checked-out gets returned back to storage. For example, if 500 Logo Pens are checked out for an event, some or none of the Logo Pens may return back to storage after the event. In such scenarios, choose the ‘Unspecified / TBD’ option. If/when any portion of item(s) end up getting sent back to storage, you can make a manual inventory adjustment entry for this asset at the storage location the items are returned to.
Also, in certain scenarios, some portion of the items checked-out may even go to a different location after the event (e.g. 15 chairs are checked out for an event, 5 of them return to the original storage location and 10 get shipped directly to a different event and get returned at a later date); in such cases, it is also recommended that the ‘Unspecified / TBD’ option be selected so that manual inventory adjustments are made upon actual arrival of the items at each location.
When to choose the ‘Everything comes right back after the event’ option:
Choose this option only if you know that all quantities of this asset checked-out for this reservation will return back to the same storage location after the event. The system will automatically make the inventory adjustment entry (increase) for the check-in on the specified return date. For example, if 15 chairs are reserved for an event, and after the event, all 15 chairs will return to the same storage location they were checked-out from, then you can select this option and specify the return date — this way, the system will automatically mark an inventory increase on the return date, and you won’t have to ‘check-in’ (by adding an inventory adjustment entry for the return).
Sign up for a free ExhibitDay account to plan your trade shows, manage your trade show assets, and collaborate on tasks with your event team.